CustomADB - The enhanced ADB UI for Windows
CustomADB offers a more interactive UI to connect with your Android Android Debug Bridge (a.k.a ADB) is a crucial part of Android devices.

CustomADB offers a more interactive UI to connect with your Android
Android Debug Bridge (a.k.a ADB) is a crucial part of Android devices. It is the one way to communicate with your device and perform a variety of actions. While ADB (along with other command-line tools) on a whole is available for three major operating systems - Linux, MacOS, and Windows, today we will be taking the Windows users into consideration.
The logic behind CustomADB is to automate and make ADB easy, especially for those who are not well-acquired with ADB’s functioning. While advanced and experienced users are familiar and handy towards using ADB, newbies tend to struggle at first. CustomADB eases out things to a great deal if you’re a newbie and spare you the struggle. It is a Windows utility, so if you’re operating on Mac or Linux, this might not be the luckiest time for you.
It is brought to us by XDA member TheBone_ and according to him “This is an extended ADB command-prompt”. It supports Windows 10 completely. You are free to try this on previous versions of the OS, it won’t harm at all. If you succeed kindly report back through the comments or provide your feedback on the original XDA thread.
CustomADB - Installation & What it offers
Now, lets talk on how to use it on your Windows PC.
Note that CustomADB doesn’t install ADB on your computer, it just enhances the way to use it. So before you even download this utility tool, you must have ADB setup on your computer system-wide. There are a lot of different ways to do that.
- Now that you have ADB installed, you can download the tool: Link
- Extract the downloaded “CustomADB_1.0.3_Installer_Fixed.zip” file. You shall then have a folder “publish”. Open the folder and run the “setup.exe”.
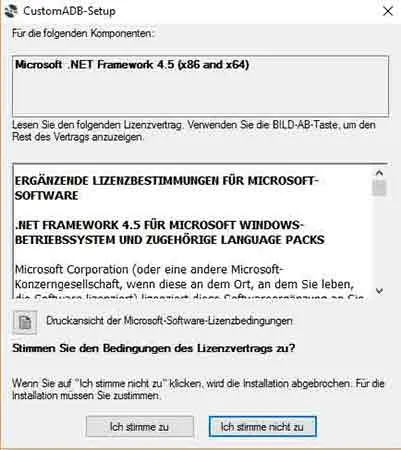
- The installer will pop up. Click on the “lch stimme zu” button, which is German for “I agree”. Follow the on-screen instructions to continue the installation.
- Once it is complete, CustomADB will run automatically. You will also have a shortcut for the same on your desktop.
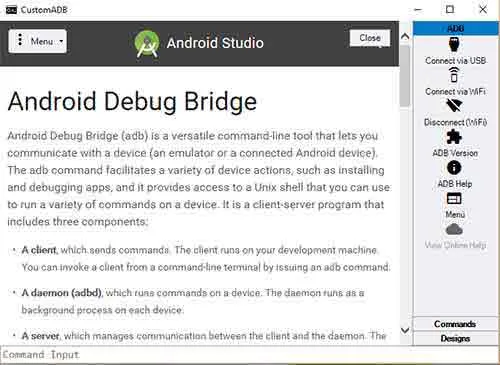
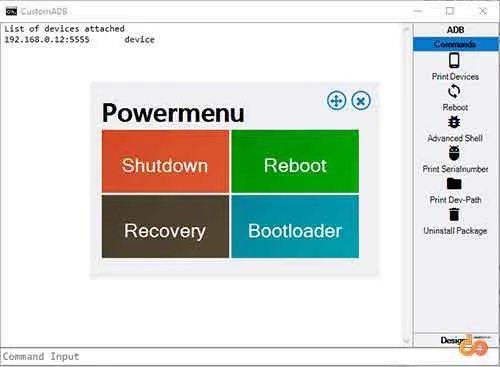
On the right-edge of the application window, you will have all the options/actions that could be performed. Majority of these are:
- Connect via USB: Simply connect your Android in debugging mode over USB.
- Connect via WiFi: Connect your device to the PC over WiFi. In order to use it, go to Settings > Developer options and enable “ADB over network”. Then, input the IP address and port number displayed in the CustomADB application window.
- ADB version: Display the current installed ADB version.
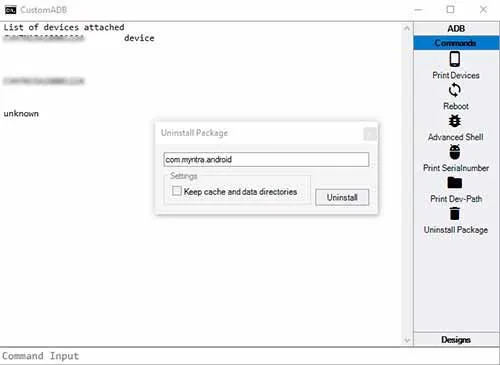
- Print Devices: Display the list of connected devices in debugging mode.
- Reboot: Interactive power menu to perform various boot actions on your connected device. Reboot, shutdown, bootloader and recovery options are available.
- Android Shell UI: Initiate the ADB shell on your device.
- Print Serialnumber: Prints the serial number of the connected device. It will not work when your device is connected over network/wifi.
- Uninstall package: Uninstall an app by typing its package name.
- Designs: Select from three different color schemes (Light, Dark, and Visual Studio 2010)
- Key Combinations: [F1] to print ADB help, [F2] to open help menu, and [F3] to clear the output off the application screen.
When entering commands in the Command Input field, do not use “adb”. For example, “adb devices” will be “devices” only.
Operating with ADB is much easier now, isn’t it? Share this article on your social channels by clicking below and let your Android buddies know about it too.
Comments
Comments are moderated, and published only if they are relevant to the topic and add value in a constructive way. If you disagree with something, please be polite and respectful. We suggest you read our comment policy before commenting.