Unlock Bootloader and Install TWRP on Lenovo Zuk Z1
Here at TheCustomDroid, we will help our Lenovo users to unlock the bootloader and install TWRP on Lenovo Zuk Z1.

Here at TheCustomDroid, we will help our Lenovo users to unlock the bootloader and install TWRP on Lenovo Zuk Z1.
Lenovo is not a top-market manufacturer for Android phones, but it did take a lead lately, to produce affordable, yet powerful devices. The Lenovo Zuk Z1 is one of the latest smartphones by the company and it distinguishes itself from its fellows because it supports Cyanogen OS natively.
The Lenovo Zuk Z1 is the trendy new smartphone counted among the mid-range Androids. It supports a 5.5-inches full-HD IPS LCD display, running a Snapdragon 801 SoC clocked at 2.5 GHz with a Krait 400 processor. Gaming is efficient on the Z1 with the Adreno 330 graphics unit. It also has 64 GB internal storage, 3 GB RAM, 13 MP camera with f/2.2 aperture, Quick Charge support, and the latest USB Type-C technology. The phone has more to offer, you can view the complete spec-sheet at GSMArena.
Taking the customization factor into consideration, the Zuk Z1 already has Cyanogen OS, which itself offers a huge list of features. But don’t we all want more and more of functions? Custom kernels and mods are something else entirely, which may require a custom recovery like TWRP, for installation.
TWRP officially supports the Zuk Z1. Flashing the TWRP recovery will require you to first unlock the phone’s bootloader, and this is where we will begin and finally end up with installing TWRP on Lenovo Zuk Z1. Installing TWRP will also help you install the available custom ROMs on the phone.
Disclaimer
Unlocking the bootloader will instantly finish your Lenovo Zuk Z1’s official warranty. We shall not be held responsible if anything goes wrong with your phone. But, we still will help you if you come across any such situation.
Before We Begin
- Charge your Zuk Z1 to at least 60% battery level.
- Unlocking the bootloader will erase everything off the device. So, backup everything including the storage, SMS, contacts, calendar, etc. Follow the ultimate backup guide for Android.
- Download the platform tools package (ADB and fastboot). Extract the zip and you will have the platform-tools folder containing all the necessary binaries.
- Enable USB debugging on your Lenovo Zuk Z1. If you’re not sure how to do it, you can view our guide.
- Download latest TWRP recovery image for the Lenovo Zuk Z1. Transfer the recovery image to the platform-tools folder extracted earlier.
Unlock bootloader & Install TWRP on Lenovo Zuk Z1
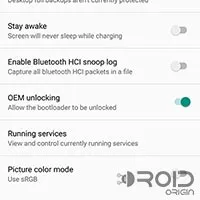
- Before you can unlock the bootloader, it will require you to enable OEM unlocking in ***Settings > Developer options.
- Connect your phone to the PC via the USB Type-C cable.
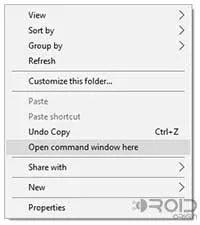
- Open the platform-tools folder where the recovery image is present. Press SHIFT key and right-click on an empty space inside the folder.
- Select Open command window here from the pop-up menu.
-
Enter the command below to instantly boot the Lenovo Zuk Z1 into bootloader mode:
adb reboot bootloader
-
Once the phone has entered bootloader mode, enter the following command to unlock the bootloader:
fastboot -i 0x2b4c oem unlock-go
-
After it is completed, confirm the unlock status using the command below:
fastboot -i 0x2b4c oem device-info
-
The output should be something like:
(bootloader) Device unlocked: true
-
Now that the bootloader is unlocked, you can go and flash TWRP on Lenovo Zuk Z1, using the following command:
fastboot -i 0x2b4c flash recovery twrp-3.0.2-0-Z1.img
-
Once TWRP has flashed, you can reboot using this command:
fastboot reboot
If you are willing to enter into TWRP recovery mode, you will need to power off your device. Now, press and hold the volume up and power key until you see the TWRP main screen.
If you come across any situation, where you feel stuck, you can comment below. Stay tuned, till we get back with more tips and tricks for the Lenovo Zuk Z1.
Comments
Comments are moderated, and published only if they are relevant to the topic and add value in a constructive way. If you disagree with something, please be polite and respectful. We suggest you read our comment policy before commenting.