
On this page
Xposed Framework for Android 10 is now available via the ‘EdXposed Framework‘ module. In this post, I will show you how to install Xposed Framework on Android 10, Android 9 Pie, and Android 8.0/8.1 Oreo devices rooted with Magisk.
Android’s open-source nature makes it versatile and easily customizable too. For those who just got into the Android modding/customization scene would surely be well-aware of Magisk. Apart from being a powerful tool to root Android devices, it also allows users to customize their phone’s software using ‘Modules’. And all without touching the system partition and passing Google’s SafetyNet checks too.
Well, before Magisk even existed, the Xposed Framework was a tool that every Android modder had in his/her arsenal. Xposed is developed by XDA Recognized Developer rovo89 and is a framework for modules that can customize the software of Android devices without touching any APKs. Unlike customizations offered by custom ROMs, Xposed allows users to easily undo the changes by disabling/removing the modules. Which makes it quite great!
The huge collection of Xposed Modules allows users to customize almost every bit of their phone’s software, irrespective of the device’s OEM or the installed Android version. But unlike Magisk, Xposed applies customizations directly to the system partition, making it its own downside now, since Magisk does the same systemless-ly.
Current Status of Xposed; and Introduction of EdXposed Framework
The last official version [v90] of Xposed was made for Android Oreo. Although in the beta stage, it still was quite as stable. Since then, Android Pie was released in 2018 and Android 10 in 2019, but the developer (rovo89) has yet to update us on the current development status of official Xposed for these newer Android versions.
Since Xposed is open-source, a team of developers (solohsu and Jim Wu) carried over the unofficial development of Xposed for newer Android versions. The project is known as the ‘EdXposed Framework‘ and uses the Riru module (by Rikka Apps) to inject code into Android’s Zygote process. This combination of EdXposed and Riru modules allows users to install Xposed Framework on devices running Android 10, Pie, and Oreo.
Now, without any further ado, let’s get to the instructions!
Prerequisites
- Any Android device running Android 10, Android 9 Pie, or Android 8.0/8.1 Oreo.
- Take a backup first! Installing EdXposed is quite safe and shouldn’t cause bootloops, but you should always be ready in case something goes sideways. So, make sure to take a complete backup of all your important data.
- In order to install Xposed Framework using EdXposed, your device must be rooted with Magisk v20.2+. If you have not yet rooted your phone, then you can look for your device-specific guide here or follow the instructions in this post.
How to Install Xposed (EdXposed) Framework on Android 10 or Below
In brief, you will have to start by downloading and installing the ‘Riru – Core‘ and ‘Riru – EdXposed‘ Magisk modules on your Android device. Once that is done, you can simply install the EdXposed Manager application to install, uninstall, and manage Xposed modules on your device.
I have split the instructions into three major steps for your better understanding. Make sure that you follow all the steps in the given order and do not skip any part of the instructions.
Step 1: Install ‘Riru – Core’ Module
The first step is to download and install the ‘Riru – Core’ module on your device. This module can be installed directly from the Magisk Manager app. Just follow the instructions below.
- Go to the app drawer and launch the ‘Magisk Manager’ app.
- Tap on the menu icon on the top-left of the app’s window.
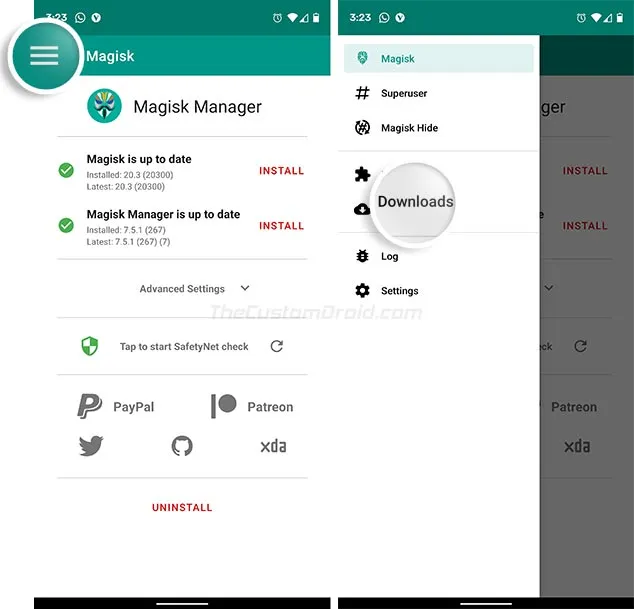
- Select ‘Downloads’ to view the list of all available Magisk modules.
- Tap on the search button and find the ‘Riru – Core’ module.
- Press the download icon next to the module’s name.
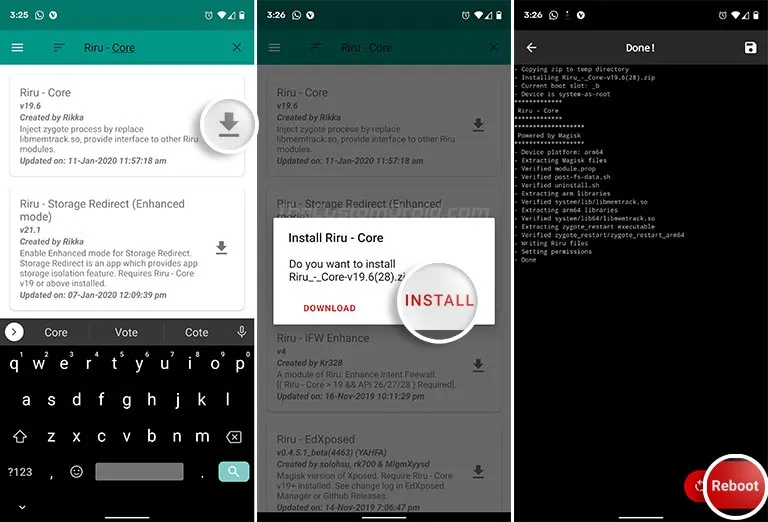
- Select ‘Install’ to download and install the Riru – Core module on your device.
- Once the module has been installed, tap on the ‘Reboot’ button.
Step 2: Install ‘Riru – EdXposed’ Module
Note: Users can directly install the Riru – EdXposed module from the ‘Downloads’ section of Magisk Manager. However, the available version (v0.4.5.1 beta) needs a customized version of Magisk and also doesn’t support Android 10. So, for now, it’s recommended that you download and manually install the module using the instructions below to prevent any incompatibility issues*. As of 29th February 2020, the latest version of the Riru-EdXposed module (v0.4.6.1) can be installed directly from Magisk Manager. The instructions have been updated.*
- To download the latest version of the module, go to the app drawer and launch ‘Magisk Manager’.
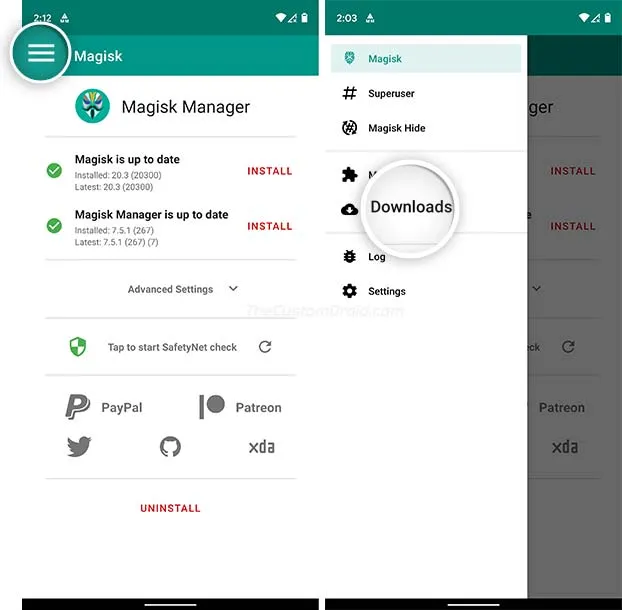
- Go to the app’s menu and select ‘Downloads’. The section should enlist all the Magisk Modules available on the official repository.
- Press the search icon and search for ‘Riru - EdXposed’ to find the module.
- Note: There are two variants of the module. If you face any issues with the ‘SandHook‘ version, then try the ‘YAHFA‘ version, which is relatively stable. For me, the YAHFA version has turned out to be most stable on my Pixel 3 XL and OnePlus 6 running Android 10.
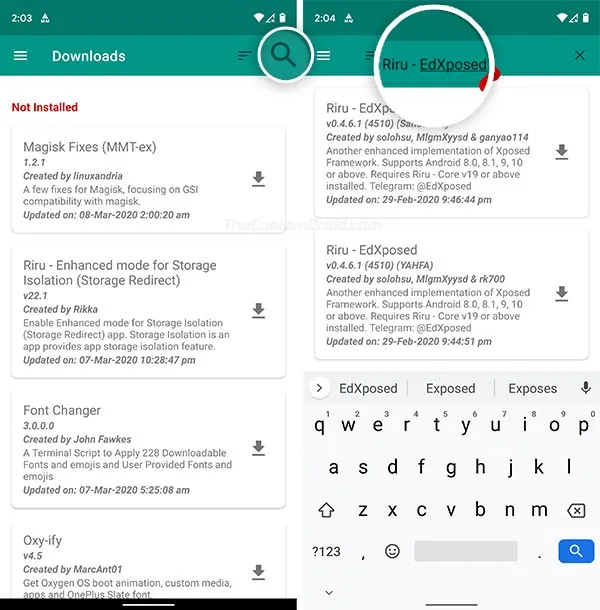
- Press the download icon next to the module’s name.
- Then tap on ‘Install’ when prompted to install the Riru - EdXposed module on your device.
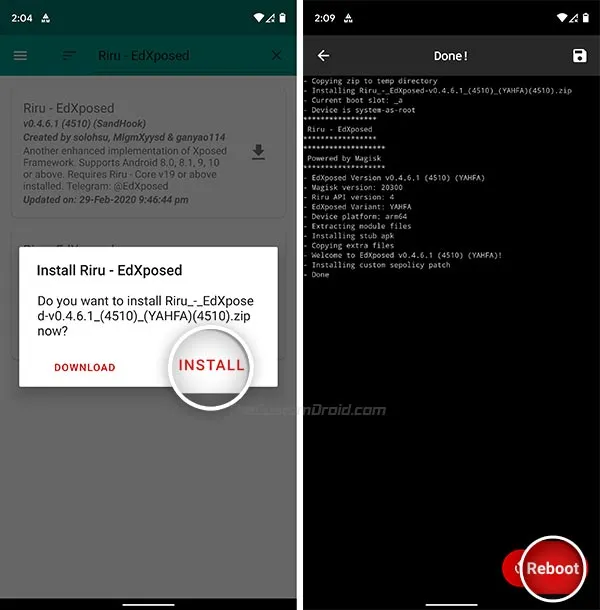
Magisk Manager will now install the module. Once the installation finishes, press the ‘Reboot’ button on the bottom-right to restart your device.
Note: If you face problems like random reboots, non-working modules, or any other sort of unusual behavior after finishing all the steps, then try using the alternate version of the Riru-EdXposed module. For instance, if you installed the YAHFA version, then uninstall that and try the SandHook version, and vice-versa.
Step 3: Install EdXposed Manager
At this point, Xposed Framework has been successfully installed your device running Android 10 or below. Now, the final step to download and install the ‘EdXposed Manager‘ companion app. It will be used to manage Xposed modules, and will also verify if the framework was properly installed and is currently active.
Simply click the link below to download the latest version of the EdXposed Manager app, available as an APK file.
- EdXposedManager-4.5.7-45700-org.meowcat.edxposed.manager-release.apk(v4.5.7) | Check the latest available version here
If you have downloaded the APK on the PC, transfer it to your phone’s storage. Then, open a file manager of your choice and navigate to the location where the file was transferred/downloaded. Simply tap on the APK file to begin the installation process.
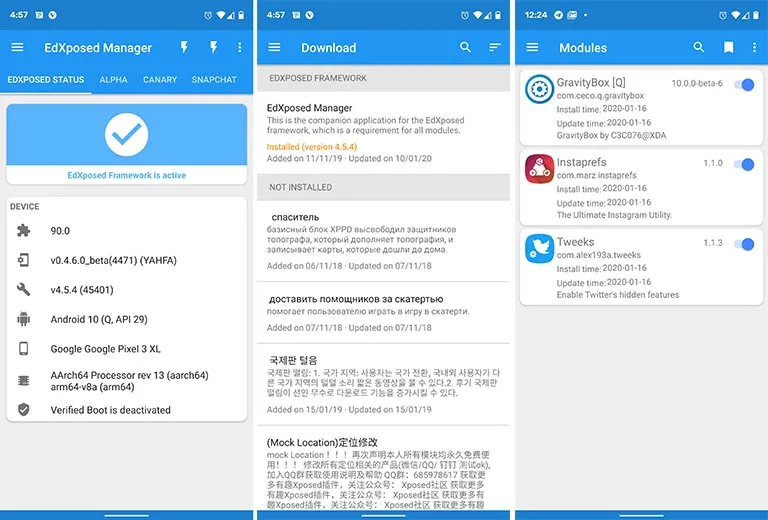
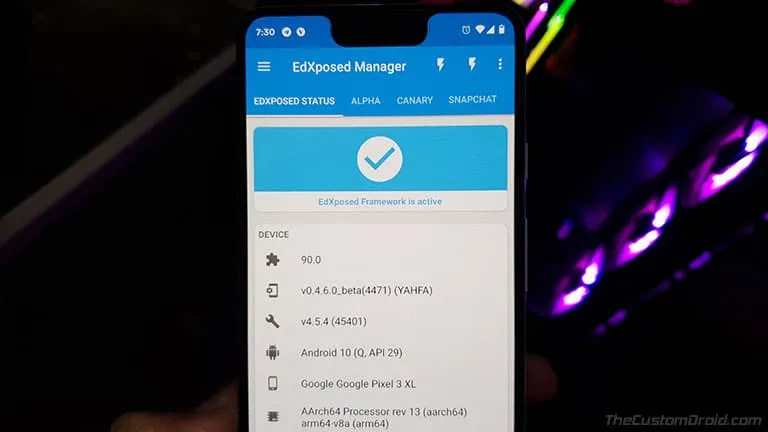
Once installed, go to the app drawer and launch the application. The status card should show the “EdXposed Framework is active” message along with other relevant information about your phone. You can tap the menu icon and go to the ‘Download’ section to download Xposed Modules of your choice. To manage the installed modules, simply go to the ‘Modules’ section of the app.
That’s it! You have just been able to install Xposed Framework on Android 10, Pie, or Oreo.
Download Android 10 Supported Xposed Modules
Now that you have the framework installed, check the list of Xposed Modules that support Android 10 and work with the EdXposed Framework.
Note: If any of the below-listed modules cause a bootloop on your phone, you can easily use TWRP to disable/remove EdXposed module to boot your device.
- App locale 2: Allows you to set the language for individual apps
- AFWall+ (Uses Xposed for some features)
- Dark Tricks: Provides a lot of UI related mods
- Exi for Swiftkey: Adds additional features to the Swiftkey keyboard app
- Fingerprint pay: Enables fingerprint authentication for payments on apps like WeChat, AliPay, and TaoBao
- GravityBox: Offers a huge list of mods to turn your stock ROM into a custom ROM
- Instaprefs: Adds loads of features to the Instagram Android app
- lataclysm: Allows you to spoof location for installed apps like Facebook and Twitter
- MinMinGuard: Allows you selectively block ads on certain apps
- Sudohide: Prevents apps from detecting other installed apps on a per-app basis
- Tweeks: Enable hidden features like DM reactions, Spheres, Subscribe tweet, etc in official Twitter Android app
- WA Tweaker: Enable hidden features and customize UI of the WhatsApp Android app
- XPrivacyLua: A complete privacy manager for Android devices
The list of supported modules provided above was cumulated by XDA members tvteja on this XDA thread. So, a huge thanks to him! For Android Pie, please refer to the list of supported modules provided on this thread, by XDA member Uraniam9.
There you go, this was our guide on how to install Xposed Framework on Android 10, Android 9 Pie, or Android 8.0/8.1 Oreo devices, using EdXposed. With the growing list of supported Xposed Modules available, you can now easily customize your phone’s software.
For some time, I thought that Xposed will no longer support the latest Android versions, and be forgotten soon. It’s quite nice to see the development being picked up and carried on voluntarily by other enthusiastic developers! So, a huge thanks to them.
If you face any issues while installing EdXposed using the instructions provided in this post, please feel free to comment below.
Sources: EdXposed’s official website and Github | Riru Github
Comments
Comments are moderated, and published only if they are relevant to the topic and add value in a constructive way. If you disagree with something, please be polite and respectful. We suggest you read our comment policy before commenting.