
On this page
Andy Rubin’s crafted piece of art, the Essential PH-1 can now be rooted. Follow this tutorial to install TWRP and root Essential Phone (PH-1) using Magisk.
The Essential Phone is a result of dedicated craftsmanship and aims at changing how our Android device’s look and how we operate them. The vision of the company is to make the smartphone truly belongs to the user. The software inside the phone is lean and does not hit the UX by bloating apps. There’s a lot more packed inside that unique design.
But the phone has already faced its share of difficulties, starting from delayed shipping, camera quality issues. These problems eventually ended in a hefty $200 price drop. But that’s a never-ending story with manufacturers. Today, we are here for a different purpose, which is to help you install TWRP on Essential Phone (PH-1) and subsequently root it using Magisk.

- How to Root Google Pixel 2 and Pixel 2 XL using Magisk
- Root Xiaomi Mi A1 (Magisk) and Install TWRP Recovery
Root Essential Phone (PH-1) using Magisk
The customization/rooting scene on the device has been sort of slowish. But it seems like the XDA community and its developers are never far behind. The forum’s senior member - bmg1001 has come up with a working TWRP build and root solution for the device.
Update (5 May 2019): Official TWRP recovery for Essential Phone (PH-1) is now available. This post has been updated to reflect the new download links and instructions.
According to the source (link at the bottom), rooting the device is fairly easy with the provided files. In order to root Essential Phone (PH-1), the first step is to flash the TWRP recovery. The recovery itself is packed inside the boot.img (kernel). That is because the Essential Phone, like Google Pixel 2 and Xiaomi Mi A1, has implemented A/B partition scheme.
After installing the TWRP recovery on the device, you can easily sideload the latest Magisk installer. Post that, you will also need to flash the patched boot image corresponding to the build number that your device has.
Disclaimer
Rooting Essential Phone (PH-1) may break your device’s official support and warranty. If you’re not sure what you’re diving into, then take a step back and rethink. We hold no responsibility for any damage to your device during or after this procedure.
Prerequisites
Now, go through the list of requirements below. Once you have fulfilled all of them, head towards the instructions to root Essential Phone.
- It is highly advised to backup your device first. You can follow our tutorial on how to backup Android devices.
- Your Essential device’s bootloader must be unlocked.
- Install ADB and Fastboot on your PC. We will be needing these Android tools in the instructions below.
- Charge your device to at least 50-60% battery level to avoid any disturbances during the root process.
- Make sure that your device is using the stock boot image. If not, then download the image corresponding to your current build and install it.
Downloads
Before you get to the steps below to root Essential Phone, make sure to download all the listed files and copy them to the folder where all the ADB and Fastboot files are present (C:\adb).
- Official TWRP recovery for Essential Phone: twrp-3.2.3-0-mata.img | twrp-installer-mata-3.2.3-0.zip
- Latest Magisk installer zip: Magisk-v19.1.zip (Changelog and more information)
Instructions to Root Essential Phone PH-1
- Boot your Essential PH-1 into Fastboot mode:
- Power off the device completely.
- Press and hold the Volume Down + Power button altogether.
- Connect your phone to the PC using the USB cable.
- Go to the directory/folder where all the ADB and Fastboot files are present (C:\adb).
- Press the SHIFT key on the keyboard and right-click inside this folder.
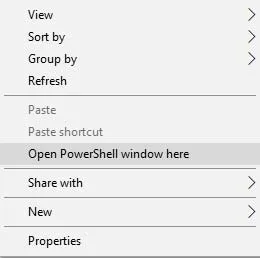
- Select the ‘Open PowerShell window here’ option.
- Now, enter the following Fastboot command to flash TWRP recovery:
fastboot flash boot twrp-3.2.3-0-mata.img - Once the recovery has been flashed, tap the Volume buttons a few times until ‘Recovery mode’ appears on the Bootloader screen. Then, select it using the Power button.
- Your Essential Phone should now enter TWRP recovery mode.
- Connect your phone to the PC using the USB cable.
- Go to ‘Advanced’ -> ‘ADB Sideload’ in TWRP and swipe the sideload button.
- Sideload the TWRP installer zip using:
adb sideload twrp-installer-mata-3.2.3-0.zip - Next, sideload Magisk using the following ADB command:
adb sideload Magisk-v19.1.zip - The file will then be sideloaded and flashed on the device.
- Finally, reboot your device using:
fastboot reboot
Great! You have just been able to install TWRP recovery and root Essential Phone (PH-1) using Magisk. Go ahead and try some modules to add new features to the device. You can also follow some tutorials for rooted devices.
If you have any problems following this procedure, drop a comment below. We will make the best effort to help you.
Source: XDA-Developers
Comments
Comments are moderated, and published only if they are relevant to the topic and add value in a constructive way. If you disagree with something, please be polite and respectful. We suggest you read our comment policy before commenting.