Manually Update Moto X Force to Marshmallow
Android Marshmallow has finally set its foot on Moto's latest rock solid flagship. And yes, we are going to help you update Moto X Force to Marshmallow, by

Android Marshmallow has finally set its foot on Moto’s latest rock solid flagship. And yes, we are going to help you update Moto X Force to Marshmallow, by manually flashing the firmware.

The update for the X Force started rolling out during the last 24 hours. While many users have already started to receive the OTA, there are others who haven’t. So if you don’t like to wait, go on and follow this tutorial. The advantage? You will go complete stock with a fresh installation, so much fewer chances of any persisting bugs. Manually flashing the firmware involves flashing the complete firmware image files using fastboot commands. You do not need to have any kind of expertise, but a little knowledge about your PC and Android device.
Of course, the update includes the new Doze mode, Standby settings, Do Not Disturb, Now On-Tap, and many other improvements. You can view the complete release notes at Motorola’s website.
For now, stock Marshmallow firmware images are available for the listed models only:
Once you have grabbed the firmware, you can move ahead.
Disclaimer
Installing the firmware manually could be risky if done wrong. Do this, only if you’re aware of the risks. We shall not be held liable for any damage to your device. However, if anything like such happens, we will always be there to help you.
Before You Begin
- Download and install Motorola USB drivers.
- Charge your phone to at least 60% battery level, to avoid any disturbances during the process.
- The process will wipe your phone completely, so backup your X Force completely. This includes the storage, messages, contacts, etc.
- In order for ADB and fastboot to work, Install Android SDK, or 15 seconds ADB Installer, on your PC.
- Enable USB debugging on Moto X Force.
- Unlock your X Force bootloader - Tutorial link
Instructions to update Moto X Force
- Start off, by downloading the firmware file for your X Force model. Make sure that you do not mix up the files, it may lead to bricking your phone.
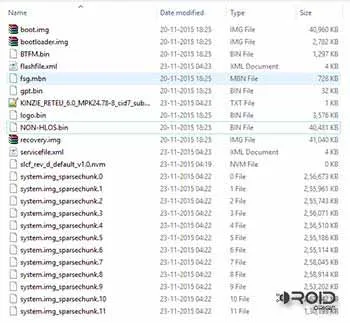
- Extract the downloaded firmware file (e.g. - XT1580_KINZIE_RETEU_6.0_MPK24.78-8_cid7_subsidy-DEFAULT_CFC.xml.zip) to a suitable location on your PC. The resultant will look something as shown in the image below.
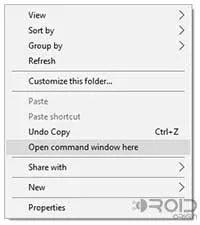
- Open the folder where the files have been extracted, press SHIFT key and right-click on a space inside this folder. Select Open command window here from the menu that pops-up.
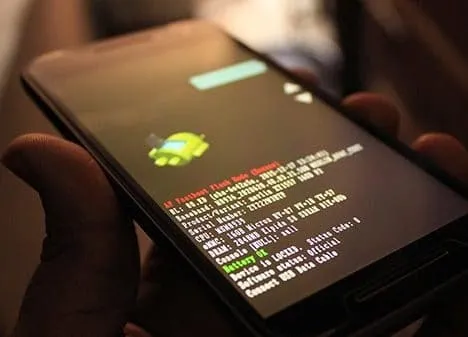
- Boot your Moto X Force into fastboot mode - Completely power off your phone. Press and hold Volume Down and Power keys until your phone’s screen lights up. Your phone should now be in fastboot mode.
-
Once your device is in fastboot mode, connect it to the PC via USB cable.
-
Now, start by entering the following command, to confirm that the device has been detected successfully.
fastboot devices
The command should return a device ID. In case it doesn’t, make sure that you have extracted the files properly and have installed USB drivers.
-
Flash the factory image, by entering the following commands, one after-the-other.
fastboot flash bootloader bootloader.img
fastboot flash boot boot.img
fastboot flash recovery recovery.img
fastboot flash system system.img_sparsechunk.0
fastboot flash system system.img_sparsechunk.1
fastboot flash system system.img_sparsechunk.2
fastboot flash system system.img_sparsechunk.3
fastboot flash system system.img_sparsechunk.4
fastboot flash system system.img_sparsechunk.5
fastboot flash system system.img_sparsechunk.6
fastboot flash system system.img_sparsechunk.7
fastboot flash system system.img_sparsechunk.8
fastboot flash system system.img_sparsechunk.9
fastboot flash system system.img_sparsechunk.10
fastboot flash system system.img_sparsechunk.11
fastboot flash modem NON-HLOS.bin
fastboot erase modemst1
fastboot erase modemst2
fastboot flash bluetooth BTFM.bin
fastboot flash fsg fsg.mbn
fastboot erase cache
fastboot erase userdata
fastboot erase customize
fastboot oem fb_mode_clear
-
Once everything is done, reboot your Moto X Force into updated Marshmallow firmware:
fastboot reboot
NOTE: If your firmware has more or less number of ‘system.img_sparsechunk’ files, adjust the commands accordingly.
So you have just done it! Updated your Moto X Force to the latest Android firmware. Go ahead, let us know how the update and its new features are treating your device, via the comments.
Comments
Comments are moderated, and published only if they are relevant to the topic and add value in a constructive way. If you disagree with something, please be polite and respectful. We suggest you read our comment policy before commenting.