Download and Install Moto X4 Oreo Update (OPW27.57-40)
Motorola is rolling out Android 8.0 Oreo to its latest X-series device. If you want to get it right now, then follow this guide to download and install Moto X4

On this page
Motorola is rolling out Android 8.0 Oreo to its latest X-series device. If you want to get it right now, then follow this guide to download and install Moto X4 Oreo Update.
The 4th generation of the infamous Moto X series was released in October 2017. The phone comes in two variants - Android One in the U.S and regular variant which is available in all other regions worldwide. Initially, users in the U.S reportedly received Android Oreo update on their Android One devices. As of the last few days, the update is also rolling out to the devices in India. It seems like it would take a bit more time before the update is available in all the regions. But if you are really keen on getting a taste of the latest Android version, then here’s your chance to manually install Moto X4 Oreo update.
- How to Install Custom Themes on Android Oreo without Root
- How to Use Autofill on Android Oreo 8.0
- Install ViPER4Android on Android Oreo 8.0
- How to Hide Persistent Notifications on Android Oreo
- Download and Install T-Mobile Moto Z2 Force Oreo OTA (OCX27)
Guide to Manually Install Moto X4 Oreo Update
Just like many other Android OEMs, Lenovo-owned Motorola is not staying far behind the line when it comes to pushing Android Oreo to its devices. According to the official announcement, at least 12 different Moto devices will receive the Android Oreo update. We recently saw the OEM pushing Oreo to the Moto Z2 Force on T-Mobile.
XDA senior member - lohanbarth has managed to get his hands on the official factory image. Thanks to his efforts that users can now easily install Moto X4 Oreo update. The new version is labeled as OPW27.57-40.
Several forum members have already tried and successfully installed this firmware on their devices. There are confirmed reports for the following models - XT1900-2 (India, Indonesia, Australia, New Zealand), XT1900-4 (LATAM), and XT1900-7 (Europe).
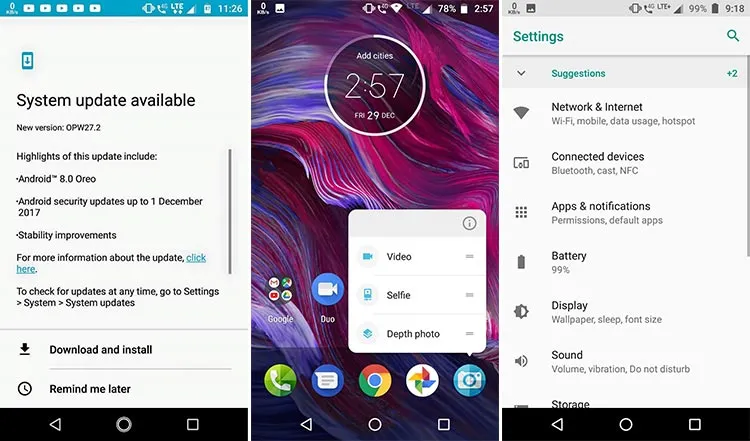
Of course, the update includes all the Oreo-exclusive features like Picture-in-Picture mode, Autofill framework, Background restrictions, and more. It also incorporates the December 1 2017 security patch. According to the users, the overall experience is now better than that on Nougat, which is quite as expected.
Credits: TechDroider
Before you install Moto X4 Oreo update using this method, make sure to check the OTA notification first. So, go to ‘Settings’ -> ‘System updates’. In case you have already got the OTA, there’s no need to go through all the hassle.
Prerequisites
- Installing the Moto X4 Android Oreo update manually will wipe your device completely. So make sure to take a complete backup before proceeding ahead. You can follow our guide on how to backup Android devices.
- Charge your device to at least 50-60% battery level to avoid any disruptions during the update process.
- Install ADB and Fastboot tools on your PC.
Download Moto X4 Android Oreo Firmware (OPW27.57-40)
PAYTON_OPW27.57-40_subsidy-DEFAULT_regulatory-DEFAULT_CFC.xml.zip
Instructions to Install Moto X4 Oreo Update
- Boot your Moto X4 into bootloader mode:
- Power down the device first.
- Press and hold the Volume Down + Power button together.
- While the device is in bootloader mode, connect the phone to the PC.
- Download the full firmware image.
- Extract the downloaded file and move all its content to C:\adb. This is the folder where all the ADB and Fastboot binaries are present.
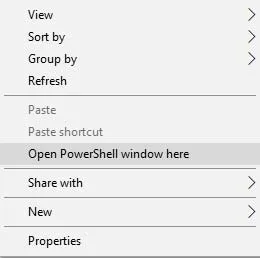
- Hold the SHIFT key on the keyboard and right-click on an empty space inside the folder.
- Select ‘Open PowerShell window here’ in the pop-up menu.
-
Start executing the following commands in the mentioned order to install Moto X4 Oreo update.
fastboot flash partition gpt.bin
fastboot flash bootloader bootloader.img
fastboot reboot-bootloader
fastboot flash modem NON-HLOS.bin
fastboot flash fsg fsg.mbn
fastboot erase modemst1
fastboot erase modemst2
fastboot flash bluetooth BTFM.bin
fastboot flash dsp dspso.bin
fastboot flash logo logo.bin
fastboot flash boot boot.img
fastboot flash system system.img_sparsechunk.0
fastboot flash system system.img_sparsechunk.1
fastboot flash system system.img_sparsechunk.2
fastboot flash system system.img_sparsechunk.3
fastboot flash system system.img_sparsechunk.4
fastboot flash system system.img_sparsechunk.5
fastboot flash system system.img_sparsechunk.6
fastboot flash system system.img_sparsechunk.7
fastboot flash system_b system_other.img
fastboot flash oem oem.img
-
Wipe the device:
fastboot erase carrier
fastboot erase userdata
fastboot erase ddr
-
Finally, reboot your Moto X4:
fastboot reboot
After the last command, your device will boot into Android 8.0 Oreo. So go ahead and enjoy all the new features. For more information on the process and user discussion, refer to the original XDA thread.
So you have just succeeded to install Moto X4 Oreo update. If you’ve got any questions regarding the update or the procedure, let us know by commenting.
Comments
Comments are moderated, and published only if they are relevant to the topic and add value in a constructive way. If you disagree with something, please be polite and respectful. We suggest you read our comment policy before commenting.