The latest version of Android Oreo has finally arrived for the supported devices. Follow this guide to install Android 8.1 Oreo on your Nexus and Pixel devices right now.
Advertisement
Google announced the first Android Developer Preview of Android 8.1 in October. And within less than two months, the final build is now rolling out to the supported devices. We saw the Second Developer Preview a week ago, that brought in the final APIs and changes just before the final release. And on December 5, Google has made the final version available for all the supported devices worldwide. The build number for the same is OPM1.171019.011. Following the instructions below you will be able to install Android 8.1 Oreo Factory Image on your Nexus and Pixel phones.
![]()
Page Contents
Guide to Install Android 8.1 Oreo Factory Image
The release was publically announced at the Android Developers Blog, along with Android Oreo (Go Edition). The latter is Google’s take to bring the latest software experience to low-memory devices. According to the company, every Android user should be given equal privilege to enjoy the latest software enhancements, irrespective of the device’s cost.
Advertisement
Now before you head down and install Android 8.1 Oreo, take a look at the other changes and new introductions in this update. Another significant addition to the new firmware is Neural Networks API (NNAPI). The API introduces Machine Learning technology on smartphones and tablets. It also includes the SharedMemory API and significant improvements to the Autofill Framework.
![]()
Advertisement
Apart from that, Android 8.1 includes various visual changes too. These include revamped reboot menu, tinted shadows in notification and power menu, improved Ambient Display, and more. We also previously stated how you can use inbuilt notification channels to disable persistent notifications on Android 8.1 Oreo.
According to Google, the update source code for the latest Android version is being pushed to AOSP repository with the latest API level 27. The company has also released the corresponding Factory Images to the servers. So follow the steps below to install Android 8.1 Oreo Factory Image on your Pixel and Nexus devices.
Prerequisites
- Flashing factory images require your phone’s bootloader to be unlocked. If you own the Pixel 2, you can follow our guide on how to unlock bootloader on Google Pixel 2 and Pixel 2 XL.
- Below, we will be altering the flash-all script file to make sure that the internal data on your phone stays untouched. We still highly recommend that you take a full backup of your device. Follow this tutorial on how to backup Android phones.
- You must install Android SDK tools on your PC.
- Download and install Notepad++ on your Windows PC. For macOS or Linux, you may use other editors like BBEdit, etc.
Download Android 8.1 Oreo Factory Image
| Pixel C | ryu-opm1.171019.011-factory-ccc99463.zip |
| Google Pixel | sailfish-opm1.171019.011-factory-56d15350.zip |
| Google Pixel XL | marlin-opm1.171019.011-factory-fe9d06f3.zip |
| Nexus 5X | bullhead-opm1.171019.011-factory-3be6fd1c.zip |
| Nexus 6P | angler-opm1.171019.011-factory-39448337.zip |
| Google Pixel 2 | walleye-opm1.171019.011-factory-f74dd4fd.zip |
| Google Pixel 2 XL | taimen-opm1.171019.011-factory-2df1c1cb.zip |
Instructions to Install Android 8.1 Oreo on Pixel and Nexus Devices
The fastest way to install the new update is by updating over-the-air. For that, you shall go to ‘Settings’ » ‘System’ » ‘System update’ and check for the notification manually.
Advertisement
![]()
The update might take some time before it reaches out to your specific device. However, if you’re not patient enough like me, you can follow the instructions below to install Android 8.1 Oreo right now.
Advertisement
- Download Android 8.1 Oreo Factory Image for your device.
- Use 7ZIP or similar software to extract the factory image (e.g. angler-opm1.171019.011-factory-39448337.zip).
- Copy the extracted files to the “C:\adb” folder where all the ADB and Fastboot binaries are present.
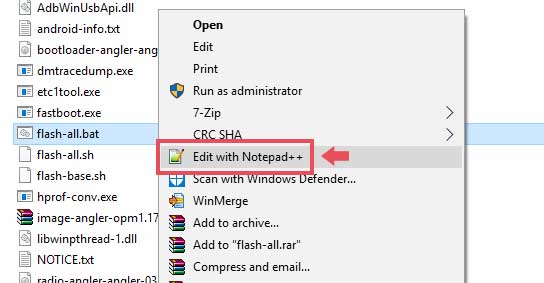
- Now, edit the “flash-all.bat” file using Notepad++. For macOS/Linux, edit the “flash-all.sh” file using BBEdit or similar software.
- Find the line starting with “fastboot -w update”. Example:
fastboot -w update image-angler-opm1.171019.011.zip
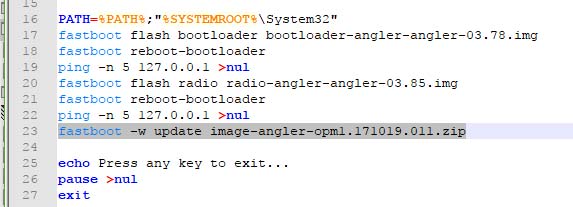
- Remove the “-w” flag from the line and save the file.
- Now, boot your Pixel/Nexus device into Fastboot mode:
- Shut down the phone completely.
- Press and hold the Volume Down + Power button altogether until you see the Bootloader/Fastboot screen.
- Connect your device to the PC via the USB cable.
- Finally, double-click on the “flash-all.bat” file to install Android 8.1 Oreo.
- On Linux/macOS, open the Terminal and execute the following command:
./flash-all.sh
- The flashing process shall begin and the new Oreo 8.1 update will be installed on your device.
- When the process is complete, your device will reboot automatically.
Once your phone boots, follow the on-screen instructions and set up the device. The new update also allows you to restore your backed-up content even after you have finished the initial setup. So take its advantage.
That was how you can manually install Android 8.1 Oreo by flashing the factory image. If you have any queries, simply contact us via the comments.
Source: Android Developers Blog
Comments 4 Comments
Comments are moderated, and published only if they are relevant to the topic and add value in a constructive way. If you disagree with something, please be polite and respectful. We suggest you read our comment policy before commenting.
I’m confused. Under the prerequisites you state, “Flashing factory images require your phone’s bootloader to be unlocked.” But from what I gather, unlocking my device (a Nexus 6P) will wipe all the data off it. So, I will then need to reinstall all the apps and reload all the data? I thought there was a way to do this that mimicked an OTA update. Or – can I do these steps without unlocking first?
Hey Jeffrey. Let me lay down the facts in form of pointers.
1) Flashing anything using Fastboot like Factory Image or individual partitions, requires an unlocked bootloader.
2) Yes, unlocking/locking back the bootloader will perform a full wipe, which includes the internal storage too.
3) And yes, there’s another way to perform this update without having to unlock.
That is to use “Full OTA Images” instead of “Factory Images”. Unlike factory images, full OTA does not need fastboot. Rather, it can easily be sideloaded using the stock recovery.
Recently, the January update (Android 8.1 Oreo) was announced. We have covered the tutorial for that too and it includes the Full OTA flashing (Method 2). You can check out the guide right here: https://www.thecustomdroid.com/install-january-2018-security-patch-google-pixel-nexus/
Is there a way to install 8.1 on a rooted Nexus 6p without losing root?
Quite easy. All you have to do is flash TWRP and just root it by flashing SuperSU/Magisk. Make sure that you do it before the first boot. Or, your internal storage will be encrypted (If it was decrypted earlier).