How to Manually Install Moto G5S Android 8.1 Oreo Update (Fastboot/TWRP)
Follow this tutorial to manually install Moto G5S Android 8.1 Oreo update right now using the fastboot image or TWRP flashable zip. Advertisement Lenovo-owned Motorola may not be the best Android OEM […]
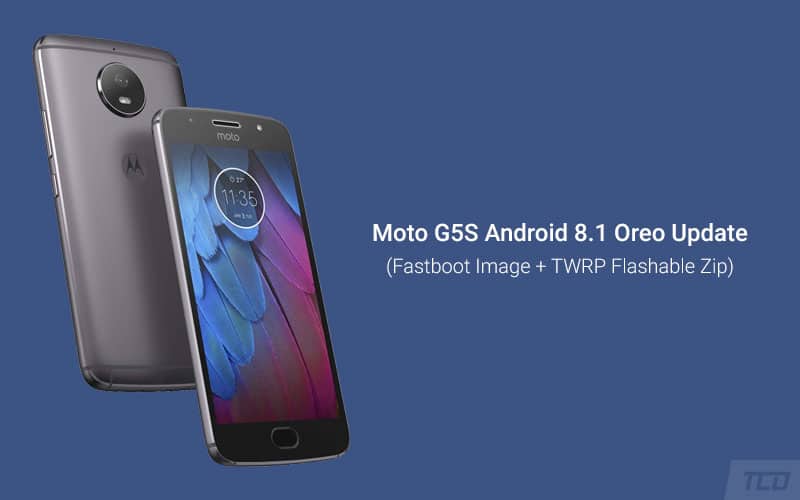
Follow this tutorial to manually install Moto G5S Android 8.1 Oreo update right now using the fastboot image or TWRP flashable zip.
Advertisement
Lenovo-owned Motorola may not be the best Android OEM when it comes to software updates. But the company did keep by its words when it came to rolling out Android Oreo for the list of supported devices. We recently saw the Moto G5S Plus being added to that list. But when it comes to the regular Moto G5S, the Oreo update has only started rolling to the users in Latin America. There’s still an unknown amount of time until the update is available for the rest of the regions.
Well, if you’d rather not wait, then you can also manually install Moto G5S Android 8.1 Oreo update right now. Thanks to our beloved XDA community and senior member Kamin4ri, you can now force upgrade your Moto G5S to Android Oreo. The said member was able to capture the OTA and thus created a TWRP flashable ZIP for users with a custom ROM/root/TWRP installed. He has also provided a link to the official Android 8.1 Oreo fastboot image.
Page Contents
Moto G5S Android 8.1 Oreo Update – Changes and New Features
Advertisement
Motorola certainly wisened up, skipped Android 8.0 Oreo and jumped directly to 8.1 Oreo. Internal beta testing (Commonly referred to as ‘Soak Testing’) for the same began back in June 2018. And now after months of development, Motorola has started rolling the update to a very small amount of users. The new build number is OPP28.65-37.
Now before you head over to the instructions and install Moto G5S Android 8.1 Oreo update, let us take a quick look at the new features.
Advertisement
Being based on Android 8.1 Oreo, the update also tracks back all the changes from version 8.0 as well. Which means you’ll get to enjoy a plethora of new features after updating your phone. These include Picture-in-Picture mode, Autofill Framework, Notification Dots, App Categories, improved background limits, WallpaperColors API, and more. To add, the new update also includes the August 2018 security patches.
Also read: Enable YouTube PIP Mode without YouTube Red on Android
If you’re in the Latin Americas, then make sure to check for the OTA notification. To do so, go to the ‘Settings’ -> ‘About phone’ -> ‘System updates’. If you’ve not yet received the OTA, then follow the instructions below to install Moto G5S Android 8.1 Oreo update right now.
Advertisement
This update was grabbed from RETLA software channel. Which means, once you flash it on your Moto G5S from a different region, you will not receive any OTA updates from your own region. If you’d like to preserve the ability to take updates over-the-air, then DO NOT INSTALL this.
This method should work on the following list of Moto G5S models/variants:
- XT1791
- XT1792
- XT1793
- XT1794
- XT1795
- XT1797
Requirements
- As always, we’d first suggest that you take a complete backup of all the data on your phone. This also includes the internal storage. We also have a detailed guide on how to completely backup Android phones.
- Charge your Moto G5S to a sufficient battery level. This shall help avoid any sudden shutdowns during the update process.
- Install Android platform tools on the PC. We’d refer to “C:\adb” in the steps below, which is the folder where the ADB and Fastboot binaries are present if you have followed our tutorial. Alternatively, you can also use Minimal ADB and Fastboot tool.
Download Moto G5S Android 8.1 Oreo Firmware
For RETLA (OPP28.65-37) variants:
- Fastboot Image: MONTANA_OPP28.65-37_cid50_subsidy-DEFAULT_regulatory-DEFAULT_CFC.xml.zip
- TWRP Flashable zip: twrp-flashable-montana-OPP28.65-37.zip (Not available now)
For RETBR and RETIN (OPP28.65-37-2) variants:
- Fastboot Image: MONTANA_OPP28.65-37-2_cid50_subsidy-DEFAULT_regulatory-DEFAULT_CFC.xml.zip
- TWRP-flashable zip: twrp-flashable-montana-OPP28.65-37-2.zip (Not available now)
How to Install Moto G5S Android 8.1 Oreo Update
Now, we have laid down two different methods that will help you install Android 8.1 Oreo update on Moto G5S.
Method 1: By Flashing Fastboot Image
This method will take you through the process of flashing the official fastboot image. It will also update the phone’s bootloader and partition table. If you think that you will need to downgrade at any point in the future, then please skip the gpt.bin and bootloader.img files.
- Download Moto G5S Android 8.1 Oreo fastboot image on the PC.
- Extract the content of the downloaded file to C:\adb, where the ADB and Fastboot binaries are present.
- Go to C:\adb on the PC.
- Hold the SHIFT key and right-click on an empty space inside the folder.
- Select ‘Open PowerShell window here’.
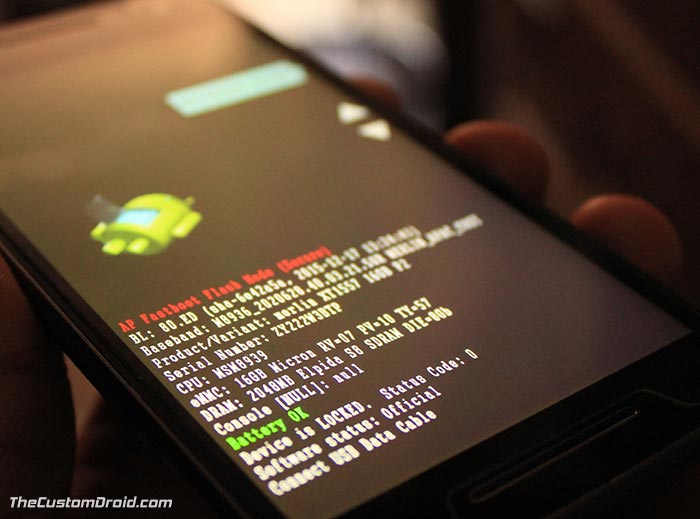
- Now, power off your Moto G5S and boot it into Fastboot Mode.

- To do so, simply hold the Volume Down + Power button simultaneously while the phone is powered down.
- Connect the phone to the PC using the USB cable.
- Enter the commands below in the given order to install Moto G5S Android 8.1 Oreo update:
fastboot oem fb_mode_set
fastboot flash partition gpt.bin
fastboot flash bootloader bootloader.img
fastboot flash boot boot.img
fastboot flash recovery recovery.img
fastboot flash dsp adspso.bin
fastboot flash logo logo.bin
fastboot flash oem oem.img
fastboot flash system system.img_sparsechunk.0
fastboot flash system system.img_sparsechunk.1
fastboot flash system system.img_sparsechunk.2
fastboot flash system system.img_sparsechunk.3
fastboot flash system system.img_sparsechunk.4
fastboot flash system system.img_sparsechunk.5
fastboot flash system system.img_sparsechunk.6
fastboot flash system system.img_sparsechunk.7
fastboot flash system system.img_sparsechunk.8
fastboot flash system system.img_sparsechunk.9
fastboot flash modem NON-HLOS.bin
fastboot erase modemst1
fastboot erase modemst2
fastboot flash fsg fsg.mbn
fastboot erase cache
fastboot erase userdata
fastboot erase DDR
fastboot oem fb_mode_clear - Once finished, reboot your phone using:
fastboot reboot
Your Moto G5S should boot into the updated Oreo firmware with all the latest features. Once it boots, you will need to follow the on-screen instructions and complete the Setup Wizard.
Advertisement
Method 2: By Flashing TWRP-flashable Zip
This is the easiest way to install Moto G5S Android 8.1 Oreo update if your phone is rooted or has a custom ROM installed.
- Download Moto G5S Android 8.1 Oreo TWRP flashable zip.
- Connect the phone to the PC and enable ‘Transfer files’ mode.
- Copy the downloaded zip file to the phone’s storage.
- Once copied, disconnect the phone and power it off completely.
- Hold the Volume Down + Power button simultaneously to boot your Moto G5S into Bootloader Mode.
- While in Bootloader Mode, tap either of the Volume keys until ‘Recovery’ shows up on the screen.
- Press the Power button to enter TWRP recovery.
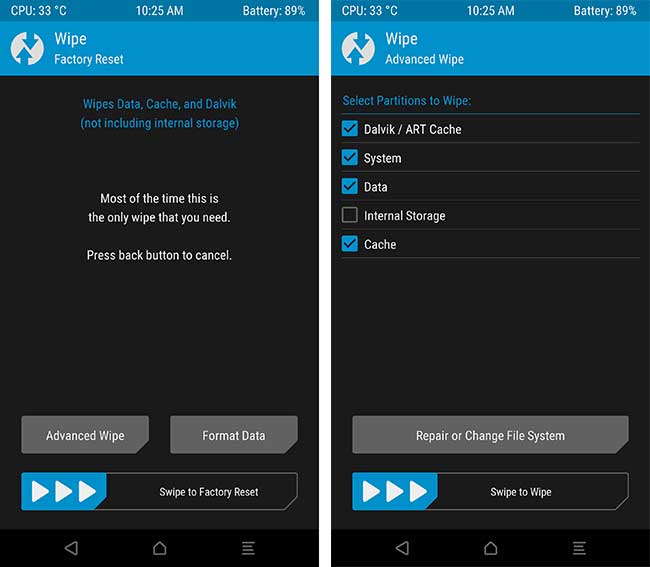
- [Optional] If there’s a custom ROM installed on your phone, you will need to perform a wipe.
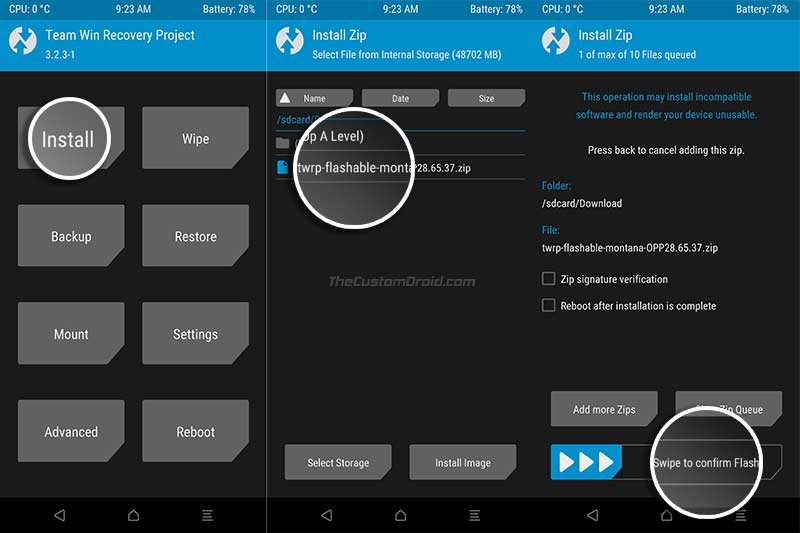
- Tap on the ‘Install’ button and select the ‘twrp-flashable-montana-OPP28.65-37.zip‘ file.

- Finally, swipe the button on the screen to start the flashing process and install Moto G5S Android 8.1 Oreo update.
- Now, if you want to keep TWRP (It will be overwritten upon boot), simply flash the latest Magisk installer zip file. Further, if your phone’s storage is decrypted and you want to keep it that way, then also flash the Universal DM-Verity Disabler zip.
- Finally, go to ‘Reboot’ and tap on ‘System’ to boot your Moto G5S into the OS.
When your phone boots, go through the on-screen instructions and set it up. It should now be running Android 8.1 Oreo with all the new features and August security patches. So, go ahead and explore the system.
So, this was our guide on how to install Moto G5S Android 8.1 Oreo update. We hope that it came in handy. If you have any questions regarding the process, then please drop a comment and let us know.
(Source: XDA) – Thanks, Kamin4ri!

