Unlock Bootloader, Install TWRP, and Root Huawei Mate 8
Have you brought the Mate 8 yet? We are going to help you unlock the bootloader, install TWRP recovery and finally root Huawei Mate 8.

On this page
Have you brought the Mate 8 yet? We are going to help you unlock the bootloader, install TWRP recovery and finally root Huawei Mate 8.
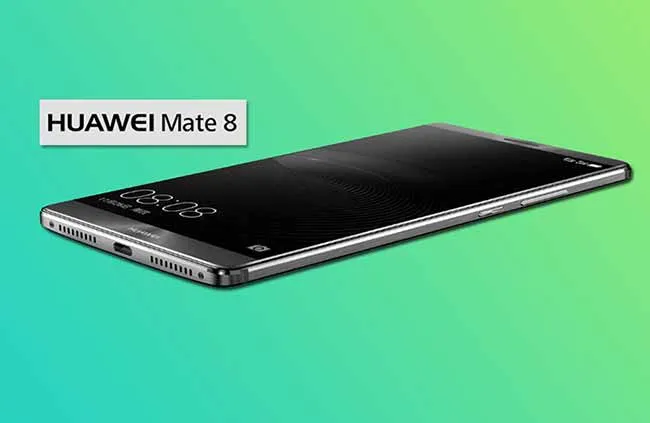
Huawei is recently trying hard to top the smartphone market with its powerful range of Android smartphones, like the Nexus 6P. And here comes the Huawei Mate 8, which is based off HiSilicon Kirin 950 chipset clocked at 2.3 GHz. Further, it also incorporates a Mali-T880 MP4 graphics unit, 6.0-inches IPS-Neo LCD display, 64 GB internal storage, 4 GB RAM, 16 MP dual-LED flash with f/2.0 aperture, USB host support, fingerprint sensor, and comes with the latest Android Marshmallow 6.0.
The phone was announced and released during November, last year, and has already gained some popularity in the smartphone market. The Mate 8 somewhat resembles a Galaxy Note 5, except with a better design, with ~78% body-to-screen ratio, giving it a much better and premium look.
Guide to Unlock Bootloader, Install TWRP and Root Huawei Mate 8
Now, if you have managed to grab one for yourself, you can boost your experience by rooting your newly bought device. But to do so, you first need to unlock the bootloader and install TWRP recovery. Later, we are going to use Chainfire’s SuperSU root package.
Prerequisites
Before you head over to the instructions to root Huawei Mate 8, ensure that you fulfill all the requirements stated below.
- Backup your Mate 8 completely, including the storage (it will be wiped clean during the process), apps, messages, contacts, and everything you feel necessary.
- Charge your phone to at least 60% battery level, to avoid any sudden shutdowns during the process.
- Install Huawei USB drivers on your PC.
- Download Android SDK platform tools and install them on the PC.
- Download the latest TWRP recovery image and transfer it to the platform-tools folder.
- Download latest Magisk installer zip or SuperSU ZIP according to your preference. I would personally suggest Magisk when it comes to rooting more newer Android versions like Oreo.
Unlock Bootloader
Huawei officially supports unlocking the bootloader. Just follow the simple instructions on the Huaweri Unlock Page. To unlock, it is necessary that you have a Huawei ID on your phone, and have stayed signed-in for at least 14 days. Once you have, you can begin the unlock process.
The next step, in order to root Huawei Mate 8, is to install TWRP recovery on it. The instructions below will take you through the complete process in a step-by-step manner.
Install TWRP Recovery on Huawei Mate 8
- Make sure you have downloaded the TWRP image on your PC.
- Reboot into bootloader mode - Power off your Mate 8 completely. Now press and hold the Volume Down and Power keys until you see the bootloader/fastboot screen. Now, connect your Huawei Mate 8 to the PC while it is in bootloader mode.
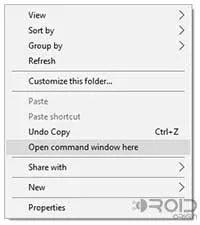
- Go to the folder/directory where ‘twrp-3.3.1-0-next.img ’ has been downloaded. On an empty space inside the same folder, press the SHIFT key and right-click. Select Open command window here from the pop-up that appears.
-
Now start by entering the following command in the CMD window that has opened in the previous step.
fastboot devices
This command should return a device ID. If it doesn’t, you will have to make sure to install and set up the drivers properly.
-
Finally, install TWRP recovery on Huawei Mate 8 using the following command:
fastboot flash recovery twrp-3.3.1-0-next.img
-
It will take a few seconds, and then you can reboot your phone by entering the command below:
fastboot reboot
Now that you have flashed TWRP successfully, you can root Huawei Mate 8.
How to Root Huawei Mate 8?
- Now, connect your phone to the PC in MTP mode.
- Transfer the Magisk/SuperSU root ZIP to the phone’s storage.
- Disconnect the device from the PC.
- Press and hold the Volume Up and Power keys until you see the lights on, and further, keep holding the Volume Up key until you see the TWRP recovery mode.
- When in TWRP mode, tap on ‘Install’.
- Navigate the device’s storage and select the root package.

- Finally, swipe the button on the bottom of the screen to root Huawei Mate 8.
- Finally, tap on ‘Reboot System’.
So now that you have rooted your Huawei Mate 8, what do you plan on doing with it next? Well, you can try several root apps or even a custom ROM. If you have issues, comment below and let us know.
Comments
Comments are moderated, and published only if they are relevant to the topic and add value in a constructive way. If you disagree with something, please be polite and respectful. We suggest you read our comment policy before commenting.