How to Downgrade Android 11 Developer Preview to Stable Android 10 Firmware on Google Pixel
So, Google recently announced the Android 11 Developer Preview and you might have already installed it on your Pixel.

On this page
So, Google recently announced the Android 11 Developer Preview and you might have already installed it on your Pixel. But what if it is not optimal for your daily usage and you want to move back to stable Android 11 firmware? Well, you just landed in the right place. Here today, we will show you how to downgrade Android 11 Developer Preview to stable Android 10 firmware on Google Pixel phones. Do note that this guide is only applicable to the supported Pixel phones including Google Pixel 4, Pixel 3a, Pixel 3 and Pixel 2.
The first developer preview of Android 11 has surely given us a good insight into the upcoming Android version and the exciting features that it will bring. But you know what? It’s a “developer preview” for now. Unlike for previous versions, Google hasn’t made this release available for end-users, wherein users could just opt-in for the beta program and get the preview installed on their phones through an OTA update.
That’s because in its first three preview builds, Google is solely aiming at the developers, and developers only. Also, as per the release timeline shared by Google, the first Android 11 Beta will drop-in in May 2020 (most likely after the Google I/O event), which will be extended to early adopters for testing out the new features.
Recommended: How to Enable Android 11’s Native Screen Recording in Android 10
Downgrading from Android 11 Developer Preview
So, why would you want to downgrade Android 11 Developer Preview to Stable Android 10 on your Pixel? That’s because the current developer preview of Android 11 is stable enough for daily use.
For instance, during our personal usage, we couldn’t reply to messages directly from the notifications shade, because the keyboard (Gboard, Swiftkey, etc) wouldn’t open up no matter how hard we tried. Google already has a list of top-voted issues in Android 11 Dev Preview and the list will only be growing as more issues/bugs are discovered by testers/developers.
And since you’re here, we believe you feel the same and now want to restore stable Android 10 firmware on your Pixel phone. So let’s get to it.
Prerequisites
- Downgrading your phone back to Android 10 will erase all the data including the installed apps (and their data), messages, calls, photos, videos, and everything stored on the phone’s internal storage as well. So, make sure that you take a full backup of all your important data. Should you need it, we have a guide for that here.
- Charge your Google Pixel phone to a sufficient battery level. This will ensure that the phone doesn’t switch off suddenly during the downgrading process.
- Download the latest Android SDK platform-tools package and install it on your PC.
- For flashing the Android 10 factory image (Method 2), the bootloader of your Pixel phone must be unlocked.
Download Stable Android 10 Firmware (Full OTA and Factory Image)
When it comes down to Pixel phones, Google provides the latest stable firmware as Full OTA packages and Factory Images. Depending on the method you choose, download the stable Android 10 firmware file for your respective Google Pixel phone from below.
Google Pixel 4 XL (codename: coral)
- Factory Image: coral-qq1b.200205.002-factory-89d84384.zip
- Full OTA Package: coral-ota-qq1b.200205.002-3e07a5f3.zip
Google Pixel 4 (codename: flame)
- Factory Image: flame-qq1b.200205.002-factory-6cea5d82.zip
- Full OTA Package: flame-ota-qq1b.200205.002-5af5767e.zip
Google Pixel 3a XL (codename: bonito)
- Factory Image: bonito-qq1a.200205.002-factory-238bc80e.zip
- Full OTA Package: bonito-ota-qq1a.200205.002-a70b6899.zip
Google Pixel 3a (codename: sargo)
- Factory Image: sargo-qq1a.200205.002-factory-36d5179f.zip
- Full OTA Package: sargo-ota-qq1a.200205.002-b24334d2.zip
Google Pixel 3 XL (codename: crosshatch)
- Factory Image: crosshatch-qq1a.200205.002-factory-3e5c17fd.zip
- Full OTA Package: crosshatch-ota-qq1a.200205.002-5a70576f.zip
Google Pixel 3 (codename: blueline)
- Factory Image: blueline-qq1a.200205.002-factory-25feefff.zip
- Full OTA Package: blueline-ota-qq1a.200205.002-7849ee41.zip
Google Pixel 2 XL (codename: taimen)
- Factory Image: taimen-qq1a.200205.002-factory-f382b0cf.zip
- Full OTA Package: taimen-ota-qq1a.200205.002-1c132203.zip
Google Pixel 2 (codename: walleye)
- Factory Image: walleye-qq1a.200205.002-factory-3f01c9f0.zip
- Full OTA Package: walleye-ota-qq1a.200205.002-9fa6e9ac.zip
Note: The files provided above are of the Android 10-based February 2020 security update, which is the latest at the time of publishing this post. You can always check for a more recent factory image for your Pixel device here or the full OTA package here.
Instructions to Downgrade Android 11 Developer Preview to Stable Android 10
In brief: You can downgrade Android 11 Developer preview using two different methods. First, by sideloading the Android 10 full OTA package via stock recovery. Or second, by flashing the Android 10 factory image via fastboot. The only difference is that in the case of the latter, your Pixel phone needs to have an unlocked bootloader.
In either of the methods, it is strongly recommended to perform a factory reset (i.e. erase all data) to make sure that no unusual issues pop up. With that information at hand, let us get to the instructions now.
Method 1: By Sideloading Android 10 Full OTA Package via Stock Recovery
First, download the stable Android 10 Full OTA package for your Google Pixel device. Then copy the downloaded zip package to the folder on the PC where the Android Platform-tools are installed. Once you have done that, head over to the instructions here on how to sideload OTA packages using ADB sideload.
After the sideloading process finishes, your phone will automatically reboot and enter the stable Android 10 OS.
Method 2: By Flashing Android 10 Factory Image via Fastboot
Step 1: Download Android 10 Factory Image for your Pixel device.
Step 2: Extract the downloaded factory image zip file on the PC using an archive tool like 7Zip.
Step 3: The extracted folder should contain the flashing scripts, bootloader and radio images, and a zip file containing the necessary partition images.
Step 4: Copy all extracted files to the folder where the Android platform-tools are installed. Example: ‘C:\platform-tools’ on Windows PC or ‘/Documents/platform-tools’ on a macOS/Linux PC.
Step 5: Power off your Google Pixel phone and boot it into Fastboot Mode by holding the Volume Down and Power keys together.
Step 6: Connect the phone (while it is Fastboot Mode) to the PC using a good quality USB-C cable.
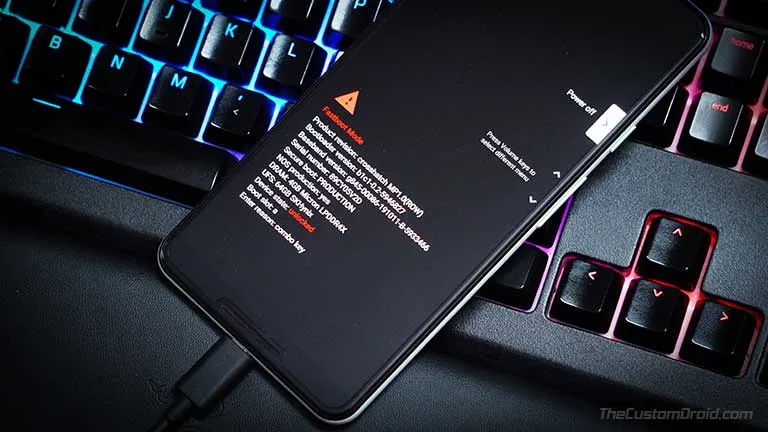
Step 7: Now double-click the ‘flash-all.bat’ file to finally flash Android 10 Factory Image and downgrade Android 11 Developer Preview on your Google Pixel device.
If you’re using macOS/Linux PC, launch the Terminal and change its directory (using ‘cd’ command) to the folder where the platform-tools are installed. For example: If the platform-tools are installed in ‘Documents/platform-tools’, then the command should be:
cd Documents/platform-tools

Now, simply enter the following command to flash the Android 10 factory image on your Pixel device:
./flash-all.sh
The flashing process can take a few minutes to finish and the progress will be shown in the PowerShell/Terminal window. During this time, your phone may reboot a couple of times, so don’t worry and leave the USB connection uninterrupted.
Wrapping Up
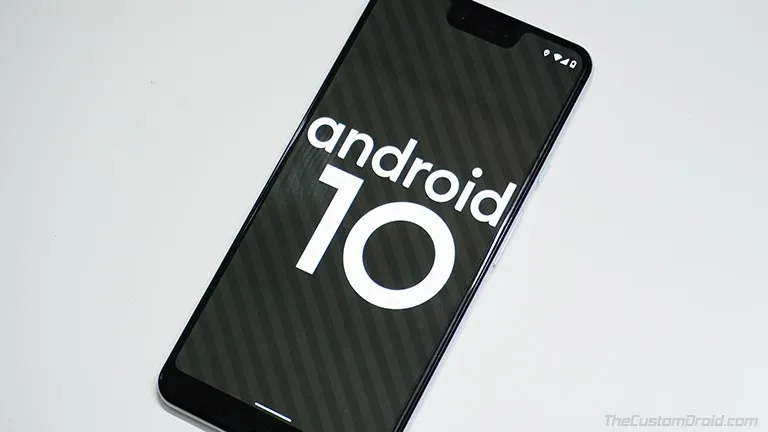
Your Pixel phone will reboot into the stable Android 10 OS once the flashing process finishes. You can now set it up by following the on-screen instructions and make it ready for your daily use.
You might want to go back and install Android 11 Dev Preview on your phone, because well, it offers a lot of new features. But we’d recommend you wait for Google to release the first Android 11 beta, which will be stable enough for you to enjoy the new features while still keeping your phone stable enough for daily use.
So, this was our guide on how to downgrade Android 11 Developer Preview to stable Android 10 firmware on Google Pixel devices. If you have any questions regarding the installation method(s), feel free to ask us.
Comments
Comments are moderated, and published only if they are relevant to the topic and add value in a constructive way. If you disagree with something, please be polite and respectful. We suggest you read our comment policy before commenting.