Enable Notification Importance Controls on Android 8.0
The article is all about how to enable Notification Importance Controls on any device running Android Oreo without Root.

On this page
The article is all about how to enable Notification Importance Controls on any device running Android Oreo without Root. It is pretty easy to do so, but before we get to the instructions, let’s learn more about Notification Importance, how it works, and how it relates to Oreo devices.
Android Oreo bought some hefty new changes and additions to the notifications department, including Notification Channels and also the ability to snooze notifications for a specific time span. Both of these are currently coming into full use for Oreo users. Notification Channels aims at providing a more structured control over notifications through the categories and snoozing the notifications is any day a better way to deal with barging notifications.
What are Notification Importance Controls
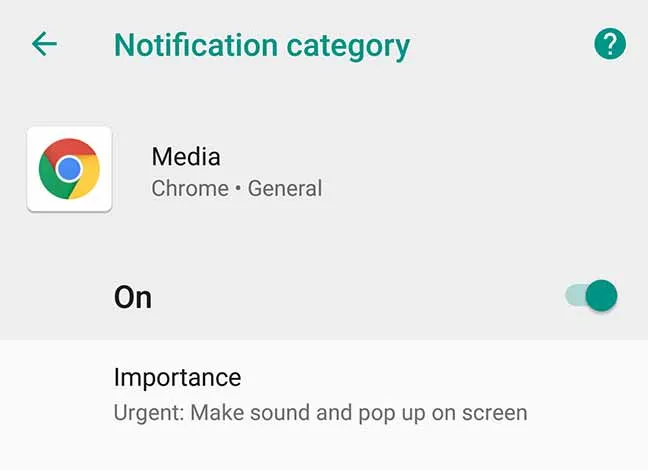
Now, if you have been using applications (Like Google Chrome, Gmail), that already target the Oreo API, you must already be relishing the notification channels feature and an important part of it is “Notification Importance Controls”. The latter allows you to set an “Importance” parameter for the specific notification channel. Which is all about how the system treats notifications from that specific category. This means users can have even more fine-grained control over the system.
The issue emerges with apps that still not target Oreo. These include popular apps like Instagram and WhatsApp, etc. If an app doesn’t do so, you shall not see Notification Channels for it and thus no Notification Importance Controls to supervise any sort of notifications.
The one straight way to solve this is reporting it to the specific app developer and requesting him to target their app for Oreo. However, this ain’t simple. While some of these developers might respond instantly to the situation, some might take their time. But don’t worry, today we have a way around and we will be demonstrating you how you can enable Notification Importance Controls for such apps.
Download AutoNotification App
This tutorial is assisted by using “AutoNotification” app that is available on Google Play. While the app is a Tasker plugin, the developer has sorted out things for Oreo users by making the Notification Categories as a standalone feature. So, you wouldn’t need Tasker at all. In order to enable Notification Importance Controls, you will need to opt for a 7-days trial period. If you think you can’t wait for third-party app developers to target Oreo, then you might also consider buying this app for just $0.99.
To start, download and install the AutoNotification app available on Google Play.
Once you have it installed, launch the app from the app drawer and grant it the required permissions it prompts for. Tap on “Start Trial” and confirm it by pressing “OK”. Then select your Google account.
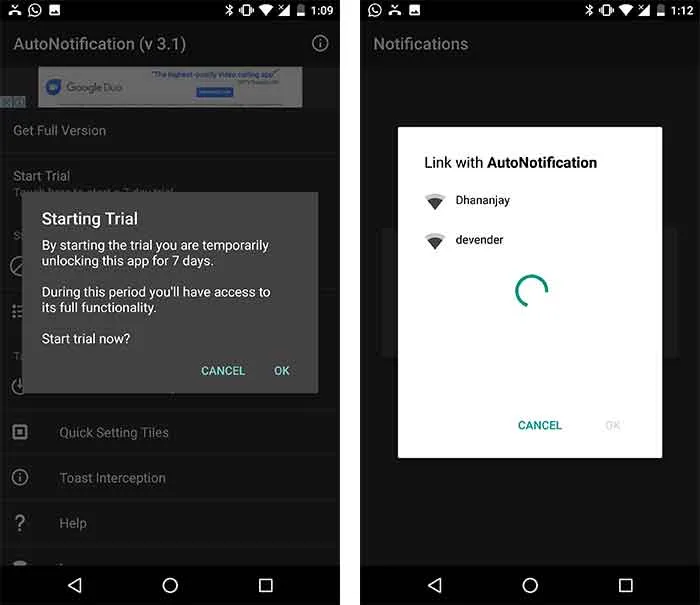
This will enable a 7-day app trial, which will be associated with your Google account. Once done, follow the instructions below to enable Notification Importance Controls for apps that don’t target Oreo yet.
Enable Notification Importance Controls on Android Oreo
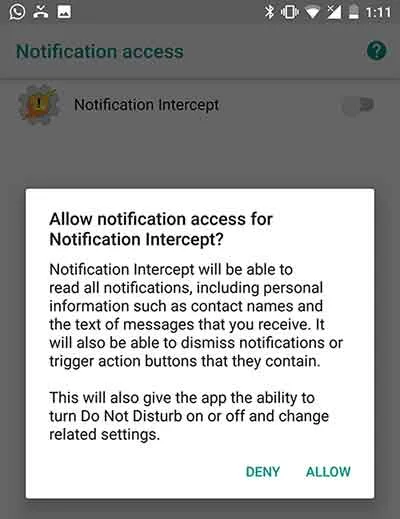
- Tap on “Notification Categories”. As soon as you tap on it, you will first require to grant “Notification access” to the app. So do it.
- Go back to the app. Now you will need to press “OK” on the device association prompt.
- Once you go through this, AutoNotification will display all the apps (user and system) on the screen.
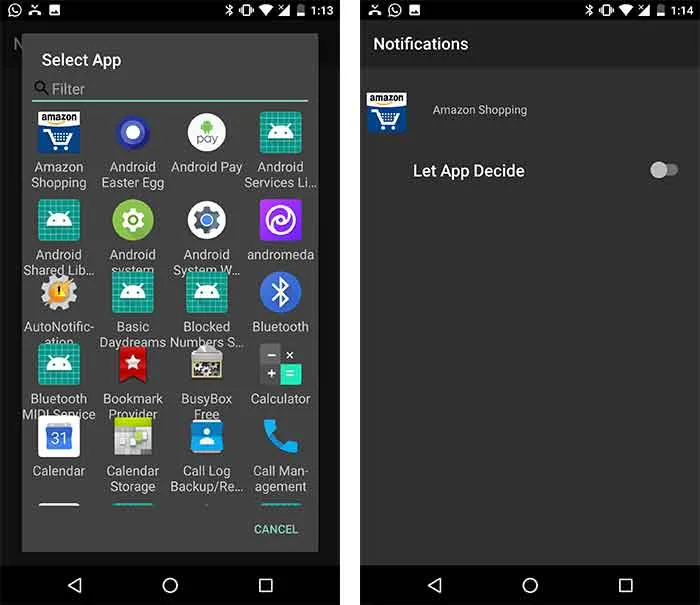
- Select the specific app for which you would want to enable Notification Categories.
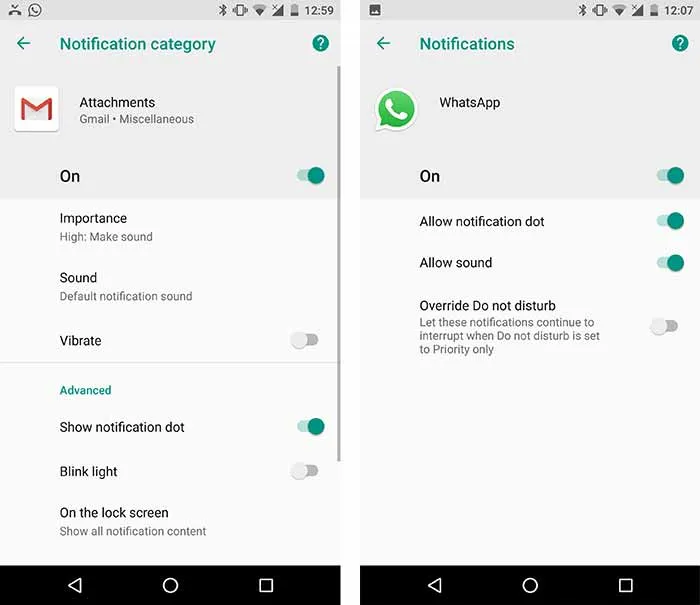
- You shall see the notifications window for the app, then switch ON the “Let App Decide” toggle.
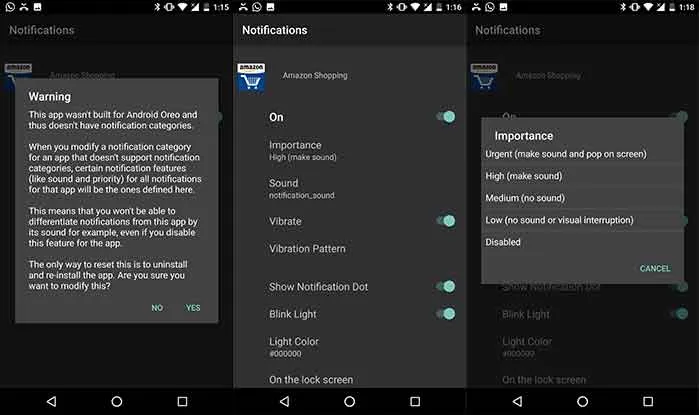
- A warning message shall pop up. Go through it, because that’s what you are doing this for and select “YES”.
- Upon doing so, you will be seeing that Notification Categories/Channels have been enabled. Now, all you need to do is, tap on “Importance” and select from the various importance controls available.
Now, you will have to do the same for any other installed apps. You will also see that AutoNotifications is not just limited to enabling categories, but you will also have more options:
- Set vibration pattern for an app, if vibration is enabled.
- Enable LED notifications and the ability to choose LED light color for a specific app.
- Control content on Lockscreen notifications
All this is great, right? Having more control over your own device is always a good thing.
Check out more on Oreo:
- How to Customize Android Oreo NavBar without Root
- How to Install Custom Themes on Android Oreo without Root
- Android Oreo Custom ROMs List for Popular Devices – Find Yours Now!
- Get ‘Turn on Wi-Fi Automatically’ Option for Nexus 6P/5X on Android Oreo
- How to Install Blob Emojis in WhatsApp and Telegram
That’s it! You have just enabled Notification Channels for an app that doesn’t target Oreo yet and you will be able to use Notification Importance Controls for it too.
Comments
Comments are moderated, and published only if they are relevant to the topic and add value in a constructive way. If you disagree with something, please be polite and respectful. We suggest you read our comment policy before commenting.