How to Install TWRP and Root Xperia Z5
The latest Xperia Z series smartphone from Sony is a high-end flagship killer. If you have got one for yourself and want to extend the boundaries of

On this page
The latest Xperia Z series smartphone from Sony is a high-end flagship killer. If you have got one for yourself and want to extend the boundaries of performance and customization, you might want to root it. So today, we are going to guide you through the easy process too, Install TWRP and finally Root Xperia Z5.
Root on the Xperia Z5 could be attained using Chainfire’s SuperSU but requires an insecure boot.img (kernel), which in this case would be AndroPlus kernel. But flashing anything would first require TWRP installed on your Z5, so we will head there first.

Before you begin with rooting, you will require unlocking the Xperia Z5 bootloader in order to flash files via fastboot. To do that, you can follow the tutorial linked below.
Now when you have unlocked the bootloader successfully, you can read ahead and root Xperia Z5, pretty easily.
Prerequisites
- Download and install Sony USB drivers.
- Backup everything, including internal storage, messages, contacts, and apps, etc.
- Charge your Z5 to at least 60% battery level.
- Enable USB debugging.
- Install Android SDK, for ADB and fastboot. Alternatively, use 15 Seconds ADB Installer.
Instructions
Flash Insecure Kernel
- First off, download Z5_AndroPlusKernel_Permissive_v31.zip.
- Extract the downloaded file using WinRAR or 7ZIP. You will now have the boot.img file, which basically is the kernel itself.
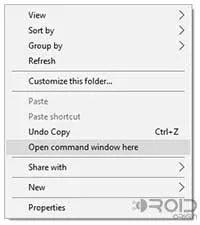
- Open the folder where the ‘boot.img’ has been extracted. Press SHIFT key and right-click on an empty space inside this folder. Select Open command window here from the pop-up menu that appears.
-
Now, boot into fastboot mode – Power off your Z5 completely. While pressing and holding the Volume Up button, connect the USB cable to the device. Now when the blue LED lights up, release the volume key, and your Z5 should now be in fastboot mode.
-
When your phone has entered fastboot mode, enter the following command to confirm that the device is ready for fastboot access.
fastboot devices
The command should return a device ID. In case it doesn’t, reinstall Android SDK and reboot your machine.
-
Time to flash the kernel. Use the following command:
fastboot flash boot boot.img
-
It will be done in a few seconds. You can reboot back your device using the following command:
fastboot reboot
It is necessary to boot the phone once after performing this process, in order to verify that everything is in its place and working. In case you get a bootloop, try flashing the kernel again.
Install TWRP Recovery
TWRP for the Z5 is unofficially available via XDA-Member AndroPlus and could be installed using a simple fastboot command. We will then use TWRP to further proceed with the guide.
- Download TWRP v3.0.0-0: twrp-3.0.2-0-E6653-20160504.img
- Boot your phone into fastboot mode - Power off your Z5 completely. Connect the USB cable to the phone, while pressing and holding the Volume Up button. When the blue LED lights up, release the key, and your Z5 should now be in fastboot mode.
- Make sure that your phone is still connected to the PC.
- Open the folder where the ‘twrp-3.0.2-0-E6653-20160504.img’ file has been downloaded. Press SHIFT key and right-click on an empty space inside the same folder, and then select ‘Open command window here’ from the menu that appears.
-
A command-line window will open. Flash the TWRP recovery using the following command:
fastboot flash recovery twrp-3.0.2-0-E6653-20160504.img
-
When it is done, you can disconnect your phone.
After the first boot, it is advised to reboot the device to recovery mode in order to mount the partitions properly.
Step 3: Root Xperia Z5
-
The easiest part of the guide is to root. Download the latest SuperSU flashable zip from here, and transfer it to your Z5’s internal storage.
-
Make sure your device is connected to the PC. Now enter the following command to reboot into recovery mode:
adb reboot recovery
-
While you are in the TWRP recovery, go to ‘Install’. Navigate your phone’s storage and select “SuperSU-v2.82-201705271822.zip”. Now, swipe the ‘Swipe to confirm Flash’ button.
-
When the flashing process is complete, tap on ‘Reboot System’.
Your Xperia is now rooted, running AndroPlus kernel. You can now tweak the kernel using Kernel Adiutor, or install apps that require root, it’s your call.
If you have queries related to the process, drop a comment below. Also, do let us know how rooting has helped you customize your Z5.
More for you:
Comments
Comments are moderated, and published only if they are relevant to the topic and add value in a constructive way. If you disagree with something, please be polite and respectful. We suggest you read our comment policy before commenting.