This tutorial is all about installing ViPER4Android on Nougat. Read the steps below on how you can get it right now on your device.
Advertisement
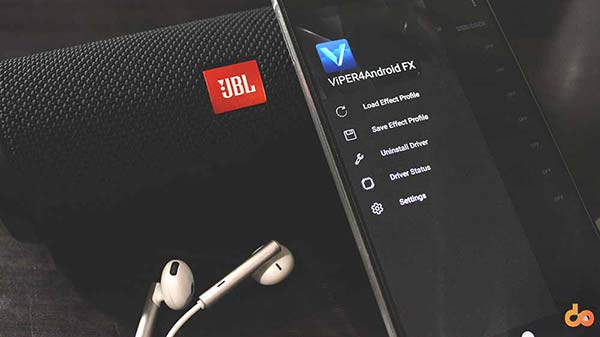
The most commonly used Audio modification tool among Android users is ViPER4Android. It has been making audio clearer and more perceptible on millions of Android devices out there. If you have Marshmallow on your device, you can read our guide or this one if your phone is on Android Oreo. Today here, we will be guiding you on how to Install ViPER4Android on Nougat running devices.
Also read: Muviz Nav Bar Audio Visualizer takes your music visualizations to a new level
After months and months of inactivity, the V4A developer – zhuhang, has finally brought ViPER4Android on Nougat with the official 2.5.0.5 update. While primarily, the update aims at enabling users to install ViPER4Android on Nougat 7.x, it also incorporates some new features.
Advertisement
Changelog (ViPER4Android on Nougat):
- New App icon, package name, and UI
- Added cross-channel (“quad channel”) convolver support. This allows faithful reproduction of sound field effects requiring such cross-channel convolution, such as simulation of speaker sound field on headphones, or crosstalk cancellation (stereo widening) on stereo speakers.
- Added FET compressor (new compressor/limiter simulating operation of FET circuits)
- Support for custom settings storage path (no more looking everywhere on the phone for the settings directory!)
- Miscellaneous bug fixes.
Build Information:
Version: FX version 2.5.0.5 (active)
Codename: (FX version) Beautiful
Compiled date: September 1,2016 / September 4,2013 – Official Release
Operating environment: Android 2.3 / 4.0 / 4.1 / 4.2 / 4.3 / 4.4 / 5.0 / 6.0 / 7.0
CPU platforms: ARM (ARM CortexA8 or higher), x86(Atom/i3/i5/i7)
Language: English (US) / Simplified Chinese / Traditional Chinese / more
Installing ViPER4Android on Nougat is pretty simple, given that you meet the requirements pre-hand. If you have found yourself in a sticky situation, then the steps below could be of help too.
Disclaimer
Installing incorrect/incompatible mods on your Android device could be harmful. Please make sure that you are aware of the outcome and don’t forget to take a Nandroid backup of your current ROM before proceeding. We shall not be held liable for any damage to your device during the process of install ViPER4Android on Nougat devices. However, if you’re stuck, we will still try to pull you out of any troubles.
A Few Things First
There are a few things to do before you go ahead towards the instructions to setup ViPER4Android on Nougat.
- In order to install ViPER4Android on Nougat, it is important that your device should be rooted using Magisk.
- ViPER4Android requires your device to be rooted with Magisk. If you still haven’t rooted your phone, then you can also follow our detailed tutorial or find your device-specific guide by using the search bar on the top-right of this page.
- Next, make sure that you take a Nandroid backup of your current ROM setup. In case anything goes wrong (It shouldn’t if you follow the instructions correctly), you can have the chance to restore back to its stable state.
Steps To Install ViPER4Android On Nougat
- Download ViPER4Android FX Magisk module: Official download link
- On the download page, click on ‘VIPER4ANDROIDFX’ to download the latest version.
- Connect your phone to the PC using the USB cable.
- Copy the V4A Magisk module zip to your phone’s internal storage.
- Once transferred, go to the app drawer and launch ‘Magisk Manager‘.

- Tap on the menu icon on the top-left of the screen.
- Select ‘Modules‘ and tap on the plus “+” icon located at the bottom of the screen.

- Navigate to the internal storage and select the ‘v4afx_v1.7.4.zip‘ file to install ViPER4Android on Android Nougat.
- The installation screen will appear.
- When prompted for ‘Select version‘, tap the Volume Up key for v2.5.0.5 or Volume Down key for v2.3.4.0.
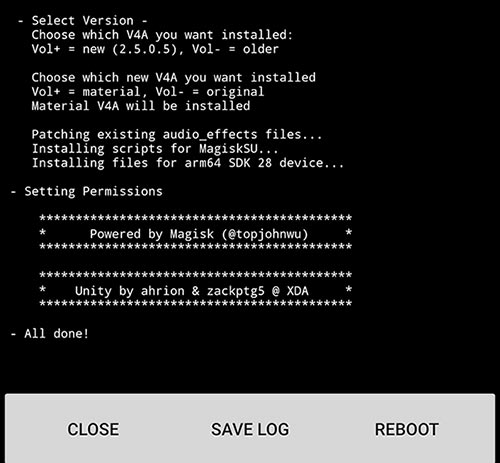
- Similarly, tap Volume Up or Volume Down if you want to install material UI V4A app or the original one, respectively.
- As soon as you do that, the module will instantly install ViPER4Android on your phone running Nougat.
- Once installed, tap on the ‘REBOOT‘ button.
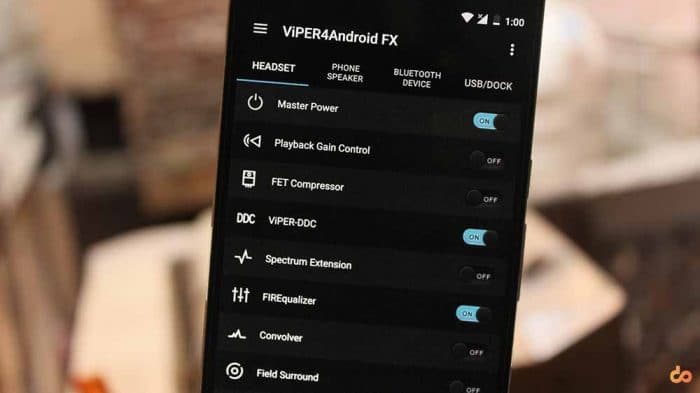
Once your phone boots up, you shall see “ViPER4Android” in the app drawer. Just go ahead and launch it, then press the menu icon and select ‘Driver Status’. The status should be ‘Normal’, which means that the installation was successful.
Now, turn on the master power and start tweaking the audio on your phone. So, this was how you can install ViPER4Android on Android Nougat. Are you now enjoying the superior sound quality on your device? Share this article on your social profiles and let others know about it too.
Comments 6 Comments
Comments are moderated, and published only if they are relevant to the topic and add value in a constructive way. If you disagree with something, please be polite and respectful. We suggest you read our comment policy before commenting.
I have crDroidAndroid-7.1.2 (lineage_kltevzw), Magisk-v18.1, SELinux.Switch (set to permissive), and BusyBox 1.29.2 pro. When I select ‘Driver Status’ I see driver version 2.5.0.4, Status ‘normal’, Processing ‘No’. I start Viper and enable headset and hear no change what so ever. I am guessing that it is not processing anything because in Magisk-Superuser I do not see Viper having root access. Do you have any idea why? Is their a path that Viber is using to look for BusyBox? Any thoughts would be appreciated.
Hi Jose. Since you have Magisk, there is a much easier method to install ViPER4Android on your device. You can download the latest version and install it using the instructions in this guide.
Before you head to the guide, make sure that you completely uninstall the current V4A installation from the device.
How to uninstal this?
Hello, to uninstall: Remove “ViPER4Android_FX_v2505_A7.x_Nougat_IO_test_fix.apk” from /system/priv-app. Then rename “audio_effects.conf.bak” back to “audio_effects.conf”. Finally reboot.
Also, if Viper4 Android still doesn’t work, try copying that audio_effects.conf file to your system/etc folder, then renaming the original in the /vendor/etc folder to .bak. You will have two audio_effects files, the original in system/etc, the other in system/vendor/etc which will be renamed with the .bak extension. That has worked on both my Google and Nvidia Shield tablets.
Thank you for sharing your experience here with other users. It will surely assist several to find the solution to their problems. Much appreciated!