
On this page
If you’re looking forward to having Xposed Framework on your device, then you might want to turn your head towards LSPosed. In this tutorial, I will show you how to install the LSPosed Xposed Framework on devices running Android 11, Android 10, Android 9 Pie, and Android 8.1/8.0 Oreo.
What is LSPosed Framework, anyway?
LSPosed is a new and improved Riru module that allows you to get the Xposed Framework up and running on your Android device. It is a fork of the much-recognized EdXposed Framework, but with less impact on performance and better security in terms of modules.
So, this is yet another version of EdXposed? Not exactly. But since it’s based on the EdXposed Framework, you’re likely to see a lot of similarities. For instance, LSPosed uses Riru to inject into Zygote and run its code, exactly the same as what EdXposed does.
Some details by developers
This new module comes from some of the developers who were on the EdXposed team, but parted ways. According to the discussion being held on GitHub, one of the developers (kotori02) mentioned that the original author of EdXposed “refused lots of breaking changes that kills backward compatibility”.
When asked by a participating member whether this meant depreciating device or module compatibility, the developer added that it meant dropping support for the old Xposed Installer, utilizing the new Xposed API, some changes that could lead to security and performance issues, among other things.
The developers of LSPosed have already added these changes to their To-Do list.
EdXposed still works
Does this mean EdXposed doesn’t work? It still works well and even supports Android 11. While some users have reported UI lags and performance hits while using it, there are others that aren’t affected. Apparently, this could be partly attributed to the hooking framework being used (YAHFA or SandHook).
LSPosed Framework uses Module Scope
The key difference between EdXposed and LSPosed is that the modules are now scoped and hooked to individual apps. In order to make their modules work with LSPosed, developers need to define the scope as stated in the official wiki.
During a module installation/activation, users can also select apps and services to which the module is hooked/applied.
This particular feature could contribute to less RAM usage and better performance by LSPosed, as compared to EdXposed.
Which one should you choose?
This brings us down to the obvious question - “Which one should I use, LSPosed or EdXposed?” There’s no definitive answer. But for now:
- EdXposed: If you want to continue using existing modules. There are certain modules that are not updated in a while/anymore and thus do not support the module scope mechanism. Not all major modules have been updated to be used with LSPosed, but some have.
- LSPosed: If you have experienced performance issues like lags, and security concerns when it comes to modules. Users over at XDA-Developers, who have already installed LSPosed have reported it to be “smoother” than EdXposed. I believe this is because of the module scope feature, as modules are only hooked to required apps thus lessening the performance impact.
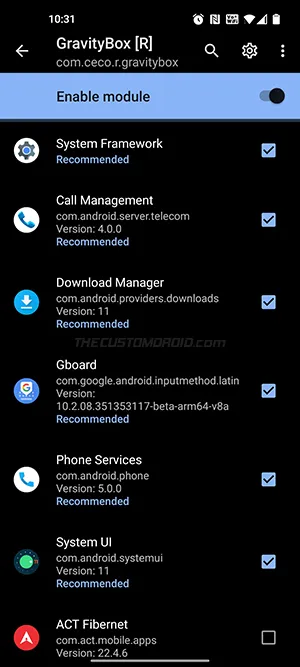
If you’d ask me, I would personally stick with EdXposed until all my favorite modules have been updated to support LSPosed. That said, GravityBox, one of the most popular Xposed Modules was recently updated and now works with LSPosed.
Now, if you have made the decision, the instructions below will help you install LSPosed Xposed Framework on Android devices running Android 11, all the way back to Android 8.1/8.0 Oreo.
Preparations
Take a backup: Software modifications could sometimes lead to soft-bricks and data loss due to an error. So it’s a no-brainer to always have a backup of all your important data with you in case this happens.
We already have a tutorial on backing up Android if you need guidance. Moreover, if you have TWRP installed on your phone, consider taking a NANDroid backup of the complete OS.
Root your Android device: Of course, any core software modification requires root access. There’s a strong chance that your device is already rooted. If not and you’re new to the whole scene, you might want to start with our Magisk rooting tutorial. Or, look up your device-specific rooting tutorial in this section of our website.
It’s worth noting that the LSPosed Framework requires Magisk v21+ to work. If you have an older version installed, make sure that you update Magisk first.
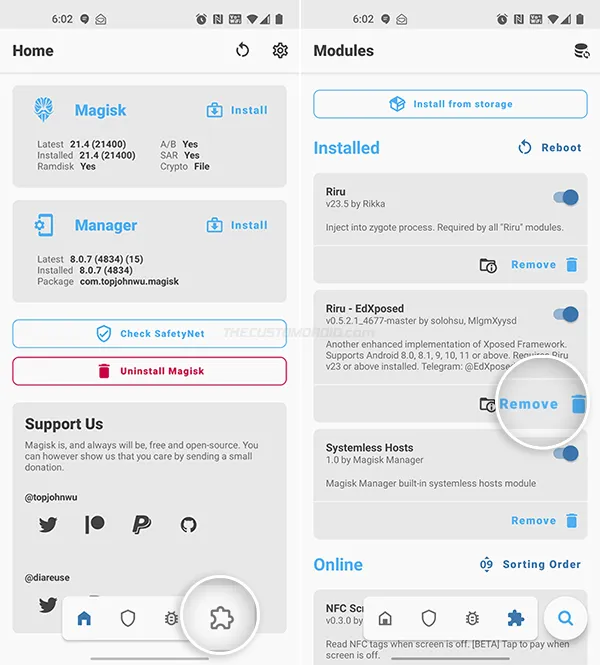
Uninstall EdXposed Framework (if you have it): LSPosed automatically disables the EdXposed module during the installation. But to be safe and prevent any unusual outcomes, it’s best to disable and uninstall EdXposed from your device first.
To do this, go to “Magisk Manager” → “Modules” and press the “Remove” button for the “Riru - EdXposed” module. Then restart your device to completely disable and remove the module.
How to Install Xposed Framework on Android 11 or below using LSPosed
LSPosed allows you to install Xposed Framework on devices running Android 11, 10, 9 Pie, and 8.1/8.0 Oreo. To make it easier for you to understand, I have broken down the installation into 4 major steps.
In brief, you have to start by downloading and installing the ‘Riru’ and ‘Riru - LSPosed” modules on your Android device. Once that is done, you have to install the LSPosed Manager and verify the installation status.
Let’s start!
Step 1: Install Riru Module
LSPosed requires Riru v23 (or above) to work. So, the first step is to install the “Riru” (otherwise known as “Riru - Core”) Magisk module on your device. The latest version of this module is merged and available in the official module repository, so it can easily be installed through the Magisk Manager app.
To install the Riru module on your device:
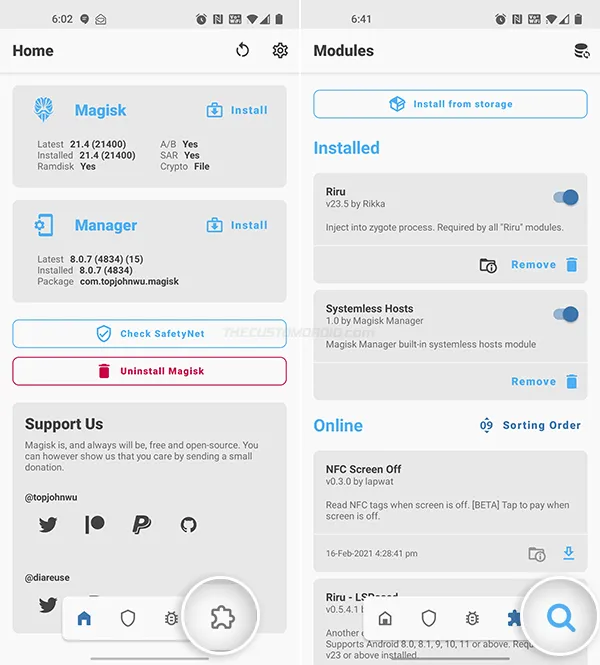
- Go to the app drawer and launch “Magisk Manager”.
- Press the icon on the extreme right of the bottom-navbar to access the “Modules” menu.
- Press the search icon on the bottom-right and search the repo for “Riru”.
- Find the Riru module and press the blue-colored download icon next to it.
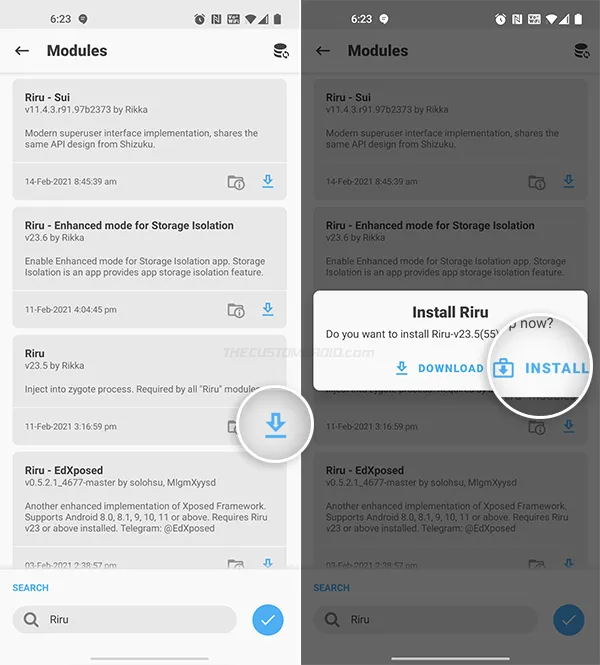
- Select “INSTALL” when prompted. Magisk Manager will download the module and install it on your Android device.
- Select “Reboot” after the module installation finishes.
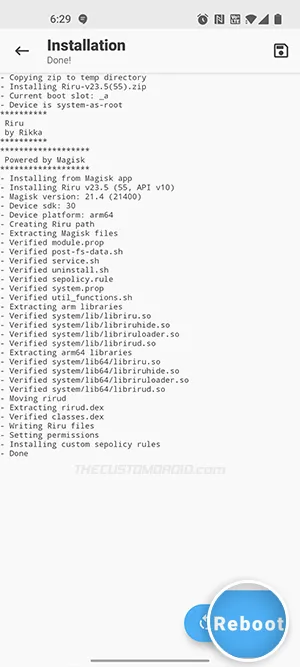
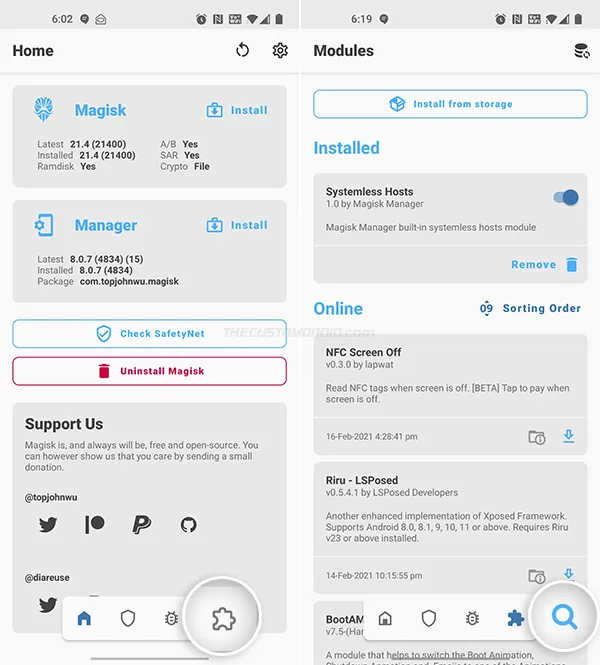
After your device boots, Riru should be installed and activated. You can confirm this by going to “Magisk Manager” → “Modules”.
Step 2: Install LSPosed Riru Module
The second step is to install the LSPosed Riru module on your Android device, which again is available in the Magisk module repository. The installation is extremely simple and very similar to what you did in Step #1, but with an extra step.
To install the LSPosed module on your Android device:
- Open the Magisk Manager application on your device first.
- Press the icon on the extreme right of the navbar to access the “Modules” menu.
- Press the search icon and search the repo for “LSPosed”.
- Find the “Riru - LSPosed” module in the search results and press the download icon next to it.
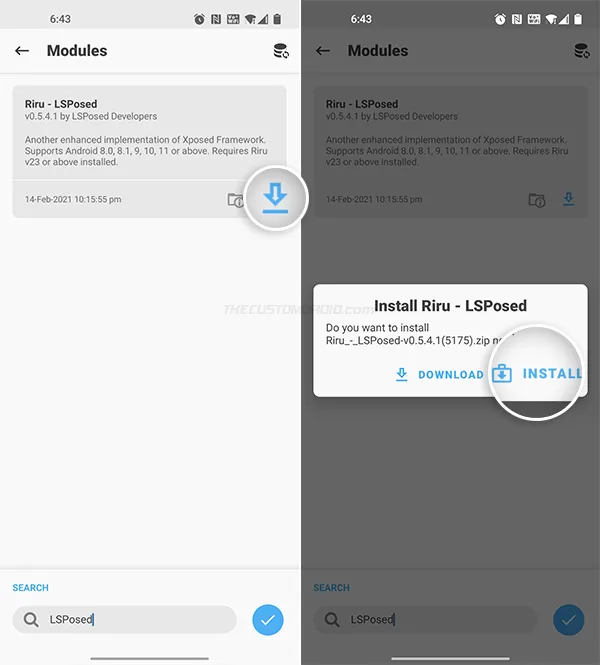
- Select “INSTALL” when prompted to begin the installation.
- During the installation, you will be prompted to select the variant of the module (YAHFA or SandHook) you wish to install. You can use the Volume Up key to make the selection and then press the Volume Down key to confirm and install the LSPosed module on your device.
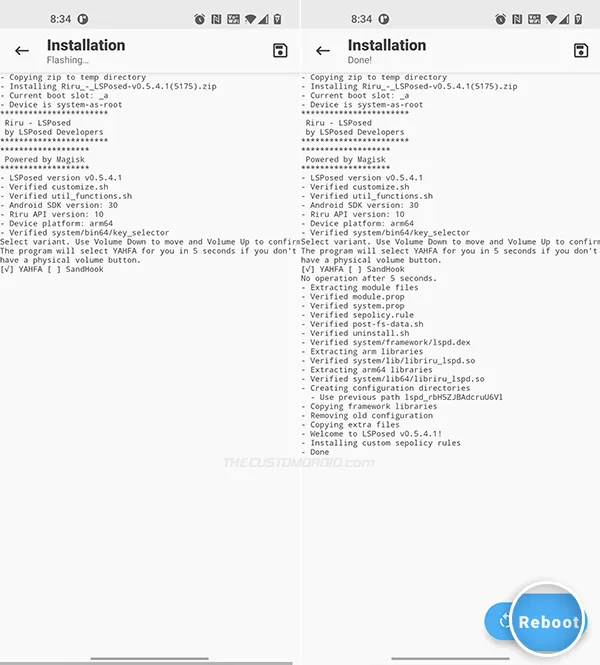
- Select “Reboot” once the module installation finishes.
Important note: As you saw during the installation, the LSPosed module comes in two different variants - (1) YAHFA and (2) SandHook. These two are basically hooking frameworks and there’s no one variant that works for all OEM Android devices.
In my personal testing, the YAHFA variant (default) worked on my OnePlus 8 and Pixel 3 XL without any issues.
If the installed variant causes a bootloop, you can remove the Magisk module using TWRP, ADB, or Safe Mode. Then boot your device and re-attempt the installation again. This time, choose the SandHook variant if you installed the YAHFA variant earlier, or vice-versa.
After the device boots back into the OS, you can go to “Magisk Manager” → “Modules” and verify if the LSPosed module is installed and active.
Step 3: Install LSPosed Manager app
At this point, the LSPosed Xposed Framework should be fully installed on your device. The next step is to download and install the LSPosed Manager companion app. It will be used to check if the framework is properly installed and working, as well as to manage Xposed modules after the installation finishes.
To begin, download the APK file of the latest version of the LSPosed Manager application from the official GitHub releases page.
For documentation, I am also adding the download links for all the versions of the LSPosed Manager app below, along with the latest version at the time of publishing this guide.
- (Latest) v0.5.4.1: LSPosedManager-v0.5.4.1-5250-release-signed.apk
- v0.5.4.0: LSPosedManager-v0.5.4.0-5175-release-signed.apk
- v0.5.3.0: LSPosedManager-v0.5.3.0-5143-release-signed.apk
- v0.5.2.0: LSPosedManager-v0.5.2.0-5139-release-signed.apk
If you have download the APK on your computer, make sure to transfer it to your phone’s internal storage. Then use your choice of file manager to install the APK on your device (See: How to install an APK).
Step 4: Verify Xposed installation status
With everything done, let’s verify the installation status of the Xposed Framework. To do this, go to the app drawer and launch the LSPosed manager application. The first card should indicate the activated variant and its corresponding version. You can tap the card to view additional information like the Xposed version, device name, Android version, and device architecture type.
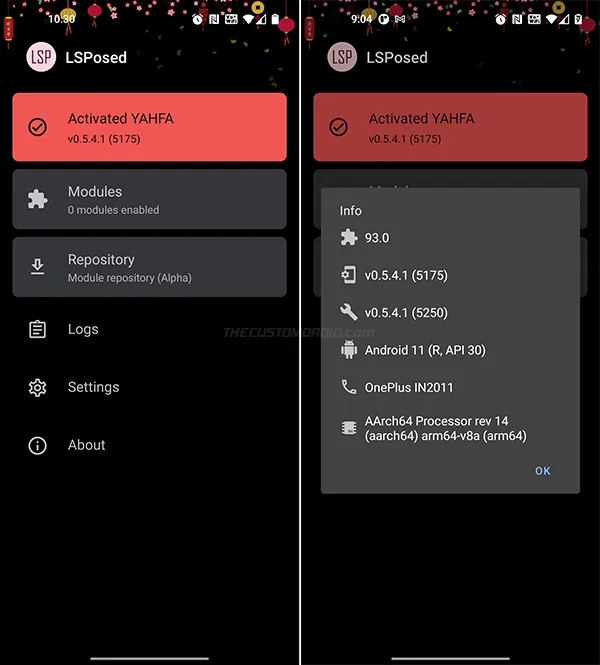
To install Xposed modules from the official repository, press the “Repository” card in the manager app. To view and manage installed modules, press the “Modules” card.

The Settings menu of the app allows you to tweak the app’s theme color, switch between YAHFA/SandHook variant, and backup/restore the app settings.
You can now go ahead and check how many of your favorite Xposed modules have been updated with the module scope feature to support LSPosed. I can tell that GravityBox for Android 11 has been updated. If you find other modules that have been updated, please consider sharing them with us.
That’s it! You have successfully install LSPosed Xposed Framework on your device running Android 11, Android 10, Android 9 Pie, and Android 8.1/8.0 Oreo. With that, you can take a look at the list of best Xposed Framework modules I published recently.
Facing issues with SafetyNet due to hardware-back attestation? Try fixing it with the Universal SafetyNet Fix.
Verdict
Users on both XDA and Github have debated whether LSPosed is legit and is it just another fork of EdXposed. The source code of the complete project is available at GitHub (See the source link at the bottom) for anyone to view, verify, and contribute. Moreover, it is being handled by some of the known developers who have previously been a part of the EdXposed team. And I think that’s more than enough to verify its legitimacy.
As for whether it’s just another version of EdXposed, I would say no. As I mentioned initially, this new LSPosed framework is more focused on performance and module security. The module scope feature in itself is valid proof.
Still, I would be happy to hear your opinions on this topic.
Since the initial release back in January, the developers have constantly been working to fix bugs, make changes, and add new features to make LSPosed better every passing day.
If you experience any bugs, consider reporting them through the Issues section on GitHub. While doing that, make sure that you share the debug logs provided in the LSPosed manager app. You can also join the official Telegram group for discussions.
So by now, you have learned how to install Xposed Framework on Android 11 and below using the new LSPosed Framework. If you face any difficulties during the installation or usage, feel free to ask. Please make sure that you mention your device name and Android version when asking for help.
Source: LSPosed on GitHub
Comments
Comments are moderated, and published only if they are relevant to the topic and add value in a constructive way. If you disagree with something, please be polite and respectful. We suggest you read our comment policy before commenting.