Enable Developer Options & USB Debugging on OnePlus 8T [Guide]
If you want to enable USB Debugging, OEM Unlocking, or the Advanced Reboot menu, then you'd first need to unhide/enable the developer options.

On this page
If you want to enable USB Debugging, OEM Unlocking, or the Advanced Reboot menu, then you’d first need to unhide/enable the developer options. Through this post, you will learn how to enable Developer Options and USB Debugging on the OnePlus 8T.
Introduction
Before we get to the instructions, let us first help you understand what Developer Options and USB Debugging are, and why you would need to enable them in the first place.
What are Developer Options?
“Developer Options” is a dedicated menu in the Settings app that contains a series of options for configuring the Android system behavior to debug apps and software. Some of the most commonly-used options include “OEM Unlocking” and “USB Debugging”. If you’re interested in knowing more about developer options, then please visit the official documentation here.
What is USB Debugging?
“USB Debugging” is a debug mode on OnePlus 8T that allows your device to communicate with a computer over USB for debugging apps and software using the Android ADB tool. ADB has multiple applications, it can be used to sideload APKs, uninstall/disable system apps, boot the OnePlus 8T into Fastboot/Recovery modes, and more.
How to Enable Developer Options on OnePlus 8T
The Developer Options menu is by-default hidden within the Settings app of your OnePlus 8T. This is done deliberately to prevent users from unknowingly access the said options and configure something that might affect the normal usage of the device. Since you’re here, we’d presume you already know why you would want or need to enable it.
To enable Developer Options:
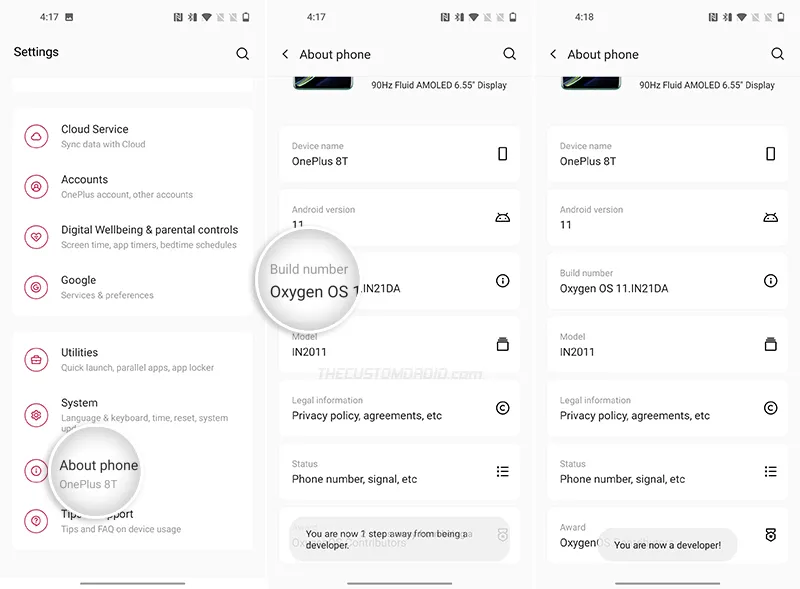
- Open the ‘Settings’ app on your OnePlus 8T first
- Scroll down to the very bottom of the screen and select ‘About phone’
- Repeatedly tap on the ‘Build number’ section five(5) times
- Enter your phone’s lock screen PIN/Password/Pattern when prompted
- You should now see the “You are now a developer!” toast notification on the screen.
You have successfully enabled Developer options on your OnePlus 8T. You can access the options by going to ‘Settings’ → ‘System’ → ‘Developer Options’.
From here on, you can enable OEM Unlock for bootloader unlocking, use the options to capture a bug report, and more. And if it’s USB Debugging that you want, then just roll over to the next section.
How to Enable USB Debugging on OnePlus 8T
If you’re someone who develops apps or ROMs, holds an interest in Android software modding, or wishes to use ADB for anything else, then USB Debugging is a developer option you will need to enable from time-to-time.
To enable USB Debugging on OnePlus 8T:
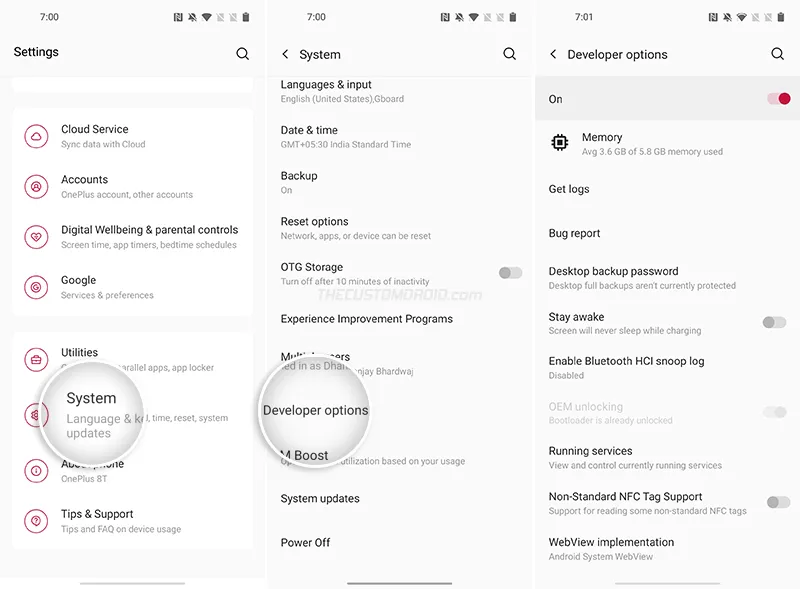
- Open the ‘Settings’ app
- Scroll to the bottom of the screen and select ‘System’
- Tap on ‘Developer options’ to access the list of available options
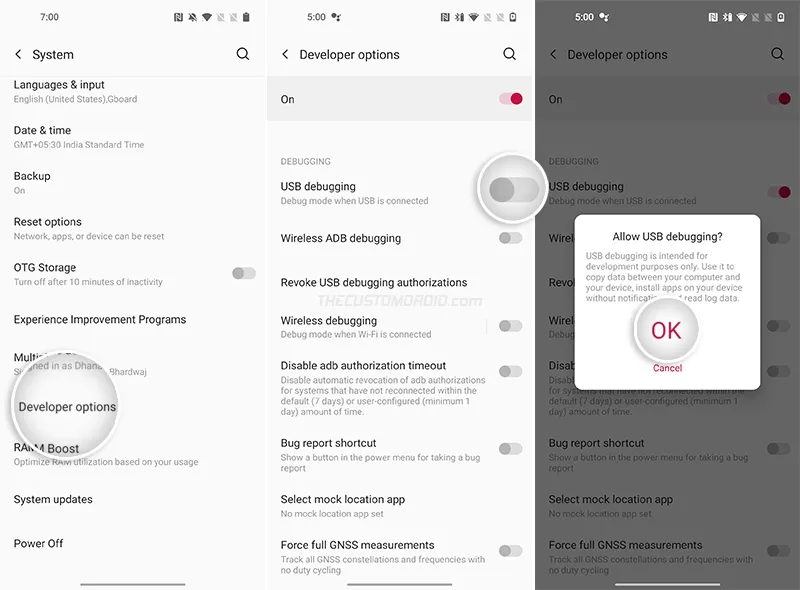
- Scroll down and find the “Debugging” section
- Turn ON the “USB Debugging” toggle
- Finally, select “OK” when prompted to allow USB debugging.
That’s it! You have successfully enabled USB Debugging on your OnePlus 8T. You could now connect the phone to your computer and start operating with the ADB tool for debugging and other purposes. If you need help with setting up ADB and configuring it for the first time, then refer to this article.
Conclusion
Developer Options like USB Debugging and OEM unlocking are extremely useful for developers, as well as for enthusiasts who want to unlock the bootloader, flash custom ROMs, or root their phones.
At the same time, it is worth noting that a lot of the available developer options are experimental and could affect the normal behavior of your phone. So do not go on enabling or tweaking every option that you see, unless you have prior knowledge about the same.
So by now, you have learned what Developer Options and USB Debugging are, why you would need them, and also how to enable them on your OnePlus 8T. If you have any questions regarding the options or the instructions above, let us know.
Comments
Comments are moderated, and published only if they are relevant to the topic and add value in a constructive way. If you disagree with something, please be polite and respectful. We suggest you read our comment policy before commenting.