Android OTA packages now come with a Payload.bin file that contains the individual image files of different firmware partitions. In this tutorial, we will show you how to extract the Android OTA Payload.bin file to get the individual device partition/firmware images. This could be done using the Payload Dumper Tool, either on a PC or on an Android device.
Advertisement
Page Contents
What is a Payload.bin File?
Google introduced the concept of A/B (Seamless) System Updates back with Android Oreo. Of course, the new update mechanism offers several benefits. For one, the updates are installed seamlessly without rebooting the phone into the recovery mode. Also, it drastically reduces post-OTA failures that could make the device unusable. XDA posted a detailed write-up on A/B partitions and how it affects the custom development scene.
This new A/B update mechanism also introduced a new format for the Android OTA/Firmware update files. Earlier, these update files or packages came with partition images, which could easily be extracted and used for manual flashing. But now, these update packages come with a single ‘Payload.bin‘ file that contains the individual partition images.
Using Payload Dumper Tool to Extract Payload.bin
Extracting the individual device partition images from an Android OTA file could come in handy in various situations. For example, if you want to grab the stock boot image for installing Magisk and rooting your phone. Or, if you want to manually upgrade your phone to the latest software by flashing the firmware images via fastboot.
Advertisement
In any of these cases, you can use the Payload Dumper tool. The tool is basically a Python script/program created by developer ius that allows users to easily extract the Android OTA Payload.bin file on any Windows, macOS, or Linux PC, and even on an Android device (since Android uses the Linux kernel).
It could be used for OTA packages for various A/B devices including but not limited to OnePlus 8 (Pro), OnePlus 7/7T (Pro), OnePlus 6/6T, Xiaomi Mi A3, Xiaomi Mi A2/A2 Lite, Xiaomi Mi A1, and more. Basically any Android device that supports seamless updates.
How to Extract Android OTA Payload.bin File
The easiest way to make use of the Payload Dumper Tool to extract the Payload.bin is on a computer. However, some users might want to do it on-the-go, skipping the need for a PC completely. If so, then there’s a way to use the Payload Dumper tool on an Android device as well.
While the latter does require a bit of extra effort than the former, but it’s still quite easy. So, depending on how you want to do it, follow the instructions below.
1. On a Computer
Step 1: Payload Dumper Tool is a Python program, so the first step is to download and install Python on your system. The tool requires Python 3 or above, which can be downloaded from the official page.
When installing Python, make sure that it’s added to the PATH on your PC. For Windows PC, this could be easily done by checking the ‘Add Python to PATH’ option within the installer. For Linux/macOS, you can use the instructions provided on this page.
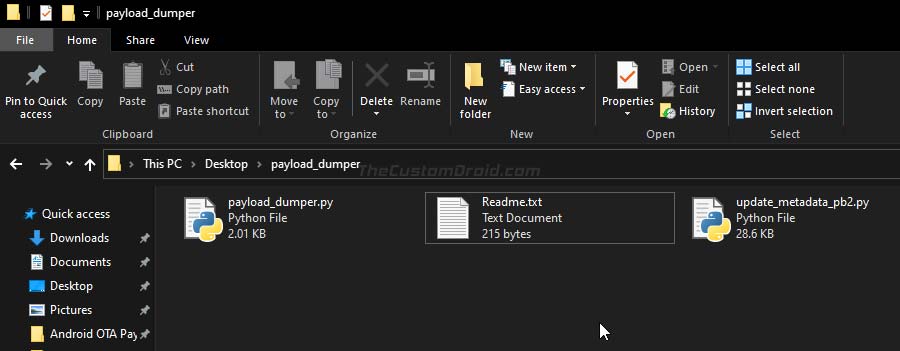
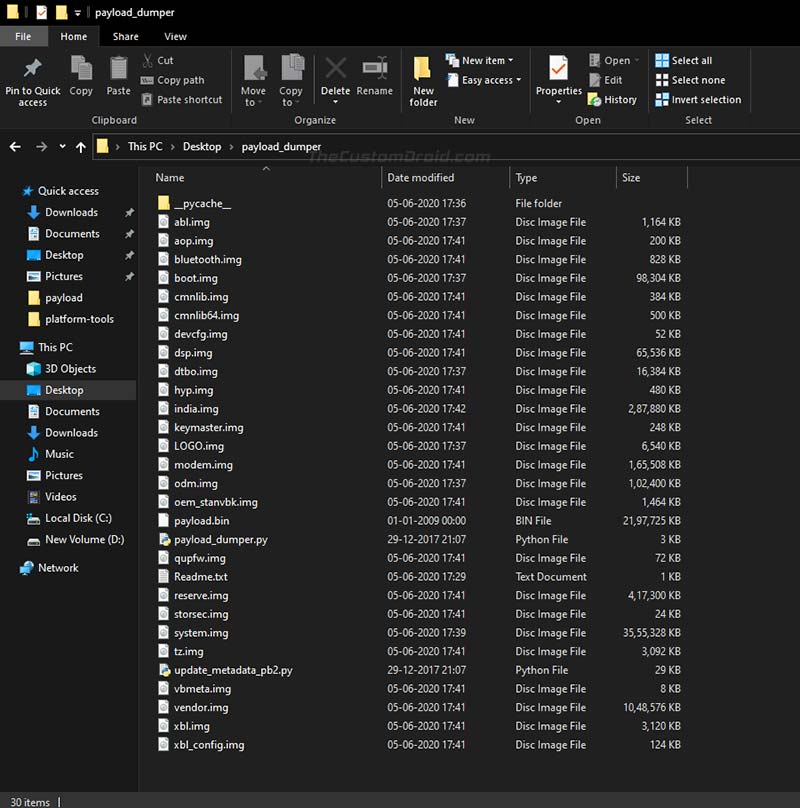
Step 2: Download the latest version of the Payload Dumper Tool on your PC from this link and extract its contents to a suitable location. Upon extracting you should have a new folder named “payload_dumper”.
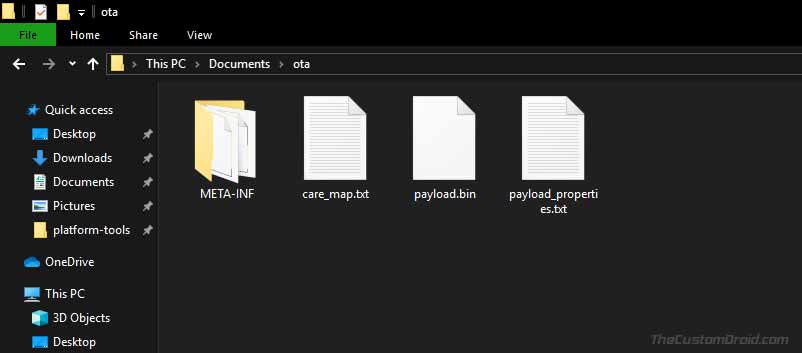
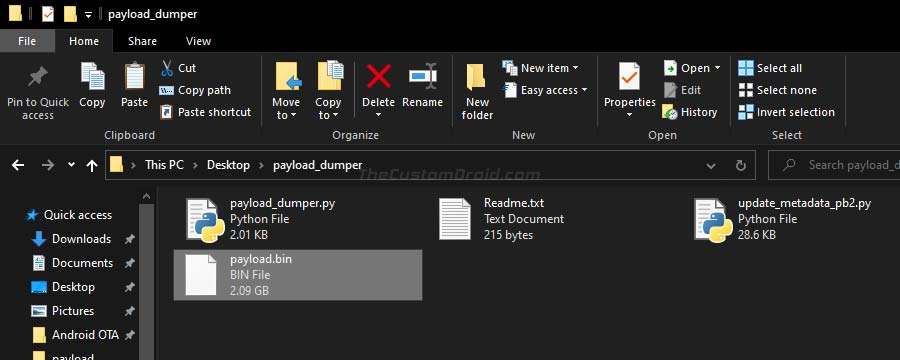
Step 3: Now, download the full OTA ZIP package for your Android device. Extract the downloaded ZIP file to your PC using an archive tool (WinRAR, 7Zip, etc). The extracted contents will include the “Payload.bin” file, which is what you’d need to extract. Copy the Payload.bin file inside the “payload_dumper” folder.
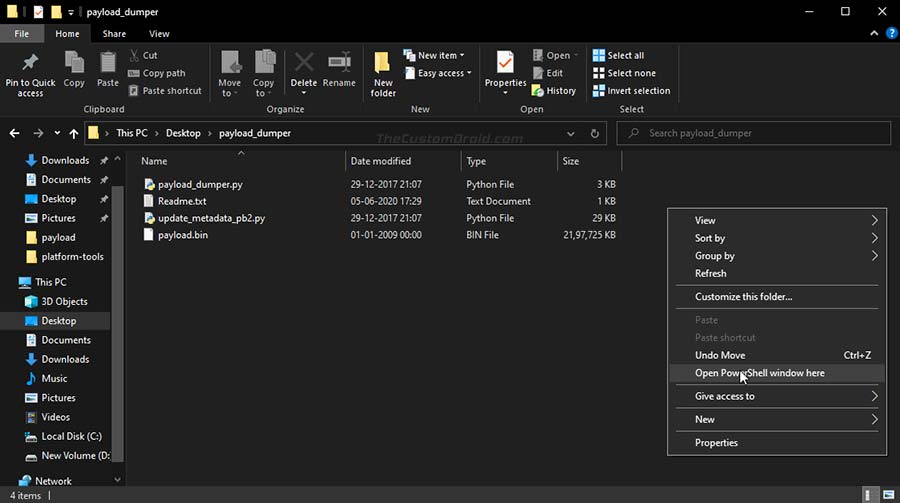
Step 4: Open the command-line window on your PC in the ‘payload_dumper’ folder, where the tool and the payload.bin files are present. To do this
- On a Windows PC: Hold the SHIFT key and right-click on an empty space inside the folder, then select the ‘Open PowerShell window here’ option.
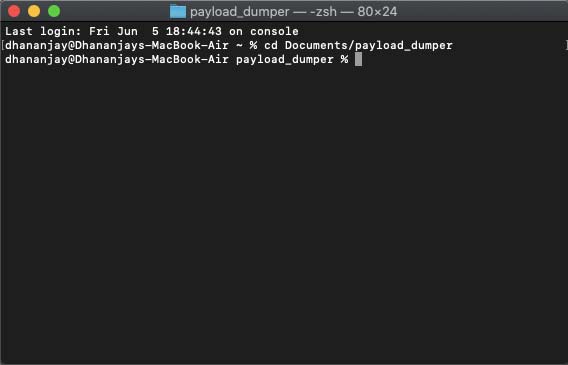
- On a macOS/Linux PC: Launch the Terminal and change its directory to the ‘payload_dumper’ folder using the ‘cd’ command. For example: If the ‘payload_dumper’ folder is located in the ‘Documents’ directory, then the command should look like:
cd Documents/payload_dumper
Step 5: In order to use the tool on your PC, you must first install ‘Protobuf‘ (Google’s data interchange format) which is basically a dependency. To install it, enter the following command.
- On Windows (in PowerShell):
python -m pip install protobuf

- On Linux/macOS (in Terminal):
python3 -m pip install protobuf
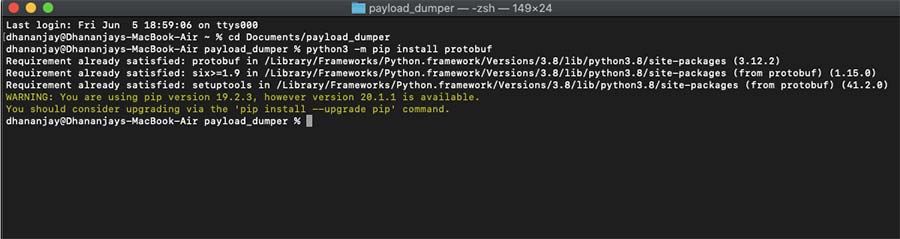
As soon as you enter the command, Protobuf will be downloaded and installed on your PC. If it’s already installed on your system, you will be notified of the same.
Advertisement
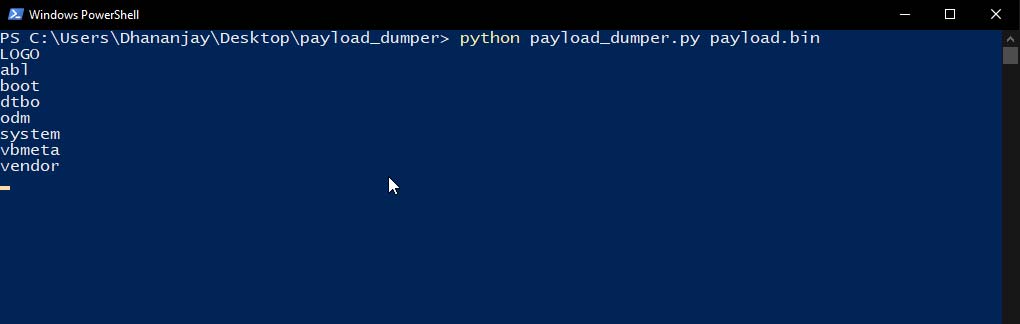
Step 6: Now to finally extract the Android OTA payload.bin file, enter the following command.
- On Windows (in PowerShell):
python payload_dumper.py payload.bin
- On Linux/macOS (in Terminal):
python3 payload_dumper.py payload.bin
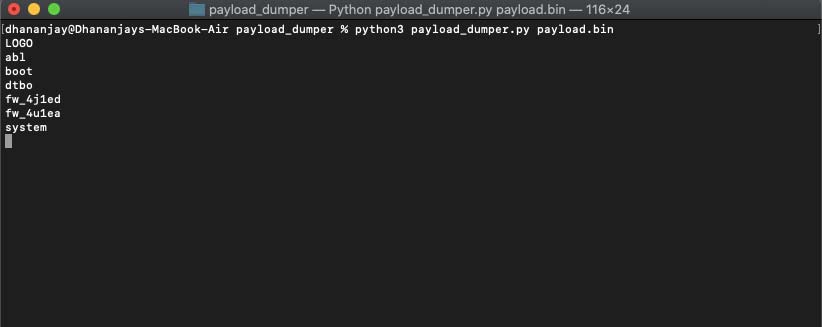
The tool will now start extracting the individual partition images from the Payload.bin file. Once finished, you will find the extracted files inside the same “payload_dumper” folder.
2. On an Android Device
Since Android uses the Linux kernel and so, you can use the Payload Dumper Tool to extract the Payload.bin on your Android device itself. The process is very similar to the one that’s followed on a PC but requires a few additional steps.
Now follow the instructions below.
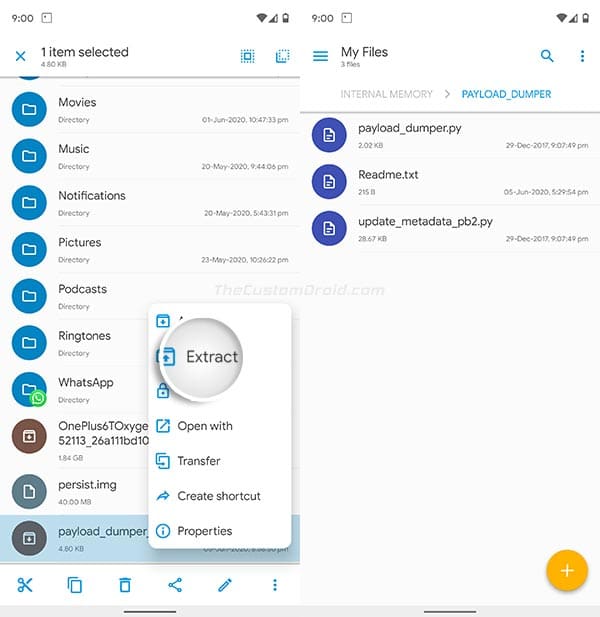
Step 1: Download the Payload Dumper Tool from here. Once downloaded, extract the contents of the ‘payload_dumper_tool_by_ius.zip’ file to the root of your phone’s internal storage. You could extract it anywhere, however, the root directory is more convenient.
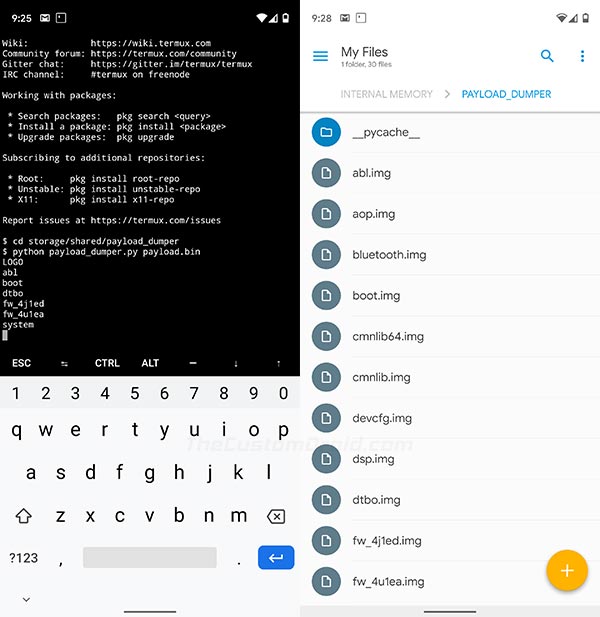
The extracted ‘payload_dumper’ folder will contain the tool’s Python scripts as shown in the figure below.
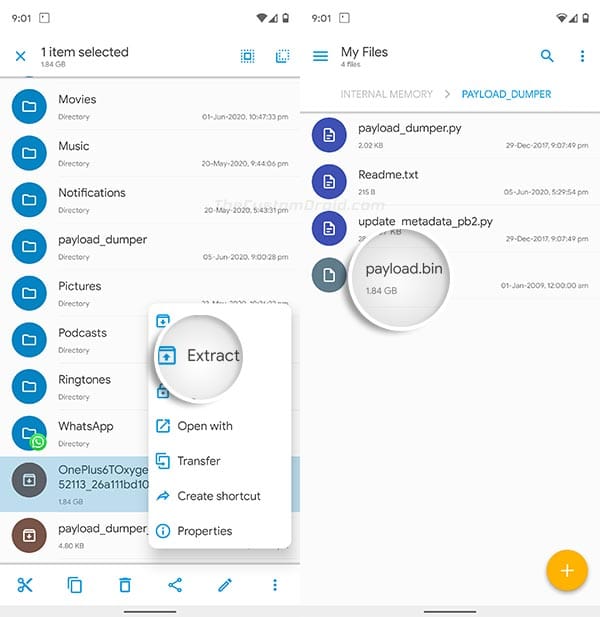
Step 2: Now, download the OTA package from which you want to extract the firmware images. Once downloaded, extract the OTA package on your device to get the ‘payload.bin’ file. Then copy the extracted ‘payload.bin’ file inside the ‘payload_dumper’ folder that you extracted during step #1.
Advertisement
Step 3: Download and install the ‘Termux‘ app (a Terminal Emulator) on your Android device. Once installed, launch the app from your phone’s app drawer.
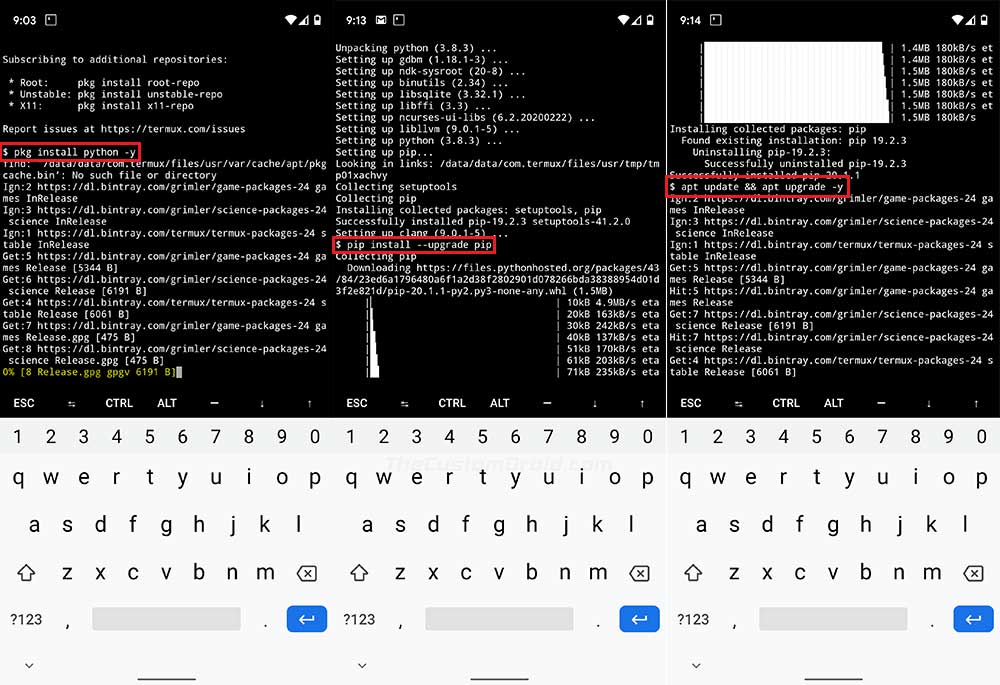
Step 4: To use the tool, you must first install and set up Python on your Android device. To do this, enter the following commands in Termux one after the other:
pkg install python -y
pip install --upgrade pip
pip install protobuf
apt update && apt upgrade -y
These commands will basically configure Python, upgrade its native package manager (pip), install the required ‘Protobuf’ dependency, and also upgrade all other program packages on your Android device.
Step 5: Now, use the following command to grant storage permissions to ‘Termux’:
termux-setup-storage
As soon as you enter the command, you’ll see a prompt to “Allow Termux to access photos, media and files on your device”. Simply press “Allow” to grant the permissions.

Advertisement
At this point, you have your Android device completely ready to use Python programs (The Payload Dumper Tool in this case).
Step 6: Change Termux’s directory to the “payload_dumper” folder using the following command, provided that you have the folder placed on the root of your phone’s internal storage.
cd storage/shared/payload_dumper
Step 7: Finally, enter the following command in Termux to extract the Android OTA Payload.bin bile on your Android device:
python payload_dumper.py payload.bin
Once finished, the extracted firmware images will be placed inside the same ‘payload_dumper’ tool.
You can now copy these files and flash them manually on your device using fastboot. You can even grab the stock boot image and patch it to install Magisk and root your Android device.
So there you go! You have just learned how to extract an Android OTA payload.bin file on a PC or on an Android device. If you have any questions or feel stuck anywhere while performing the instructions in this guide, then please do let us know.
Source: Github | Credits: Developer ius
Comments 15 Comments
Comments are moderated, and published only if they are relevant to the topic and add value in a constructive way. If you disagree with something, please be polite and respectful. We suggest you read our comment policy before commenting.
Hello all,
a qustion. I have bricked Oculus 2, my onw, Meta did issue a faulty update in December 2024 and did mullfuncioned thousands of Oculus 2 over the World.
But Oculus 2 can connect in EDL mode.
Wha I have from one webpage is payload.bin update ROM file.
With this procedure to dump the payload.bin file info the partitions, would it be possible than to flash such decrypted partitiones back to the Oculus 2 via EDL mode ? For example using the QFIL, but I think I will be missing the rawprogram.xml file that is needed to address concrete memory blocks ?
Thank you for answerl and help.
regards
Otto
Hi Otto,
Thanks for providing the background info about your situation with the Oculus 2. I did try digging into the issue and was only able to find the mirrors for OTA packages with a few references to EDL mode.
However, no reports of any successful EDL flashes, like you said, because of the missing memory block programmer file. And flashing the partition image files to the corresponding partition blocks via fastboot wouldn’t be possible either.
The only resort I see, is flashing the OTA via USB update mode. Have you tried that?
Hi,
I’m currently facing an error as per below. Kindly need your advise.
PS C:\Users\User\Desktop\payload_dumper> python payload_dumper.py payload.binTraceback (most recent call last):
File "C:\Users\User\Desktop\payload_dumper\payload_dumper.py", line 12, in
import update_metadata_pb2 as um
File "C:\Users\User\Desktop\payload_dumper\update_metadata_pb2.py", line 33, in
_descriptor.EnumValueDescriptor(
File "C:\Users\User\AppData\Local\Programs\Python\Python311\Lib\site-packages\google\protobuf\descriptor.py", line 796, in __new__
_message.Message._CheckCalledFromGeneratedFile()
TypeError: Descriptors cannot not be created directly.
If this call came from a _pb2.py file, your generated code is out of date and must be regenerated with protoc >= 3.19.0.
If you cannot immediately regenerate your protos, some other possible workarounds are:
1. Downgrade the protobuf package to 3.20.x or lower.
2. Set PROTOCOL_BUFFERS_PYTHON_IMPLEMENTATION=python (but this will use pure-Python parsing and will be much slower).
More information: https://developers.google.com/protocol-buffers/docs/news/2022-05-06#python-updates
PS C:\Users\User\Desktop\payload_dumper>
Hi Rafiq, it seems like the Payload Dumper script isn’t compatible with the newer versions of Protobuf. The error message itself gives you a fix, which is to downgrade Protobuf to the said version.
I personally wouldn’t bother about it and would suggest you to use Payload Dumper Go. It’s based on the Python version of the script, is faster, and doesn’t rely on any dependencies. You can get the pre-compiled binary for your OS from the GitHub project release page.
For more information about the usage, take a look at the original XDA thread.
In the meanwhile, I will try and update this guide with the new instructions that use the Payload Dumper Go tool.
Not working in Android device:
~/…/music/payload_dumper $ python payload_dumper.py payload.bin
Traceback (most recent call last):
File “/storage/emulated/0/Music/payload_dumper/payload_dumper.py”, line 86, in
assert op.type in (op.REPLACE, op.REPLACE_BZ, op.REPLACE_XZ), \
^^^^^^^^^^^^^^^^^^^^^^^^^^^^^^^^^^^^^^^^^^^^^^^^^^^^^
AssertionError: unsupported op
Thomas, give a try to Payload Dumper Go. It doesn’t rely on any dependencies and supports incredibly fast decompression rate.
Hi, I’m on Windows 11 Pro.
After running python3 payload_dumper.py payload.bin, I’m getting the below error. Please let me know how to fix it.
Traceback (most recent call last):File "C:\Users\user\Downloads\payload_dumper-master\payload_dumper.py", line 7, in
import bsdiff4
ModuleNotFoundError: No module named 'bsdiff4'
Rahul, please try and use Payload Dumper Go. It’s a modern-day alternative to the current script that doesn’t involve the hassle of setting up Python or dealing with multiple installations of it, and is better-performing by a large margin.
Thanks for a very good blog Dhananjay! I am newbie to Linux but got it working on first go!
Credited your article here
https://android.stackexchange.com/questions/232257/how-do-you-root-a-device-with-magisk-when-it-doesnt-have-a-custom-recovery
I am glad it was helpful, Shyam. And thank you for the credit, appreciate it.
And must say, a really comprehensive answer there on Stack Exchange. Should help a lot of other users there.
Hope to see you around here. If there’s anything you want me to write a tutorial on, I’d be more than happy to do that.
Thanks very much for your help. It’s extremely helpful.
python paylod_dumper.py payload.bin didn’t work
py payload_dumper.py payload.bin worked.
Note the spelling error in the original command. The first payload in “python paylod_dumper.py payload.bin” is missing an “a”.
Thanks for pointing that out. I will make the required changes.
Yes, the command could be a bit different depending on how Python is configured on the machine. I will add the command (that worked for you) as an alternative to try if the primary fails.
Does not work on windows 10.
OK, somehow got it to work by downloading the 64 bit web installer instead the default selection of 32-bit Python offline installer and using the command python without number 3.
Hi. I am glad you figured it out by yourself.
On my 64-bit PC, I had to use the ‘python3’ syntax specifically because there was a prior installation of another Python version which was configured to use just ‘python’ without the ‘3’.
Thanks for bringing it up, other readers will benefit from this info.