How to Customize Android Oreo Navigation Bar without root
Here's how you can easily customize Android Oreo Navigation Bar on your device without needing root.

On this page
Here’s how you can easily customize Android Oreo Navigation Bar on your device without needing root.
Android Oreo has just launched, and with it come a set of various new features, optimisations and new looks. You can install Android Oreo 8.0 on Nexus & Pixel devices right now. But today, I’ll be introducing navbar customization for Android oreo, without root.
And also take a look at, Android Oreo Features – 10 Awesome New Features & Changes.
Customize Android Oreo Navigation Bar without root
So, here I will be customising Android Oreo Navigation bar, without root. For this method, we recommend you to install Custom Navigation Bar Tuner from the Google Play Store, as it provides a nice GUI frontend for the navigation bar customization tuner. This will let you customize almost everything about the navigation bar including its looks, functionality as well as its buttons.
1. Download Custom Navigation Bar App
For customising navigation bar in our Android phones, we need to take help of an app ‘Custom Navigation Bar’. It is a free app which available on Google play store. You can easily Download Custom Navigation Bar from play store using this link. If you want to extend the features then you can go with the premium app which removes ads and gives access to extra themes.
2. Enable USB Debugging and Setup ADB connection
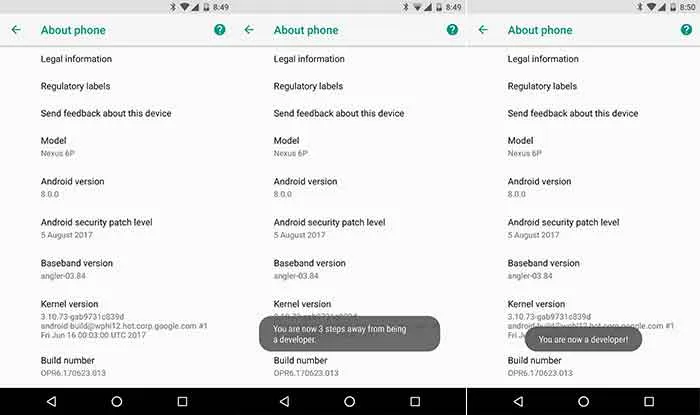
Installing ADB and setting up your device for it is easy. We have a simple tutorial for that, just click the link below. If you have already done that and know how to use ADB, you may skip this step.
— How to Install ADB on Windows, Linux, and macOS
3. Connect Your Android to Your Computer
In this step, you will need to connect Your Android phone to your computer. For this, Plug your USB cable into your PC and then connect it to your Android device. Then, a pop-up will appear on your Android screen for accessing your device files. Click the ‘Yes’ button to proceed further.
4. Configuring Custom Navigation Bar App
Now, we have done all the major steps for customising navigation bar. Let’s continue further.
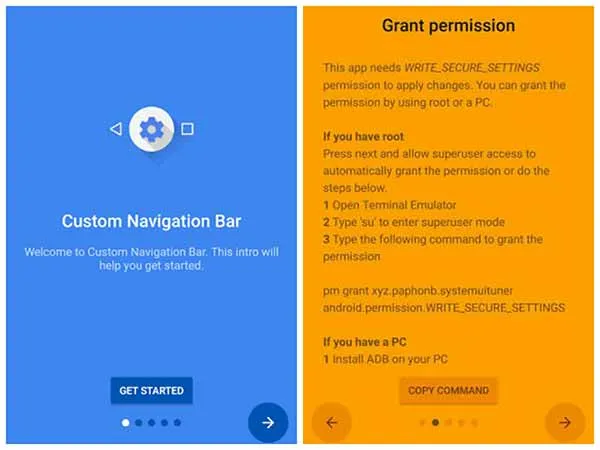
- Firstly, open ‘Custom Navigation Bar’ app on your Android phone and tap on the “Get Started” button. In the next screen, you require giving the requisite access to the app.
-
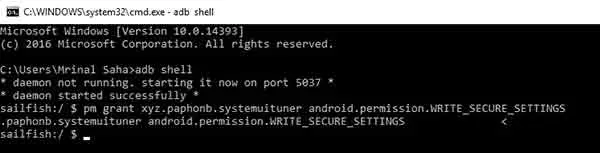
Once your device is connected with USB Debugging Mode, launch terminal and paste the following codes in it.
adb shell
-
Now, grant permission to the app to customize Navigation Bar. To do that, just copy & paste the below codes in the terminal.
pm grant xyz.paphonb.systemuituner android.permission.WRITE_SECURE_SETTINGS
-
Now hit enter.
- In the next screen, the app will run a compatibility test, and it goes well, you will see the option to customize your navigation bar.
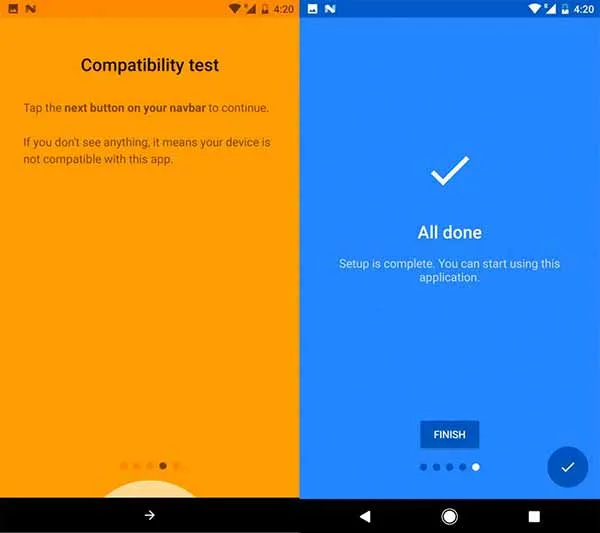
- Done. Now, you can customize Android Oreo Navigation bar according to your wish.just Go to the Navigation bar > Settings > scroll down till you see Extra Left button and Extra right button option > and select the type of button you want to add.
Now, everything is ready. We have done all the steps which are required to customize Android Oreo Navigation bar. Just go ahead and start customising your phone’s Navigation bar.
More for you:
- Install Android O Emoji on Any Android 5.0+ Devices
- How to Install AOSP 8.0 Oreo ROM for Xiaomi Mi 3 and Mi 4
- Install Pixel Launcher 2.1 on Any Rootless Device (5.0 or above)
So, above was the tutorial about how to Customize Android Oreo Navigation Bar. Using this quick tutorial you can also customize Navigation bar of your Android screen. You need to follow the above steps. If you have any problem regarding this article then please feel free to share with us we will try to fix it soon.
Comments
Comments are moderated, and published only if they are relevant to the topic and add value in a constructive way. If you disagree with something, please be polite and respectful. We suggest you read our comment policy before commenting.