How to Enable Floating Bubble in Google Phone
Check out this extensive guide to enable Floating Bubble in Google Phone app right now. The tutorial is meant for both - rooted and non-rooted users.

On this page
Check out this extensive guide to enable Floating Bubble in Google Phone app right now. The tutorial is meant for both - rooted and non-rooted users.
The in-call floating bubble is currently being tested by Google for the “Google Phone” app. It has already been a month since the feature was first discovered, but it has still not arrived officially for anyone. It is an exciting new and a functional addition to the Dialer and it seems while the feature is already present in every latest Google Phone update, it has deliberately been turned off. Reasons? Yet unknown, but we think it’s still being tested and is not yet completely bug-free. But then, only Google knows the real reason.
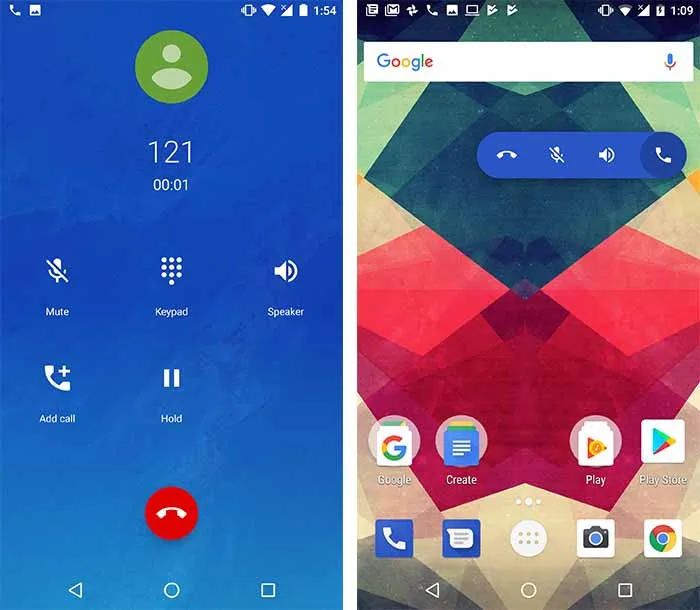
The feature is often seen as a part of third-party dialer apps and has definitely proved its worth with them. And now, having it enabled in the default Dialer app by Google, just makes calling much more functional for devices running AOSP firmware. The floating bubble appears when you’re in a call and exit the dialer to access something else in the phone. You can then move the bubble anywhere on the screen. It enables you to manage the basic dialer functionality by allowing to mute, enable loudspeaker, and end a call directly from the bubble.
Read: How to Install Custom Themes on Android Oreo without Root
How to Enable Floating Bubble in Google Phone Dialer
We have found a way to enable this feature for an installed version of Google Phone, but the method will only work for users that have a rooted phone. For those of you, who are not rooted, there’s a previous version of Google Phone that has been patched using the same method. In any scenario, you will easily be able to enable Floating Bubble in Google Phone easily.
On Rooted Phones
As we earlier told, the method is full proof and is already working on Google Phone version 12.0.167196395. The method follows editing a simple boolean value in the app’s data to enable Floating Bubble feature.
- To begin with, download the latest Google’s Phone app. You can either get it on Google Play or manually install the APK from APKMirror.
- Once you have it installed on your device, download a root file explorer. We will be using Solid Explorer File Manager to demonstrate.
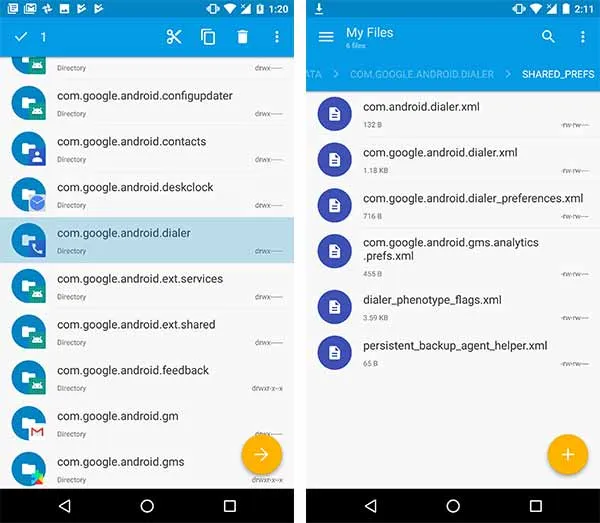
- Open the Solid Explorer app and navigate to /data/data/com.google.android.dialer/shared_prefs.
- You might need to grant the app root permissions if you haven’t done it till now.
- Now tap on the “dialer_phenotype_flags.xml” file to open it in the default editor.
- Search the file for “G_enable_return_to_call_bubble” boolean value.
- By default, the value should be set to “False”. All you have to do is, remove that value and enter “true” in its place.
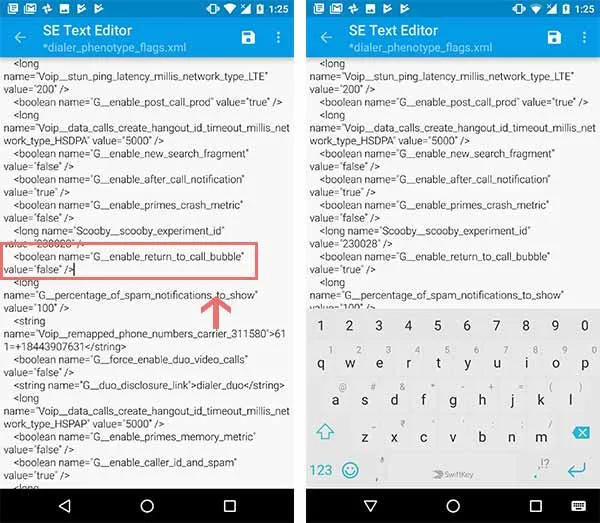
- Finally, save the file and exit the file manager app.
Now, reboot your device. Make a call and just press the home button to enable floating bubble on your screen.
Read: Enable Adaptive Icons on Android Running 5.0 or Up
On Non-Rooted Phones
Now, this procedure will work for both rooted and non-rooted devices. But there’s a fallback. The patched version of Google Phone app currently available is version 11.0.164102751, which is not the lastest one. It is completely understandable that many people will be concerned about the integrity of the patched app. We can assure that it has been sourced from XDA forums (Check the source link at the bottom of this post) and is already being used by many. So, all you will need to do to enable Floating Bubble is to install this APK manually and you’ll be good to go.
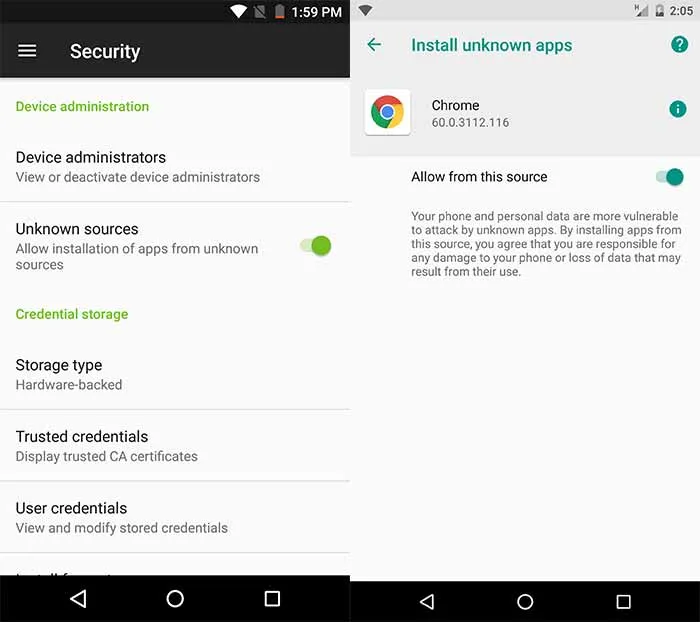
So, all you will need to do to enable Floating Bubble is to install this APK manually and you’ll be good to go. Before you move ahead, make sure that you have enabled “Unknown sources” option enabled in Settings > Security (For Nougat and below) or “Install unknown apps” in Settings > Apps & notifications > Special app access > Install unknown apps (For Oreo).
Also, make sure that you remove any previous version of Google Phone installed on your device. Since the package name is same, the file will clash and would not install in this scenario.
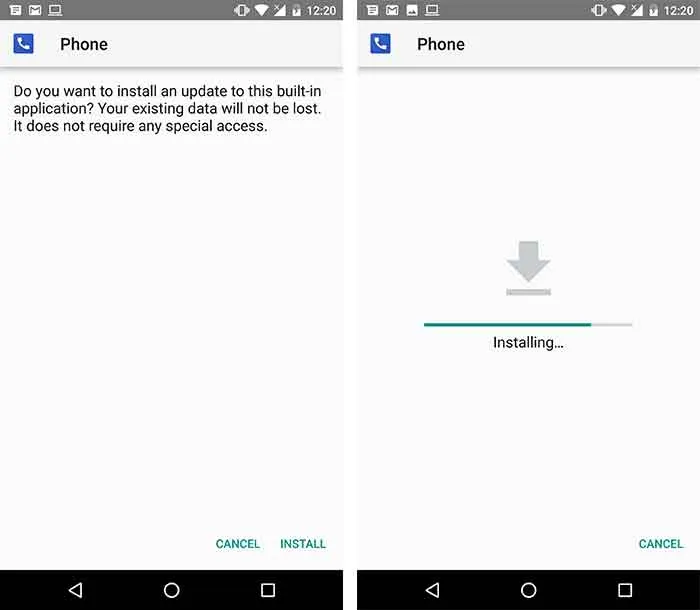
Once done, download the patched Google Phone APK from here. Using a file manager, browse the storage and tap on the “Google Phone 11.0.164102751 [Bubble] [Patched].apk” to install it. When installed, you can try making a call and the floating bubble will appear as soon as you leave the dialer app.
Okay, so you have succeeded to enable Floating Bubble feature on Google’s Phone app. Enjoy it!
Troubleshooting
If after using either of the methods to enable floating bubble in Google Phone doesn’t work, then make sure that you have granted the following two special permissions to the app.
- Display over other apps
- Modify system settings
These could be easily accessed and enabled from - Oreo (Settings > Apps & notification > Apps info > Phone) and Nougat (Settings > Apps > Phone).
It is also important that you set Google Phone as the default dialer for your device.
Check out more tutorials:
- Enable Notification Importance Controls on Android 8.0
- How to Install Sony Apps on Any Android Device
- How to Install Blob Emojis in WhatsApp and Telegram
- How to Customize Android Oreo NavBar without Root
There you have it! You have been successful to enable Floating Bubble feature and can use it for better user experience. If the process still doesn’t work for you for some reason, ping us via the comments and we will try and help you.
Comments
Comments are moderated, and published only if they are relevant to the topic and add value in a constructive way. If you disagree with something, please be polite and respectful. We suggest you read our comment policy before commenting.