Install TWRP Recovery and Root Galaxy Tab S4 (SM-T830/T835)
In this tutorial, I will show you how to install TWRP recovery and root Galaxy Tab S4 running Android 10, Pie or Oreo, easily.
On this page
In this tutorial, I will show you how to install TWRP recovery and root Galaxy Tab S4 running Android 10, Pie or Oreo, easily. This guide supports both the SM-T830 (WiFi) and SM-T835 (LTE) variants.
In 2018, we barely saw any Android-based tablets being released, except Samsung’s own Galaxy Tab S4. The 10.5-inches tablet aims at achieving a near-desktop experience with a magnetic keyboard, an S-Pen, and improved multi-tasking through Samsung DeX. The Tab S4 is powered by the Qualcomm Snapdragon 835 SoC and comes with Android 8.1 Oreo out-of-the-box.
Despite all the powerful hardware and software with extended features, users might often want to root Samsung Galaxy Tab S4. Well, one might simply want to use root-enabled apps or install mods for additional features. Whatever the reason might be, you can now easily install TWRP recovery and root Galaxy Tab S4 using Magisk 20.0.
Thanks to XDA Recognized Contributor mentalmuso, we now have official TWRP recovery for the Galaxy Tab S4. According to the developer, the latest TWRP 3.4 recovery provided by him is completely stable for usage and supports everything including OTG and MTP. And as mentioned earlier, both the WiFi (SM-T830) and LTE (SM-T835) variants of the Tab S4 are supported.
Our appreciations also go to XDA member ianmacd who helped the developers with continuous testing that resulted in a working TWRP, as well as root.
Now, before you follow the instructions, take a look at the information provided right below.
Important Thing to Note
- Flashing TWRP and rooting your tablet will trip the KNOX counter and thus, will break the official warranty. This cannot be undone.
Prerequisites
- Although installing TWRP recovery will not wipe anything off your tablet, but rooting it will require a complete wipe of all the data. So, make sure that you take a complete backup of all the data beforehand. You can also follow our detailed tutorial on how to backup Android devices completely.
- Install latest Samsung USB drivers on the PC.
- Download Odin 3.13.1 on the PC and extract the zip to an easily accessible location.
- It is strongly advised to use a USB 2.0 port of your PC for the flashing process.
- Enable ‘OEM unlock’ option in Settings -> Developer options. If the OEM unlock toggle is missing, then you can also try fixing it using our tutorial.
Make sure to fulfill all the requirements stated above before you head over to the instructions to install TWRP recovery and root Galaxy Tab S4.
Downloads
Download all the files to the PC before you follow the instructions. The files provided below are the latest as of 29 October 2019 and support both Android Pie and Oreo firmware. Please visit the original XDA threads (1 & 2) and make sure that you download and use the latest ones for the procedure.
TWRP Recovery Image
-
Unofficial (Recommended):
- For Android 10: TWRP_T83x_3.4.0-6.tar
- For Android 9 Pie: TWRP_T830_3.3.1-4.tar
-
Official: twrp-3.5.0_9-0-gts4lwifi.img.tar
WETA Kernel
Note: Flashing the WETA kernel is mandatory on Android Pie, but not required for Android 10.
- For Android 10: WETA_Kernel_T83x-TF5.img
- For Android 9 Pie: WETA_Kernel_T83x_5.0.zip
Forced-encryption Disabler
- For Android 10 & Pie: Disable_Dm-Verity_ForceEncrypt_05.21.2019.zip
- For Android Oreo: TabS4_oreo_forced_encryption_disabler.zip
Latest Magisk flashable ZIP
Install TWRP Recovery on Galaxy Tab S4
The first step in order to root Galaxy Tab S4 is to install TWRP recovery on it. Further, to ensure that DM-Verity is not triggered and your Tab S4 doesn’t enter a bootloop it is crucial to boot your tablet directly into TWRP recovery mode after the flashing process finishes. The process may sound a bit confusing, but it’s quite easy instead. Simply follow the steps laid below to install TWRP recovery on Galaxy Tab S4.
- Boot your Galaxy Tab S4 into Download Mode.
- To do so, power off the tablet first. Then hold the Volume Down and Power buttons until the tab vibrates. Then quickly release the Volume Down button and hold the Volume Up + Power button. Your tablet should now enter the stock recovery mode. To boot into Download Mode, select ‘Reboot to bootloader’.
- Connect the tablet to the PC using the USB cable.
- Launch Odin tool by double-clicking on the ‘Odin3 3.13.1.exe’ file.
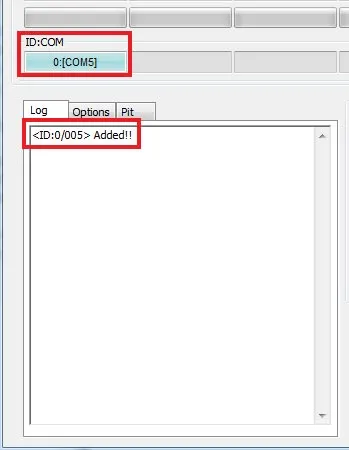
- The ID:COM port on the Odin window should light up blue.
- In the Odin tool window, uncheck ‘Auto Reboot’ in the Options menu.
- Click on the ‘AP’ button and select the TWRP recovery image file (e.g. TWRP_T830_3.3.1-4.tar).
- Finally, click on the ‘Start’ button to flash the file and install TWRP recovery on Galaxy Tab S4.
Now here goes the important bit: After the flashing is complete, it is necessary to boot into TWRP mode directly. Hold the Volume Down and Power buttons until the phone powers off. As soon as it powers off, hold the Volume Up and Power buttons to enter TWRP recovery mode on your Galaxy Tab S4.
How to Root Galaxy Tab S4
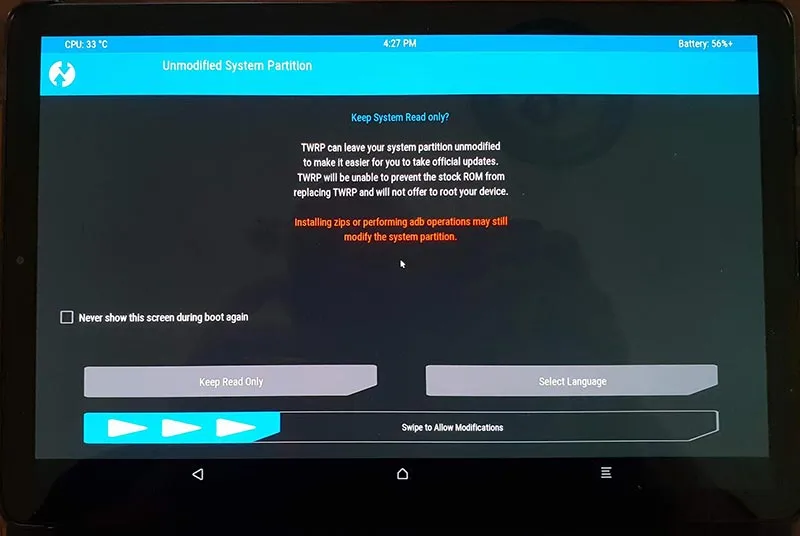
- Select ‘Keep Read Only’ when TWRP prompts to keep the system read-only.
- Go to ‘Wipe’ -> ‘Format Data’ in TWRP and enter ‘yes’ in the provided field. This will wipe the tablet completely, including internal storage. It is important to perform this step in order to disable encryption completely and have access to the storage in TWRP recovery.
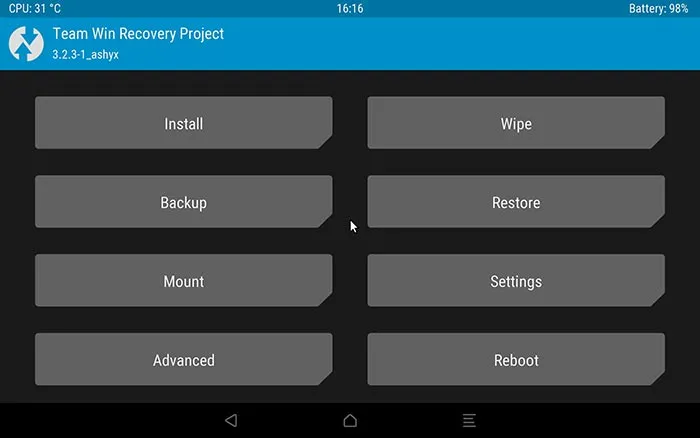
- Once formatted, reboot your Tab S4 into TWRP recovery mode. To do so, go to the “Reboot” menu in TWRP and tap on “Recovery”.
- Connect the tablet to the PC and turn on the “Enable MTP” button in the TWRP’s “Mount” menu.
- Transfer the WETA kernel, Forced-encryption Disabler, Magisk Flashable ZIP files to the tablet’s internal storage or microSD card.
- Once the files have been transferred go back to the TWRP main screen and tap on the ‘Install’ button.
- Select the WETA kernel ZIP file (Optional for Android 10) and press the ‘Add more Zips’ button. Then select the ‘TabS4_oreo_forced_encryption_disabler.zip’ file (Android Oreo) or ‘Disable_Dm-Verity_ForceEncrypt_05.21.2019.zip’ file (Android 10 & Pie).
- Then tap on ‘Add more Zips’ again and select the ‘Magisk-v21.2.zip’ file.
- Once the files have been added to TWRP’s flashing queue, swipe the button on the bottom of the screen to flash the files and root Samsung Galaxy Tab S4.
After the flashing process finishes, you can boot your tablet back into the OS by pressing ‘Reboot System’. The first boot might take some time.
Your Galaxy Tab S4 should now be rooted with Magisk and you should see the Magisk Manager application among the installed apps in the app drawer. To verify if your tablet has been successfully rooted, launch the Magisk Manager app and check its status
Now that you have successfully rooted your tablet, you can install root-enabled apps, or install Magisk modules to add more features to the software. You can also install an audio mod and the infamous Xposed Framework.
So, this was our tutorial on how to root Galaxy Tab S4 and install TWRP recovery on it. We hope that it proved useful to you and was easy to follow. If you have any questions, please leave a comment below. We will try to help you to the best of our knowledge.
Comments
Comments are moderated, and published only if they are relevant to the topic and add value in a constructive way. If you disagree with something, please be polite and respectful. We suggest you read our comment policy before commenting.