Unlock Bootloader on Nothing Phone 1 and Relock it — A Beginner's Guide
A step-by-step guide that will take you through the complete process of unlocking the bootloader on Nothing Phone 1. Also learn how to relock the bootloader.

On this page
An unlocked bootloader is required if you wish to root your phone, flash custom ROMs on it, or make any other modifications to the installed firmware. In this tutorial, we will discuss how to unlock the bootloader on Nothing Phone 1 by using fastboot commands. Further, I will also show you how to relock the bootloader
Before we hit the instructions, let us start by taking a look at what a bootloader is, why it is locked by the manufacturer, and when would you need to unlock it.
Having a good understanding of these things and how they work is a good practice, especially if you’re just kicking off your journey into the Android modding/flashing scene.
What is Bootloader?
The bootloader of your Nothing Phone 1 is a piece of program that brings up the kernel and loads the Android operating system when you turn on the phone. It also determines if the phone should boot into the Android Recovery and Userspace Fastboot modes, which are loaded from a different partition than the main Android OS.
You can refer to the official documentation if you wish to learn more about the Android Bootloader and boot-process.
Like most other Android phones, the bootloader on the Nothing Phone 1 is locked to ensure that the phone only runs the manufacturer-authorized firmware. It does so by:
- Verifying the integrity of
/bootand/recoverypartitions during the boot-process. - And preventing users from flashing bootloader and other device partitions.
Why Unlock Bootloader?
This brings us down to the question — Why and when would you need to unlock the bootloader?
Things such as rooting, flashing custom ROMs/kernels, installing a custom recovery, etc, involve flashing different partitions such as /boot, /recovery, /system, /vendor, among others. And as I mentioned earlier, a locked bootloader does not allow flashing the device partitions at all.
If you’re interested in extensively modifying the stock firmware by rooting it or flashing a totally different firmware (a custom ROM) altogether, then you will need to unlock the bootloader of your Nothing Phone 1.
Important Information
With bootloader unlocking, there are a few important things you should take note of.
- Effect on warranty: The manufacturer hasn’t provided any public statement to confirm the effects of bootloader unlocking on the phone’s warranty.
So I reached out to Nothing through their customer support page for clarification and according to the support executive - “Unlocking Nothing Phone 1’s bootloader voids warranty”.
I was particularly disappointed considering that phones from several manufacturers such as OnePlus and even Google itself are covered under warranty even after the bootloader is unlocked.
That said, it’s still not a big deal because you can always restore the stock firmware and relock the phone’s bootloader if and when you want.
- SafetyNet/Play Integrity and Android apps: There are several apps that utilize the SafetyNet/Play Integrity APIs to check if the phone’s bootloader is unlocked and might stop working if it is. Banking apps such as Google Pay (Wallet) and games like Pokemon Go are common examples of such apps.
The only way to use such apps is by rooting your phone and then spoofing the bootloader state using Magisk Modules such as the Universal SafetyNet Fix, MagiskHide Props Config, etc.
- Unlocking bootloader wipes data: Unlocking the bootloader erases all the data stored on your Nothing Phone 1. This is standard procedure that is done automatically by the bootloader to prevent unauthorized data access.
I can understand that it could be annoying to back up and then restore the data after the bootloader is unlocked, but it is a good practice from a security viewpoint.
Before You Begin
Here are a few things that you should do before you start with the instructions.
Backup your data:
As I mentioned earlier, unlocking the bootloader completely wipes off all the data stored on your phone. This includes the contacts, messages, call logs, installed apps, and any data stored locally on the phone’s internal storage (like documents, music, videos, photos, etc).
So, make sure that you take a full backup of all your important data and store it safely on your computer. If you need guidance, refer to our Android Backup Guide.
Charge your phone:
If it’s your first time unlocking the bootloader on an Android device, I suggest you take all your time to fully read and understand the instructions.
Having a sufficient battery charge in your Nothing Phone 1 will ensure that it doesn’t power off while you’re following the instructions and performing them. I suggest charging your phone to a minimum of 40-50% battery level.
How to Unlock the Bootloader on Nothing Phone 1
Nothing Phone 1 employs the standard method of unlocking the bootloader using fastboot commands, similar to what we follow for Google Pixel and OnePlus phones.
Requirements:
The only things you will need to follow the instructions are:
- Your Nothing Phone 1
- A compatible USB cable
- A computer with Windows, macOS, or Linux operating system
The method is quite easy and shouldn’t take much of your time. I have broken down the instructions into multiple steps so that you can have a clear understanding of the process.
Step 1: Set up Android Platform-Tools
We are going to use the fastboot command-line tool to unlock the bootloader. The tool itself is a part of the Android SDK Platform-Tools package, along with some other useful tools such as adb.
So the first step is to download and set up the Android Platform-Tools on your computer.
Note:
While you could use one-click installers like Minimal ADB and Fastboot, I recommend doing it manually as shown here. This is because one-click installers often include outdated platform-tools, which may cause incompatibility issues and unusual errors during usage.
So, download the latest Android SDK Platform-Tools package according to your computer’s operating system using the links below.
The downloaded file will be a compressed archive with .zip file format. You will need to extract the archive to get the “platform-tools” folder.
To do this:
- On Windows: Right-click on the file (
platform-tools_rXX.X.X-windows.zip) and select “Extract all” from the contextual menu. - On macOS/Linux: Double-click on the file (
platform-tools_rXX.X.X-darwin.zipfor macOS andplatform-tools_rXX.X.X-linux.zipfor Linux) to extract the contents using the built-in archive utility.
The extracted folder will contain the binary files of all the Android SDK command-line tools including fastboot.
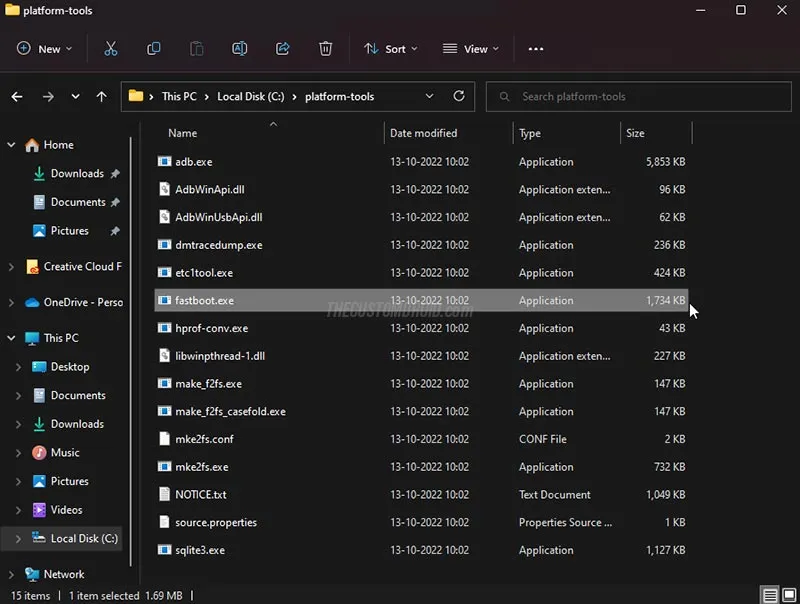
For easy access, move the “platform-tools” folder to the root directory of the C:\ drive of a Windows computer, or to the Desktop directory of a macOS or Linux computer.
Step 2: Launch Command Window inside Platform-Tools Folder
With the required tool installed, the next step is to launch the command-line window inside the platform-tools folder, which will be our Working Directory.
I have already covered a separate tutorial that will help you open the command window inside the platform-tools folder, which also explains why you need to do this in the first place.
You can follow that tutorial and come back here when done. Still, here’s a brief:
-
On Windows: Launch the Command Prompt/PowerShell and then enter the following command:
cd C:\platform-tools -
On macOS/Linux: Launch the Terminal app and then enter the following command:
cd Desktop/platform-tools
Basic command-line syntax:
When entering the commands, make sure to prepend them with a dot and backslash .\ in Windows PowerShell, and a dot and forward slash ./ in Mac/Linux Terminal.
Step 3: Enable OEM Unlocking on your Nothing Phone 1
The bootloader on the Nothing Phone 1 will only accept the unlock command if the OEM Unlocking switch is enabled. It is disabled out-of-the-box to prevent unauthorized unlocking of the bootloader.
The OEM unlocking option resides inside the hidden Developer Options to prevent accidental access. So, you will first have to enable the Developer Options menu to access it.
To enable OEM Unlocking on Nothing Phone 1:
- Open the Settings menu and scroll down to the very bottom.
- Tap “About phone” and then tap “Software info”.
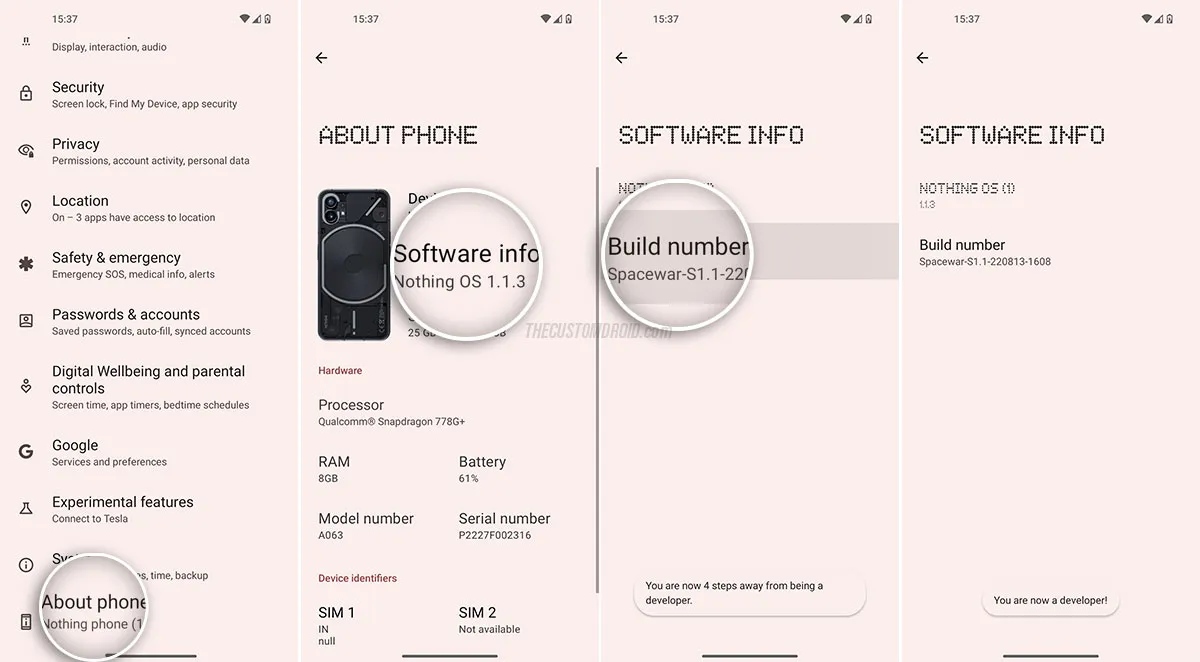
- Repeatedly tap the “Build number” five times until you see the “You’re now a developer!” message on the screen (Enter your phone’s lock screen PIN/Password/Pattern when prompted).
- Go back to Settings, tap “System” and then tap “Developer options”.
- Find “OEM unlocking” and press the toggle beside it (Again, enter your phone’s lock screen PIN/Password/Pattern when prompted).
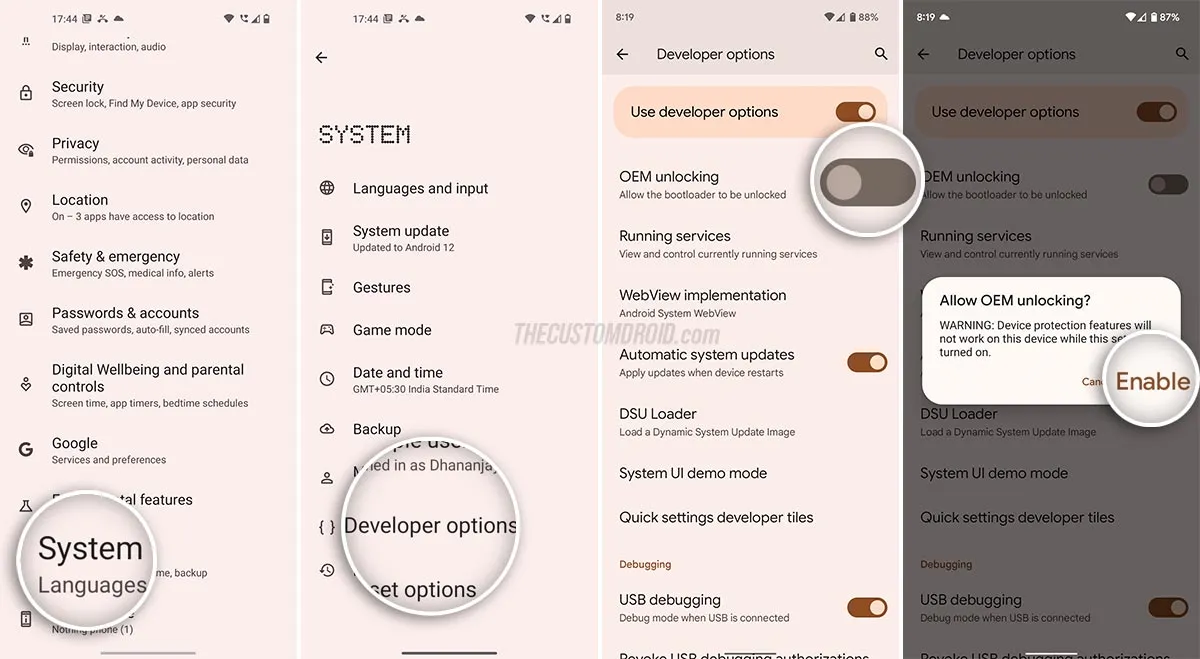
- Tap “Enable” when prompted to allow OEM Unlocking.
Note:
If the OEM unlock option is missing or greyed out, make sure that you have logged into your Google account and connected your phone to the internet via WiFi or mobile data. Then re-check if the option is visible and could be enabled.
With OEM Unlocking enabled on your Nothing Phone 1, the bootloader will accept and honor the unlock command.
Step 4: Boot into Fastboot Mode
The fastboot tool can only communicate with your phone while it’s booted into a special interface known as “Fastboot Mode”.
So the fourth step of the unlock press is to boot your Nothing Phone 1 into Fastboot Mode. You can do so by either pressing a combination of physical buttons (Volume Down + Power buttons) of your phone while it’s turned off. Or by enabling USB Debugging and then issuing the adb reboot bootloader command from your computer.
Both of these methods have been explained well in the tutorial linked below. Refer to it if you are in need of detailed instructions.
With your Nothing Phone 1 in Fastboot Mode, connect it to your computer using the USB-C cable.
Step 5: Connect Phone to PC and Verify the Fastboot Connection
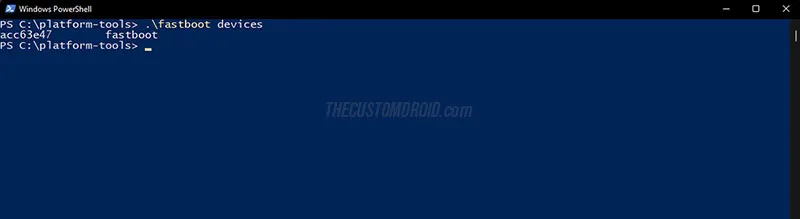
Now, you need to make sure that your computer can communicate with your phone over the fastboot protocol. To do this, open the command window and enter the following command:
fastboot devicesNote:
Again, the command should be preceded with a dot immediately followed by a forward slash (./) on a Linux/macOS computer, or a dot followed by a backslash (.\) on a Windows computer.
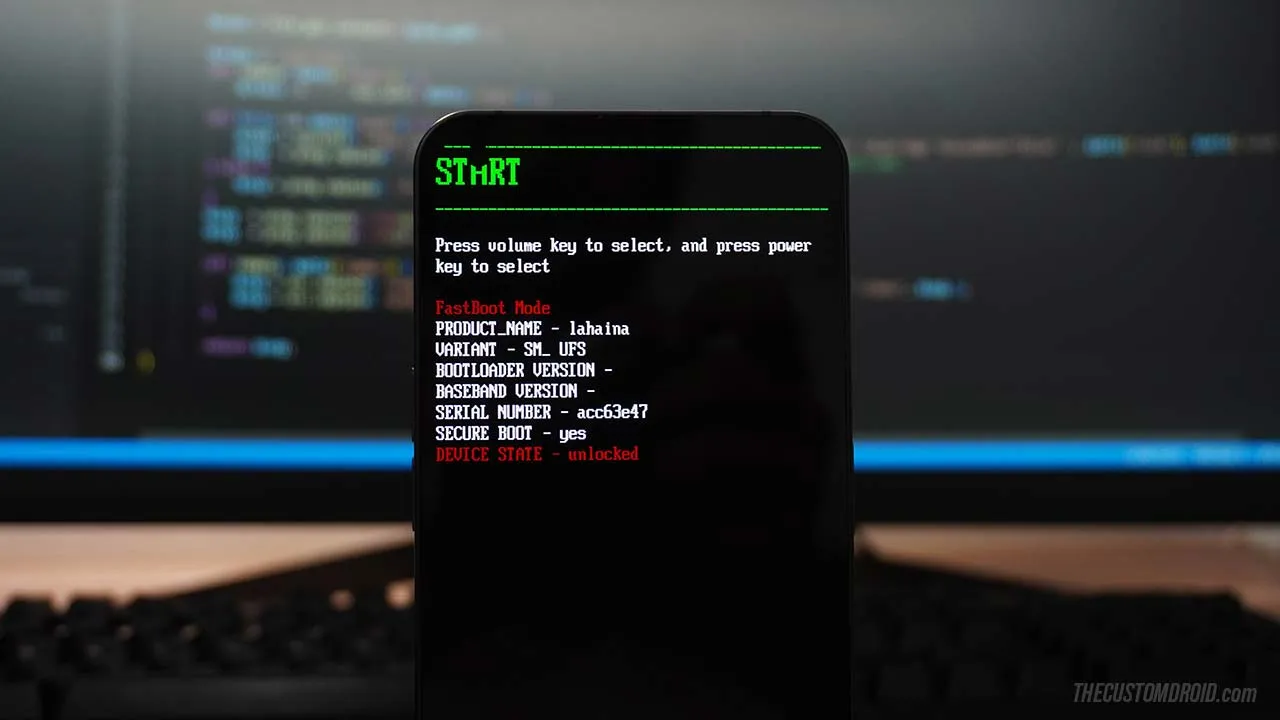
The fastboot devices command should return an output with your device’s unique ID, just as shown in the figure below. This means that the connection over Fastboot can be established successfully.
In case you get an empty output, it means that your computer could not recognize your phone over fastboot. If so, you will need to perform some simple troubleshooting. Below are a few things that I would suggest checking:
- Try switching to a different USB cable for connecting your phone to the computer.
- USB 3.0/3.1/3.2 could sometimes cause issues with fastboot connections. Try using a USB 2.0 port in that case.
- If you’re using a Windows computer, try installing the official Google USB drivers and reboot your PC.
Once you have checked for the above, enter the fastboot devices command again and make sure that the output includes a device ID.
Step 6: Use Fastboot Command to Unlock the Bootloader
The last and final step is to finally unlock the bootloader on your Nothing Phone 1. To do this, input the following command in the command-line window and hit Enter:
fastboot flashing unlock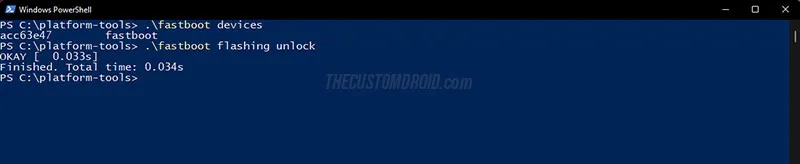
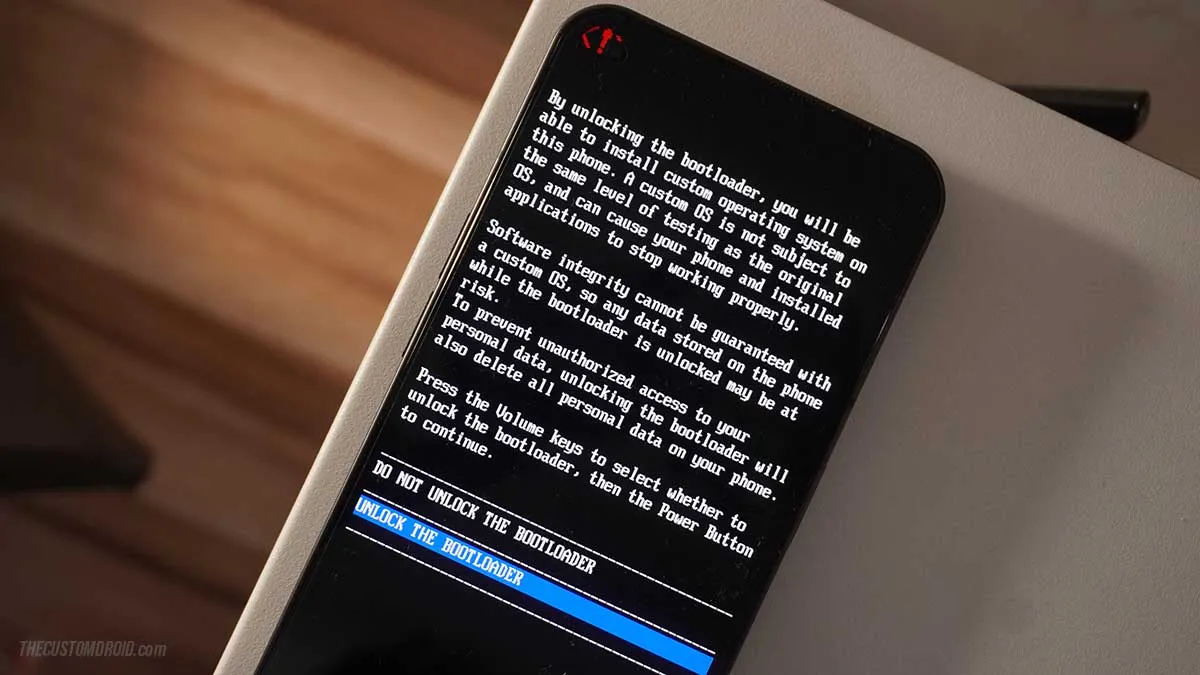
As soon as the command is executed, you should see a confirmation prompt on your phone’s screen. Use the Volume buttons of your phone and move the selector to “UNLOCK THE BOOTLOADER”. Finally, press the Power button to confirm the unlock the bootloader on your Nothing Phone 1.
A factory data reset will be performed automatically and your phone will boot into the operating system.
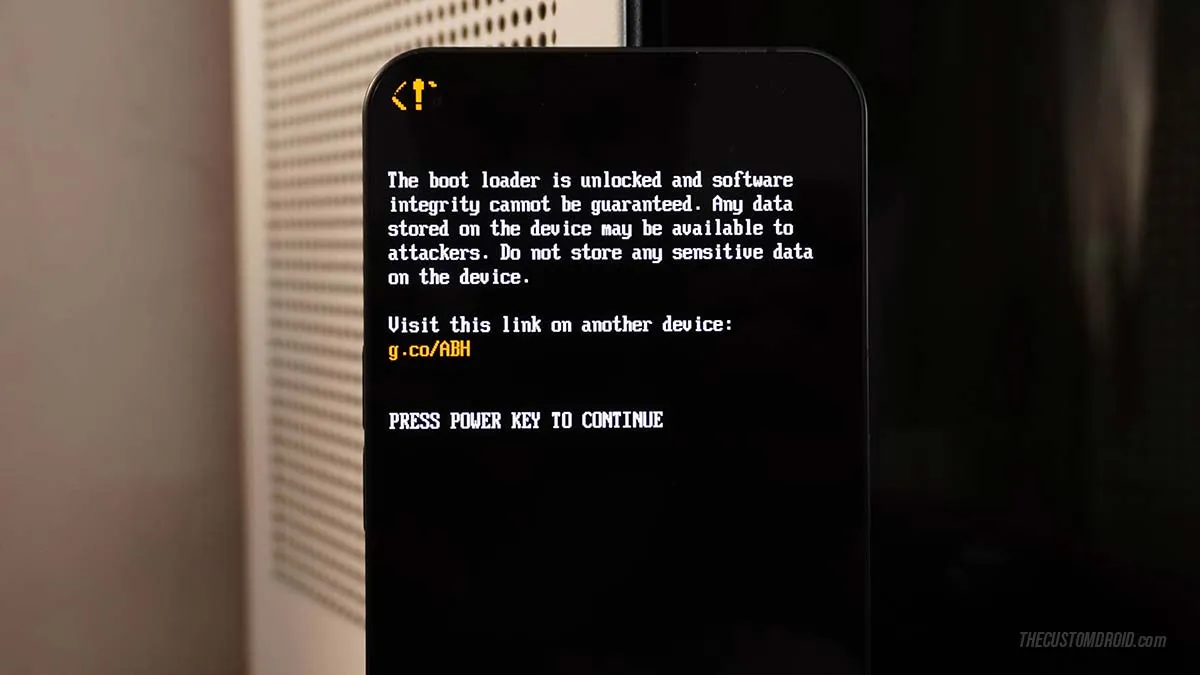
You will also notice a warning message during the initial boot. It’s a standard message and you can continue to use your device as normal. If you need more information about this message, it has been published by Google.
Step 7: Unlock Flashing of Critical Partitions
There are certain partitions on the Nothing Phone 1 that still cannot be flashed and are locked even after performing the fastboot flashing unlock command. These are known as “Critical Partitions”, and the bootloader itself is one such partition.
Normally, you would not need to flash such partitions, especially when things like rooting, custom ROMs, and software modifications are concerned. But having the ability to do so can be really useful if you’re dealing with a hard-bricked state.
In order to unlock the critical partitions of your Nothing Phone 1, you will need to use another command. So, boot back into Fastboot Mode, make sure that the phone is connected to the computer via USB, and then use the following command to fully unlock all critical partitions:
fastboot flashing unlock_criticalAgain, you will see a prompt on your phone’s screen to confirm the unlock. So, use the Volume keys to highlight “UNLOCK THE BOOTLOADER” and press the Power button.
That’s it! Your phone should now boot into the OS. You can finish the initial setup and restore your backed up data now.
The bootloader of your Nothing Phone 1 should now be fully unlocked. You can now make your way to rooting, custom ROMs and kernels, other software mods, and customize your phone’s UI, performance, and features the way you like.
If you’re new to the whole scene of flashing and modding, it will be very overwhelming at first. I would personally suggest starting off with something as simple as rooting your device with the stock Nothing OS installed. Then slowly learn and move towards more complex things like custom recoveries, ROMs/kernels, and mods such as Xposed Framework.
How to Relock the Bootloader on Nothing Phone 1
Using custom ROMs, having root access, and tweaking the software to your own liking is exceptional. However, if you ever want to revert back to the factory state, you can do so by unrooting and flashing the stock Nothing OS.
After doing that, you would also want to relock your phone’s bootloader. Locking the bootloader again will ensure the software’s integrity and prevent unauthorized flashing of the software in case it is ever lost or stolen.
Important Note:
Do not attempt to relock the bootloader unless you have made sure that the phone is running the stock Nothing OS firmware without any sorts of modifications like TWRP, root, etc whatsoever.
To relock the bootloader on Nothing Phone 1:
-
Power it off and boot it into Fastboot Mode.
-
Connect the phone to the computer via USB.
-
Launch the command-line window inside the
platform-toolsfolder. -
Input the following command to initiate the bootloader locking process and hit Enter:
fastboot flashing lock
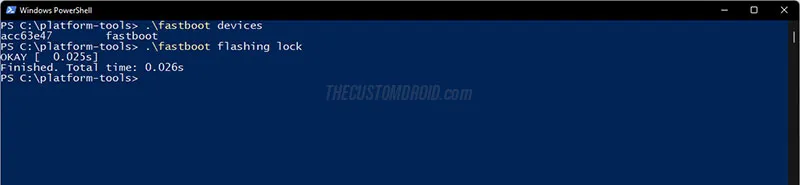
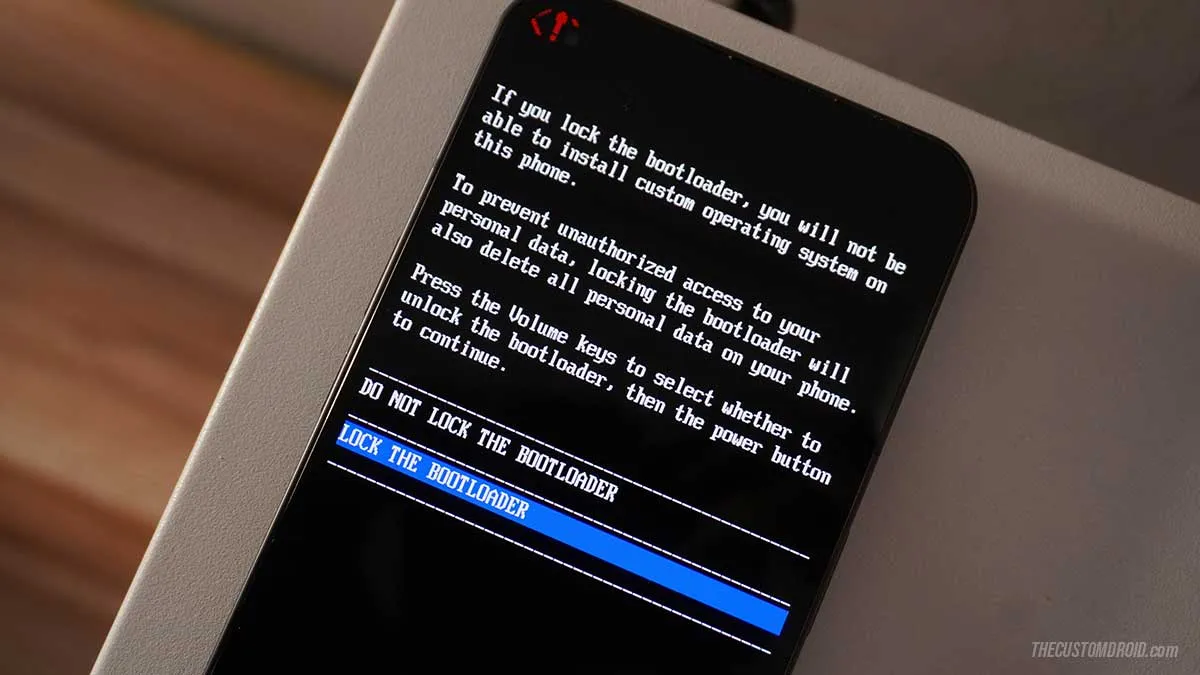
- As soon as the command is executed, you should see a confirmation prompt on the phone’s screen. Use the Volume buttons to highlight “LOCK THE BOOTLOADER” and press the Power button to confirm and relock the bootloader of your Nothing Phone 1.
Just like unlocking, relocking the bootloader erases all the data on your phone. So you will need to set it up again by going through the initial setup.
I hope this guide was helpful. If you feel there’s anything that could be improved, added, or removed with regards to this guide and the instructions, please share your feedback. And do not hesitate to comment if you have any questions, or if you face any problems while following the instructions.
Comments
Comments are moderated, and published only if they are relevant to the topic and add value in a constructive way. If you disagree with something, please be polite and respectful. We suggest you read our comment policy before commenting.