How to Install TWRP Recovery on OnePlus Nord and Root it with Magisk
A step-by-step comprehensive guide on how to install TWRP recovery on OnePlus Nord and use it to root the phone with Magisk.

On this page
In this guide, we will show you how to install TWRP recovery on the OnePlus Nord and use it to root the phone with Magisk.
When we talk about custom development and software modding, OnePlus phones are always among the front-runners because their bootloader is easily unlockable. And the OnePlus Nord is no different.
If you’re stepping into software modding and flashing, then TWRP is a tool you should be familiar with. It is a custom recovery that allows you to flash custom ROMs, kernels, mods like ViPER4Android and Xposed Framework, and even take NANDroid backups of the complete Android OS. If you’re after rooting, you can also use TWRP to flash Magisk and root your phone in a matter of minutes, something we will be demonstrating in this tutorial as well.
TWRP for OnePlus Nord
Thanks to XDA Recognized Developer mauronofrio, TWRP for the OnePlus Nord is available. According to the developer, the recovery is completely functional and can decrypt the /data partition. However, there are a few bugs worth taking into consideration before you attempt to flash or use TWRP on your Nord.
- First, the ability to backup and restore NANDroid doesn’t work. This means you would not be able to take full OS backups, which is one of the prime features of the TWRP custom recovery.
- Next, you will also not be able to flash system and vendor images files to the
/systemand/vendorpartitions, respectively. You can still flash custom ROMs and ZIP files to the phone’s system partition directly. - ‘fastbootd’ (userspace fastboot interface) does not work. While this may have very little-to-no effect for an average user who just wants to use TWRP for flashing ROMs and Magisk ZIP files for rooting, it’s still worth knowing about.
With that information at hand, let us show you how to install TWRP recovery on the OnePlus Nord and subsequently root the phone with Magisk. The instructions below will take you through the complete process in a comprehensive manner.
Do not plan on flashing ROMs or kernels? Here’s how to root the OnePlus Nord without TWRP Recovery.
Before You Begin
Before you follow the instructions and attempt the procedure, there are a couple of things you should do first.
1. Take a Complete Backup: Installing TWRP or rooting your OnePlus Nord using the instructions here will not erase any data. However, it’s a good practice to take a complete backup of all your important data beforehand. This will create a failsafe in case the data is lost due to corruption or a bad flash.
If you want, you could also take a look at our in-depth tutorial on backing up different types of data stored on Android.
2. Install OnePlus USB Drivers: If you’re operating on a Windows computer, it will generally install the required USB drivers for your phone automatically. But that’s not always the case, and especially when working with ADB and Fastboot. So, it’s best that you install the latest OnePlus USB drivers on your computer.
Users operating on macOS or Linux computers will not need any drivers at all.
3. Charge your OnePlus Nord: Make sure that your OnePlus Nord has a sufficient battery charge so that it doesn’t turn off accidentally while performing the instructions. We suggest having at least 40% battery charge before you begin.
4. Unlock the Bootloader: In order to install TWRP, root, or flash the device partitions, you must first unlock your OnePlus Nord’s bootloader. Like we said earlier, this is extremely simple and could be done by issuing a fastboot command from your computer.
- More info: How to Unlock OnePlus Nord Bootloader
Instructions
We have split the instructions into seven major steps so that it’s easier for you to understand the whole procedure. These steps will take you through the process of installing TWRP on the OnePlus Nord and then rooting it with Magisk.
Step 1: Install Android SDK Platform-tools on Computer
You will be flashing TWRP to your OnePlus Nord using a fastboot command. So, the first step is to install the Android SDK platform-tools on your computer. Begin by downloading the latest platform-tools for your computer using the links below.
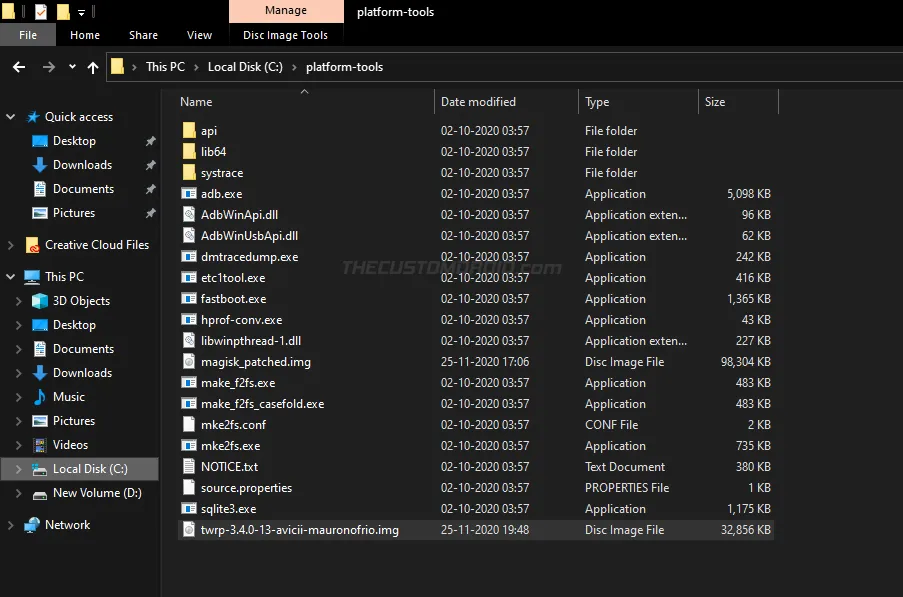
Once you have downloaded the tools, extract the ZIP package to get the “platform-tools” folder. This folder should contain the binary files of the required tools, such as ADB and Fastboot.
For easier access, we suggest you move the “platform-tools” folder to the root of the C:\ drive if you’re using a Windows computer, or inside the “Documents” directory if you’re using a macOS/Linux PC.
While you could use one-click ADB/Fastboot installers like Minimal ADB and Fastboot, we recommended doing it the manual way as shown above. This is because one-click installers often include outdated platform-tools binaries, which may cause unusual errors during usage.
Step 2: Download TWRP Recovery Image
The second step is to download the latest TWRP recovery for the OnePlus Nord and save it on your computer. The recovery is available as a fastboot-flashable image file in .img file format. You can download the latest build directly from the developer’s Sourceforge database.
Once downloaded, move the recovery image (e.g. twrp-3.4.0-13-avicii-mauronofrio.img) inside the ‘platform-tools’ folder where the ADB and Fastboot tools are installed.
Step 3: Launch Command-line Inside ‘platform-tools’ Folder
Now that you have the required tools installed and the TWRP recovery image in the correction location, the third step is to launch the command-line inside the working directory (i.e. ‘platform-tools’ folder). If you’re experienced with using the command-line, you could alternatively add the platform-tools to your computer’s PATH.
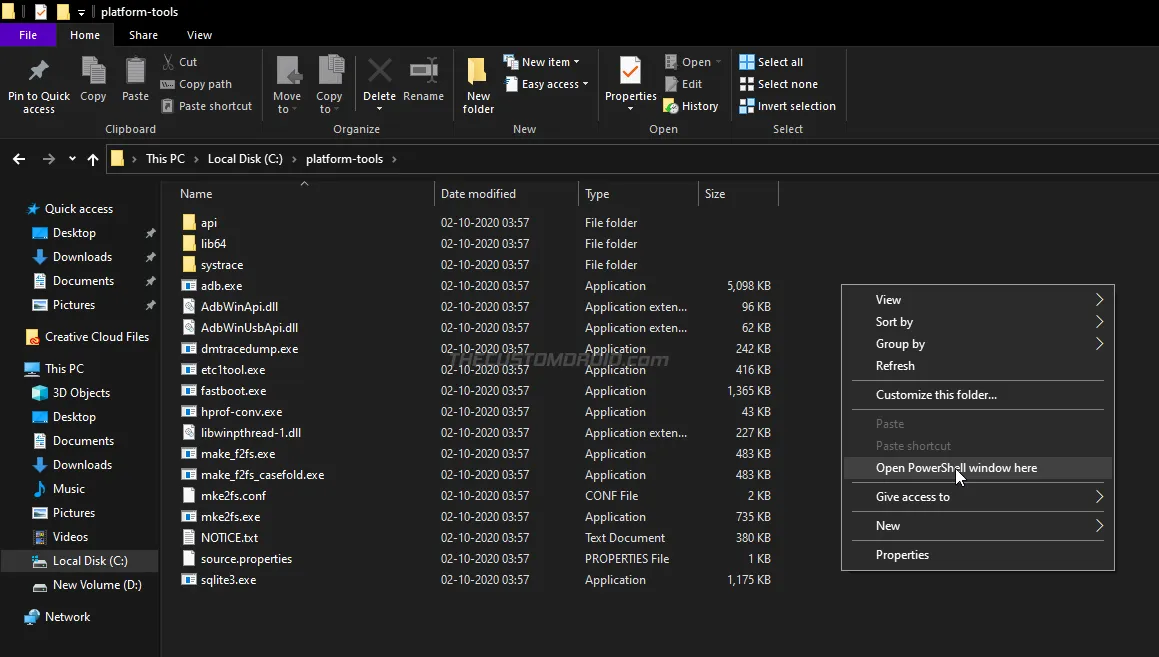
- Launch PowerShell in Windows: Go to C:\platform-tools. Hold the SHIFT key on the keyboard and right-click on any empty space inside the folder. Then select the “Open PowerShell window here” option.
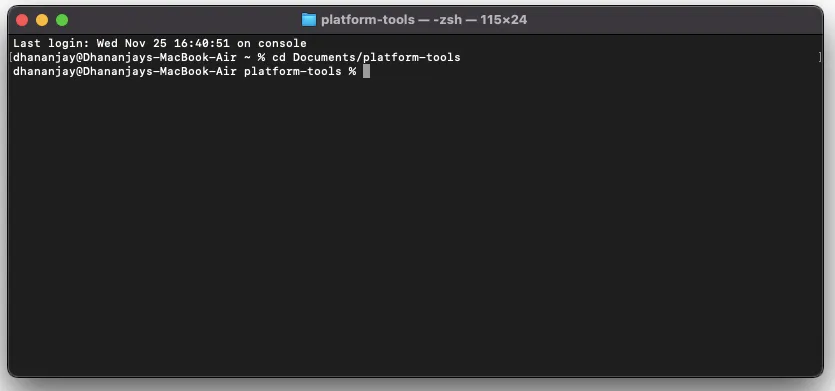
- Launch Terminal in Linux/Mac: Launch the Terminal and use the cd command to change its directory to the “platform-tools” folder. For example: If you moved the folder inside the “Documents” directory, then the command should be:
cd Document/platform-tools
Command-line Usage:
When entering the commands, make sure to prepend them with a dot and backslash [.\] in Windows PowerShell, and a dot and forward slash [./] in Mac/Linux Terminal.
Step 4: Boot the phone into Fastboot Mode
Your phone can only accept fastboot commands while it’s in a dedicated boot mode known as ‘Fastboot Mode’. So, you have to boot your OnePlus Nord into Fastboot Mode.
To do this, first power off your phone and wait for a few seconds to ensure that it’s completely off. Then hold the Volume Up, Volume Down, and Power keys together until you see the fastboot mode on your phone’s screen.
Here’s what it will look like:
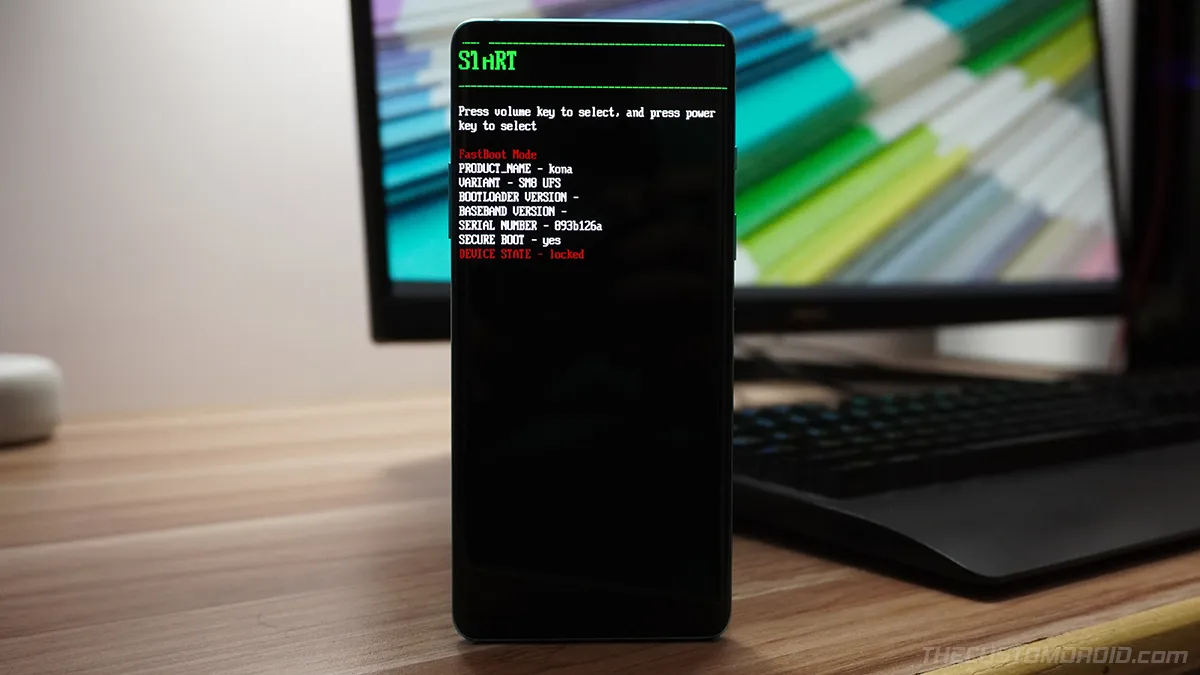
See detailed instructions on how to enter Fastboot and Recovery Modes on OnePlus Nord.
Step 5: Install TWRP Recovery on OnePlus Nord
It’s time to finally install TWRP recovery on your OnePlus Nord. The developer recommends booting the TWRP image instead of permanently flashing it. This means you will need to connect your phone to the computer and use the following command every time you want to use TWRP.
To temporarily boot TWRP on your OnePlus Nord, use the following command:
fastboot boot twrp.img
“twrp.img” in the above command should be replaced with the full filename of the recovery image you’ve downloaded. For example, if you have downloaded the latest TWRP 3.4.0-13 image, then the command should be:
fastboot boot twrp-3.4.0-13-avicii-mauronofrio.img
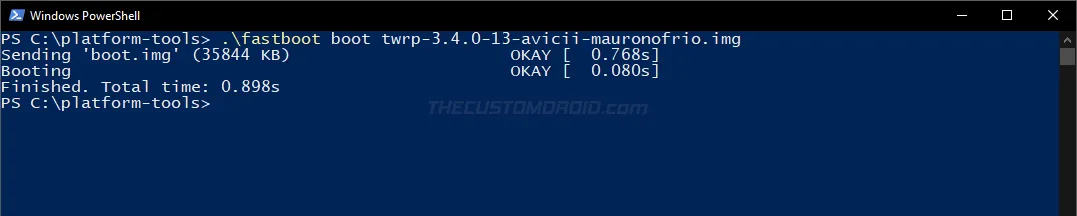
As soon as the command is entered, your OnePlus Nord will instantly reboot and enter TWRP recovery mode.
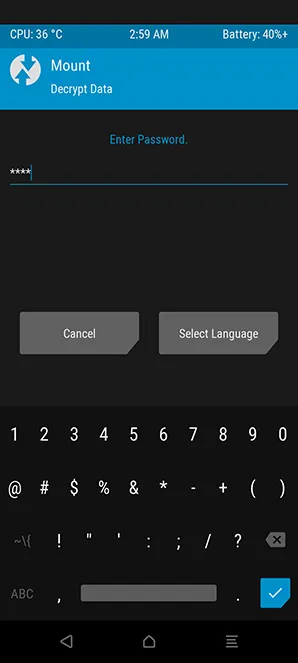
If you have lock screen security set up on your phone, then TWRP will prompt you to enter the PIN/Password. This is required so that TWRP can properly decrypt the /data partition (internal storage). So, make sure that you input the PIN/password when prompted.
According to one of the community members (luckana), it is possible to permanently flash the TWRP image to the /recovery partition as well. Again, this is not something that the developer recommends you to do.
But if you’re still willing to go ahead with it, then just use the following command:
fastboot flash recovery twrp.img
Step 6: Download Magisk ZIP and Transfer it to the Phone
While your OnePlus Nord is in TWRP mode, connect it to your computer using the USB cable. Then go to the ‘Mount’ menu in TWRP and press the ‘Enable MTP’ button. If it shows ‘Disable MTP’ instead, then MTP is already enabled and you do not need to do anything else.
Now, download the latest Magisk installer ZIP file (e.g. Magisk-v21.1.zip) from the official Github releases page. Then transfer it to your phone’s internal storage. While you can put the file anywhere on the storage, we suggest copying it to the root of the internal storage (i.e. outside all the folders) so that it’s easier to find.
Once the file has been copied, disconnect the phone from the computer and go back to the TWRP main screen.
Step 7: Flash Magisk ZIP to root OnePlus Nord
The seventh and last step of this tutorial is to flash the Magisk ZIP file using TWRP and root your OnePlus Nord. To do this, press the ‘Install’ button on the TWRP main screen. Then navigate to the internal storage of your phone and select the Magisk ZIP file (e.g. Magisk-v21.1.zip) to add it to TWRP’s flashing queue.
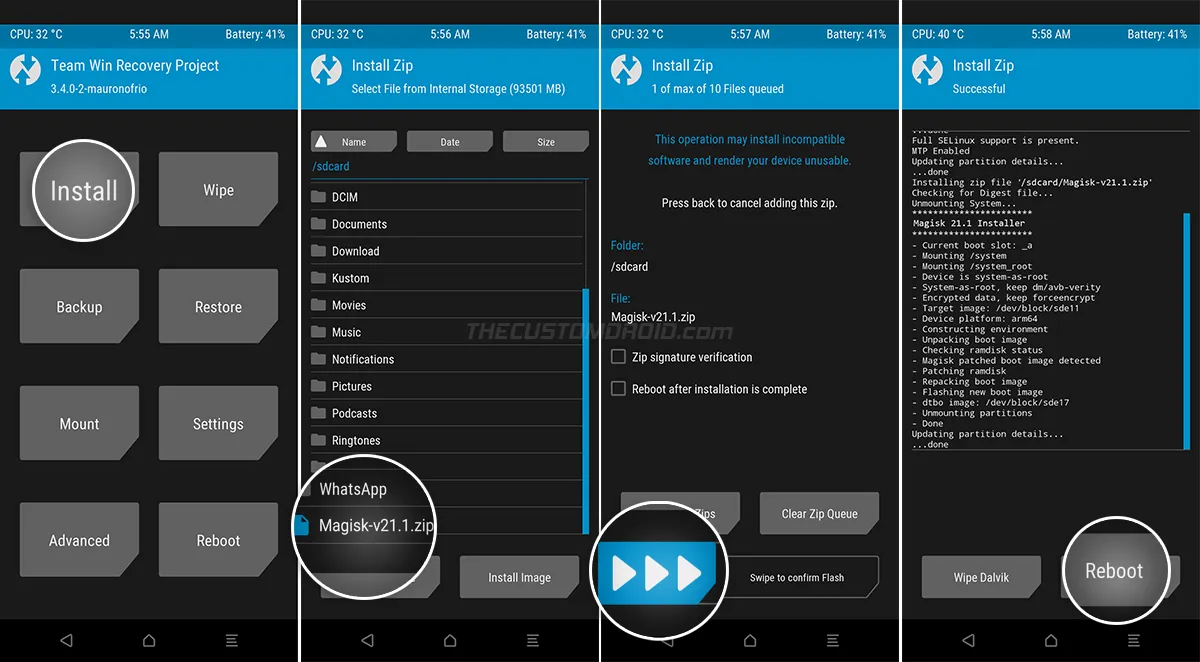
Finally, swipe the button on the bottom of the screen to install Magisk and root your phone. The flashing process will take a few seconds to finish. Once it is complete, press the ‘Reboot System’ button to reboot your OnePlus Nord into the system (OS).
Wrapping Up
Once your phone boots, you should see the Magisk Manager application among other apps in the app drawer. You can launch the app and verify Magisk’s installation status and version. You can further check if your rooted phone passes SafetyNet by pressing the ‘Check SafetyNet’ button in Magisk Manager.
Now go ahead and start using root applications such as Titanium Backup. Root permissions for these apps can easily be managed from within Magisk Manager. You can also install mods like Xposed Framework, and ViPER4Android to tune up your phone’s audio. With TWRP, you can now flash a variety of different custom ROMs, kernels, and mods available for the OnePlus Nord here on XDA.
SafetyNet fails and shows ‘Hardware’ evalType? It means that Google’s new hardware-backed attestation is now in effect on your phone. You can fix this by using the Universal SafetyNet Fix Magisk module.
So by now, you have learned how to install TWRP recovery on the OnePlus Nord and use it to root with Magisk. If you have any questions in regards to the instructions or find yourself stuck anywhere, let us know.
More articles on the Nord:
Download Google Camera (GCam) Port for OnePlus Nord
OnePlus Nord OxygenOS OTA Updates Repository
Restore OnePlus Nord back to stock OxygenOS software after rooting or installing custom ROMs
How to unbrick OnePlus Nord from a hard-brick using MSMDownload Tool
Comments
Comments are moderated, and published only if they are relevant to the topic and add value in a constructive way. If you disagree with something, please be polite and respectful. We suggest you read our comment policy before commenting.