Download and Moto Z2 Play Android Oreo Update (OTA and Factory Image)
Motorola is now rolling out Android 8.0 Oreo to its users in India and Europe via OTA. Through this guide, you can download Moto Z2 Play Android Oreo update

On this page
Motorola is now rolling out Android 8.0 Oreo to its users in India and Europe via OTA. Through this guide, you can download Moto Z2 Play Android Oreo update (OTA or factory image) and follow the instructions to manually install the update on your phone.
Within the past few months, Motorola has gained its pace and has already released the Oreo update for several supported devices. These include the Moto X4, Moto Z 1st Gen, Moto Z Play, and more. Even the Moto Z2 Force received the update during March. The company eventually started the Moto Z2 Play rollout in late April. The update, however, was only limited to Europe at the time. Recently the OTA has started reaching out to the users in India as well. Since the rollout is incremental, it could take some time before it reaches every region. In such a case, you can simply upgrade your phone manually. The instructions below will help you manually install Moto Z2 Play Android Oreo OTA and Fastboot Image.
Android Oreo Update for Moto Z2 Play
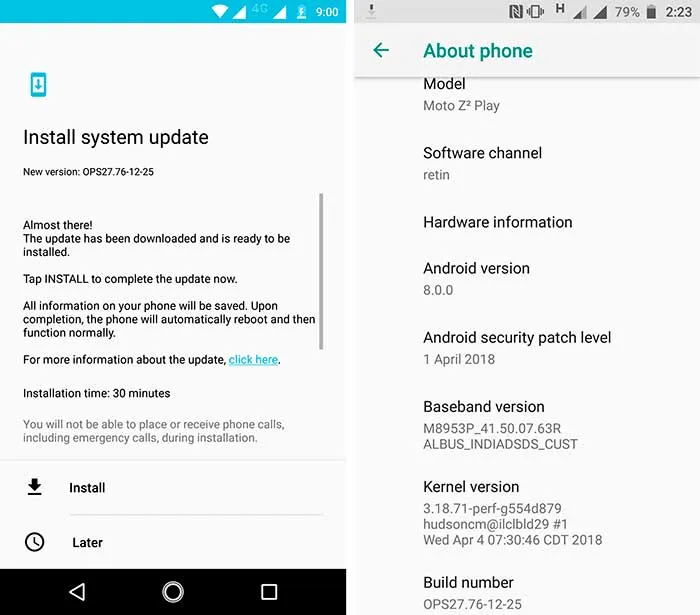
The latest Android 8.0 Oreo update comes with the delightful new features such as Picture-in-Picture mode, notification channels, adaptive icons, Autofill API, and more. Alongside the regular Oreo features, the new software also adds April 2018 security patches. This means that the phone not only gets the latest features but also a more secure and up-to-date environment. The firmware comes with the OPS27.76-12-25 build number.
Thanks to XDA members raphamfc for the OTA ZIP, and HTCDevil and Junior Passos for the links to the factory image. The process itself is pretty easy. We have stated two different methods to help you install Moto Z2 Play Android Oreo update. The first method will guide to sideload the OTA ZIP using the stock recovery. If the first method fails for your particular variant or in case the phone is rooted, then follow the second method that involves flashing the factory image using fastboot.
According to the source and reports from various users, the method works for the stated models/variants:
- XT1710-01
- XT1710-02
- XT1710-06
- XT1710-07
- XT1710-08
- XT1710-09
- XT1710-10
Before you proceed, make sure to check for the OTA notification by going to Settings > About phone > System update.
Download Moto Z2 Play Android Oreo OTA and Factory Image
- OTA: Blur_Version.27.21.26.albus.retail.en.US.zip (File deleted by developer)
- Factory Image: ALBUS_OPS27.76-12-25_cid50_subsidy-DEFAULT_regulatory-DEFAULT_CFC.xml.zip
Requirements
Ensure that you fulfill all the requirements as stated below before you head to the instructions.
- Irrespective of the method you choose, perform a full backup of your phone beforehand, including the internal storage. Method 2 will specifically wipe off your phone completely. We suggest that you follow our Android backup guide.
- Charge the Motorola phone to at least 60% battery level to avoid any mishaps during the update process.
- Download and set up Android SDK tools on the PC. We will refer to “C:\adb” during the process below, which is the folder on the PC where the ADB/Fastboot binaries are present.
- In order to use method 1, your phone must be completely stock with the NPSS26.118-19-1-6 Nougat firmware.
How to Install Moto Z2 Play Android Oreo Update?
Method 1: Sideload OTA using Recovery
- Download Android Oreo OTA ZIP on the PC.
- Copy the downloaded file to C:\adb, where the ADB/fastboot files are present.
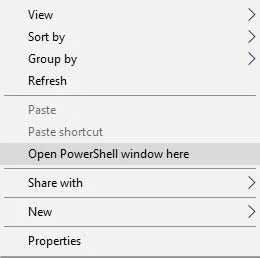
- Hold the SHIFT key on the keyboard and right-click on an empty space inside the folder.
- Select ‘Open PowerShell window here’.
- Next, power off the phone completely and boot into stock recovery:
- Hold the Volume Down and Power button simultaneously to enter bootloader mode.
- On the bootloader screen, select ‘Recovery mode’.
- When the ‘No command’ screen appears, hold the Power button and tap the Volume Up key once.
- The Moto Z2 Play should now be in stock recovery mode.
- Connect the phone to the PC using the USB cable.
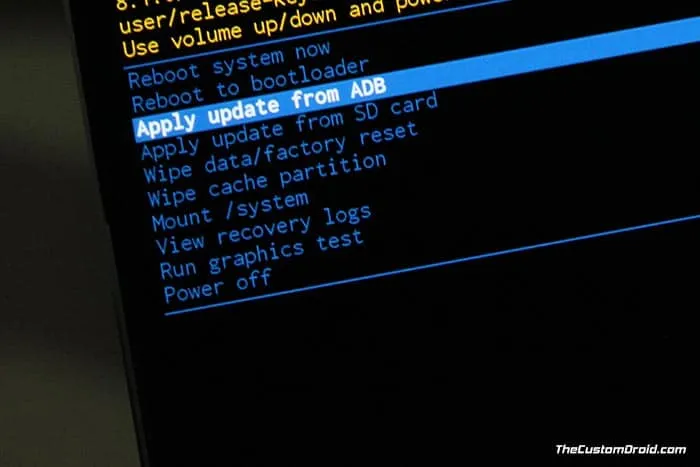
- Select ‘Apply update from ADB’ in the stock recovery.
-
Finally, enter the following command in the PowerShell window to install Moto Z2 Play Android Oreo OTA:
adb sideload Blur_Version.27.21.26.albus.retail.en.US.zip
-
When the sideload process finishes, select ‘Reboot system now’.
Your phone should boot into the updated OS. The above process is the easiest one to follow. But in case it fails to work for your phone for some reason, then opt for the second method down below.
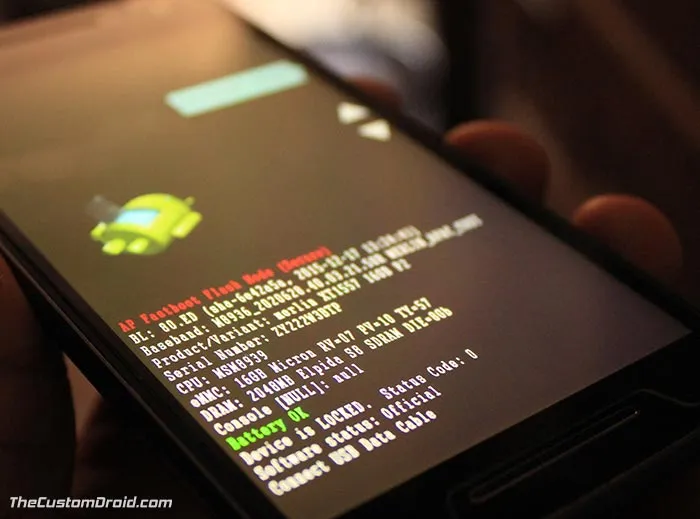
Method 2: Flash Factory Image using Fastboot
- Download Moto Z2 Play Android Oreo factory image.
- Extract the downloaded file to an easily accessible location on the PC.
- Copy the extracted firmware files to C:\adb, where the ADB and Fastboot binaries are present.
- Hold the SHIFT key and right-click on an empty space inside the folder.
- Select ‘Open PowerShell window here’.
- Power off the Moto Z2 Play completely.
- Hold the Volume Down and Power button simultaneously to boot into bootloader mode.
-
Connect the phone to the PC using the USB cable.
-
Install Moto Z2 Play Android Oreo factory image using the following commands:
fastboot getvar max-sparse-sizefastboot oem fb_mode_setfastboot flash partition gpt.binfastboot flash bootloader bootloader.imgfastboot flash modem NON-HLOS.binfastboot flash fsg fsg.mbnfastboot flash dsp adspso.binfastboot flash logo logo.binfastboot flash boot boot.imgfastboot flash recovery recovery.imgfastboot flash system system.img_sparsechunk.0fastboot flash system system.img_sparsechunk.1fastboot flash system system.img_sparsechunk.2fastboot flash system system.img_sparsechunk.3fastboot flash system system.img_sparsechunk.4fastboot flash system system.img_sparsechunk.5fastboot flash system system.img_sparsechunk.6fastboot flash system system.img_sparsechunk.7fastboot flash system system.img_sparsechunk.8fastboot flash system system.img_sparsechunk.9fastboot flash system system.img_sparsechunk.10fastboot flash system system.img_sparsechunk.11fastboot flash oem oem.imgfastboot erase carrierfastboot erase DDRfastboot erase userdatafastboot erase cachefastboot oem fb_mode_clear -
Finally, reboot the phone using:
fastboot reboot
When the phone boots, it shall be running on the Android 8.0 Oreo firmware with build number OPS27.76-12-25 and April 2018 security patches. The second process could be time-consuming, but at the same time, it ensures that your phone is completely stock. You can easily re-root using Magisk and install TWRP recovery.
So this was our guide on how to download and manually install Moto Z2 Play Android Oreo update. If you have any questions regarding the procedure, then please leave a comment.
Comments
Comments are moderated, and published only if they are relevant to the topic and add value in a constructive way. If you disagree with something, please be polite and respectful. We suggest you read our comment policy before commenting.