Through this page, you can download Samsung’s Odin Flash Tool for Windows computers. This includes the latest version of Odin, as well as all previous versions, along with a handful of patched versions.
Advertisement
Further, we will discuss some of the common uses of the Odin tool, its terminology, and show you how to use Odin to flash stock firmware on Samsung Galaxy devices.
Page Contents
What is Odin Flash Tool?
Odin (also called Odin3, Odin Downloader, or Odin Flash Tool) is Samsung’s official firmware flashing software for Windows computers. The tool communicates with Galaxy devices in Download Mode to flash the stock firmware binaries for manually installing software updates or unbricking the device. It can also be used to flash custom recoveries (such as TWRP or Safetstrap) or Magisk patched firmware binaries for rooting Galaxy devices.
The tool is generally used by Samsung internally, in their authorized service centers, and in their factory for flashing and testing the software. However, it was leaked out to the public through XDA-Developers and is now freely available for the end-users to use.
Advertisement
Odin supports flashing firmware binaries in .tar (tarball) and .tar.md5 file formats, and can be used on any Windows 11, Windows 10, Windows 8/8.1, Windows 7, Windows Vista, and Windows XP computer.
Download Odin Flash Tool
Below, you will find the links to download all versions of the Odin Flash Tool, including the latest version as well as some patched versions.
Which version of Odin should I download? – In most cases, it’s strongly advised to use the latest version of the Odin tool as it supports flashing Android 11 (One UI 3.1) and Android 10 (One UI 2.5) firmware on the latest Samsung Galaxy devices like Galaxy S22, Galaxy Note 20, Galaxy Z Flip, Galaxy Tab S8, Galaxy Tab S6 Lite, Galaxy Fold, etc.
Important information about Odin v3.14.4
More recently, a newer version of the tool, that is v3.14.4 has been floating around the internet. According to XDA member/developer realbbb – “It appears to be a hacked version 3.14.1 (same filesize); has internal modifications and includes a known cloud-based client-server communication dll (cpprest141_2_10.dll)“.
Here’s a little discussion between the users on the same topic over at XDA.
So, it’s best to avoid it and use v3.14.1 instead.
Latest Odin v3.14.1
| Name: | Odin 3.14.1 |
| Version: | v3.14.1 |
| Developer: | Samsung Electronics Co., Ltd. |
| Supported OS: | Microsoft Windows |
| Filesize: | 3 MB |
| Download link: | Odin3_v3.14.1.zip |
Previous Versions of Odin
If you want to use an older version of the Odin tool, refer to the table below for all the versions and their corresponding download links.
| Odin v3.13.3 | Use Odin 3.13.3 or above for flashing Galaxy S10, S20, Note 10, and Note 20 devices. |
| Odin v3.13.1 | Use Odin v3.13.1 or above for flashing Android 9 Pie firmware |
| Odin v3.12.10 | |
| Odin v3.12.7 | |
| Odin v3.12.5 | Use Odin v3.12.5 or above for flashing Android 7.0/7.1 Nougat firmware |
| Odin v3.12.4_4 | |
| Odin v3.12.3 | |
| Odin v3.11.2 | |
| Odin v3.11.1 | Use Odin v3.11.1 or above for flashing Android 6.0 Marshmallow firmware |
| Odin v3.10.7 | |
| Odin v3.10.6 | |
| Odin v3.10.5 | |
| Odin v3.10.0 | |
| Odin v3.09 | Use Odin v3.09 or above for flashing Android Jelly Bean and KitKat firmware |
| Odin v3.07 | |
| Odin v3.06 | |
| Odin v3.04 | |
| Odin v2.10 | |
| Odin v1.86 | |
| Odin v1.85 | Use Odin v1.85 or above to flash Android Gingerbread and Ice Cream Sandwich firmware |
| Odin v1.84 | |
| Odin v1.83 | |
| Odin v1.82 | |
| Odin v1.70 | |
| Odin v1.30 | |
| Odin Downloader v4.44 |
Modded and patched versions of Odin
Now, here are some known patched versions of the Odin Flash Tool. These are often used while performing procedures like rooting, installing a custom recovery such as TWRP, flashing custom binaries, etc.
Patched Odin v3.14.1_3B
This version was patched by XDA Senior Member realbbb and sourced from the official XDA thread. It allows you to bypass “FAIL! Model mismatch fail”, “FAIL! SHA256 is invalid”, and “FAIL! Blocked carrier” errors in Odin:
Modded Odin v3.13.1 by Raymonf
Raymonf’s version is needed when flashing custom binaries on the Snapdragon Galaxy S9/S9+ and Note 9 sold in the US.
PrinceComsy’s Modified Odin
This version is generally needed when flashing firmware or custom binaries on Snapdragon models of the Galaxy S8, Note 8, and Galaxy S7 sold in the US.
Now that you have been able to download the Odin flash tool, let us move forward and take a look at its usages, terminology, and instructions on how to use Odin to flash the firmware.
Advertisement
Common Uses of Odin Tool
Odin can be used for a lot of different purposes. For Samsung Galaxy smartphone and tablet users, Odin can be used to:
- Force-upgrade the software of the device by flashing the latest stock firmware.
- Flash custom binaries such as a custom recovery (TWRP or ClockWorkMod; for older devices) or root binaries like Magisk patched firmware image/CF-AutoRoot to root Samsung smartphones and tablets.
- Restore stock firmware/ROM if the user has previously flashed a custom binary and wishes to revert to the stock factory firmware.
- Fix potential software issues like boot loops, increased battery drains, performance degradation caused over time, and more.
- Downgrade the software of the Samsung Galaxy device to an older version. However, that is within limitations in rare cases as downgrading to a software version with an older bootloader revision than the one currently installed is not possible.
To sum up, the Odin Tool is useful for both an average user and an enthusiast who wishes to customize the software on their Samsung Galaxy device.
Odin’s GUI Explained
Odin is a very easy-to-use Windows software and most of the options/parts of its GUI are pretty self-explanatory. However, for someone who’s new to the software, it could also be confusing initially.
So below, I have listed all the different options available in the Odin tool GUI that you’d be using, along with a brief explanation for each of them.
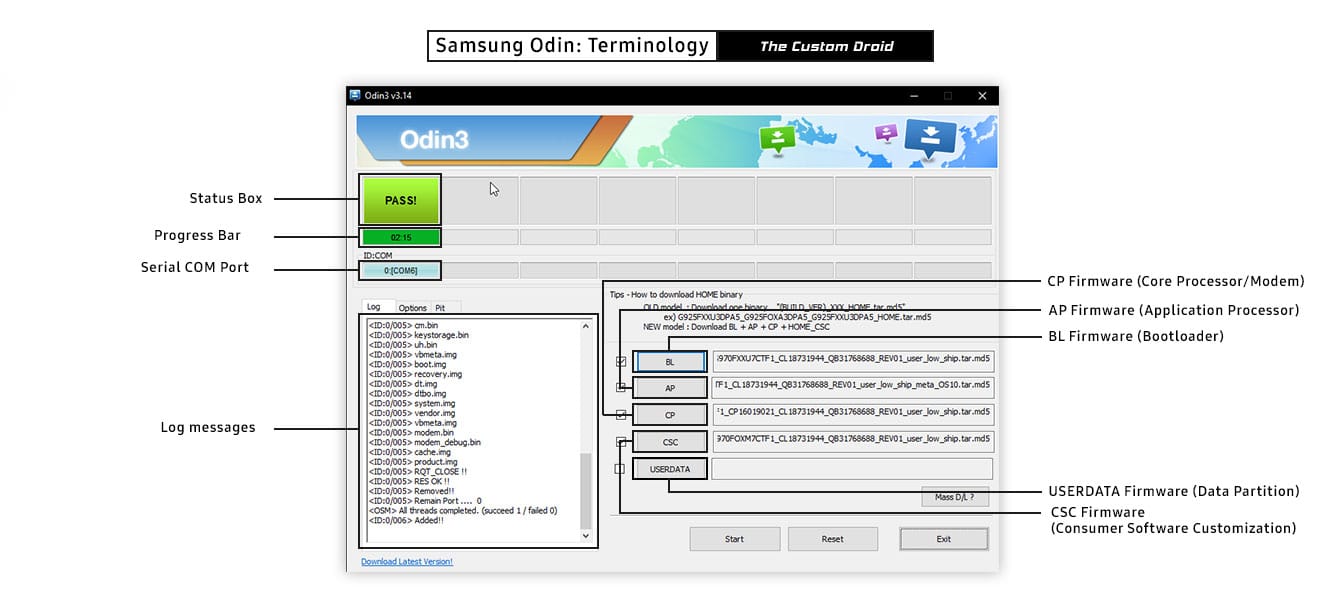
- Status Box: This is located at the very top of Odin’s graphical user interface. The status box shows you the current state of the things carried out in the program.
For example, it will show the “Added!!” status when a supported Samsung device is connected, “Pass!!” status when the flashing process finishes successfully, or “Fail!!” status when the firmware flashing fails. - Progress Bar: The progress bar sits right below the Status Box and as shows you the real-time progress when flashing the firmware binaries.
- ID:COM: This entry shows the serial COM port of your computer to which your Samsung Android device is connected.
- Log (Tab): The log section of the program’s interface displays the raw information of each event that occurs when using Odin.
- Options (Tab):
- Auto Reboot (Checkbox): This option reboot your device as soon as the firmware flashing process is complete.
- Nand Erase (Checkbox): This option completely erases all the logical partitions of your device. Nand Erase could sometimes be helpful when fixing corrupted device firmware partitions like EFS (for lost IMEI), etc.
- Re-Partition (Checkbox): This option (along with a supported PIT binary) enables you re-flash the partition table of your phone. It is helpful for fixing damaged storage (eMMC or UFS) due to a wrong firmware flash.
- F. Reset Time (Checkbox): This option resets the flashing timer once the firmware flashing process is finished.
- DeviceInfo (Checkbox): Verifies the corresponding device information when flashing kernel.
- Flash Lock (Checkbox): This option will tell the Odin software to unlock the “ODIN Flash” lock on the Device to allow the Device to be “Programmed”. Only certain Devices use this feature and should not be used unless instructed to do so.
- Pit (Tab): Allows you to load your device-specific Partition Information Table (.pit) file and flash it to your Samsung Android phone/tablet to repair the device’s storage (eMMC).
- BL (button): Allows you to load and flash the bootloader firmware binary (BL file).
- AP (button): Allows you to load and flash the Application Process firmware binary (AP file), which is the main firmware file that stores the system/OS. Also known as “PDA” in older versions of Odin.
- CP (button): Allows you to load and flash the Core Process firmware binary (CP file) or modem/radio. Also known as “Phone” in older versions of Odin.
- CSC (button): Allows you to load and flash the Consumer Software Customization (CSC file) for your phone’s region/carrier. Also commonly known as “Country Specific Code”.
- USERDATA (button): Allows you to load and flash the user data (/data) partition of the phone. Also known as “UMS” in older versions of Odin.
Some Myths & Misconceptions Regarding Odin
Since Odin is a very popular tool, it does attract a fair share of misconceptions from various online communities and resources.
Advertisement
There’s no official Odin website
According to Wikipedia – “There is no account of Samsung ever having officially openly released Odin”. The software was rather leaked out to the public through community forums such as XDA-Developers.
So, if you come around any online communities/websites claiming to be the official source of the Odin tool from Samsung, you have probably opened the wrong link when you searched.
Odin doesn’t allow you to flash custom ROMs
Odin cannot be used to flash custom ROMs. Although, Odin can be used to flash custom binaries (like TWRP, patched Magisk AP/boot images, etc) and open the gateways to get the required tools for flashing a custom ROM. But it cannot be used not flashable ZIP files like custom ROMs.
Odin does not require USB debugging
Odin does not require USB debugging to be enabled on your Samsung Galaxy device. USB debugging only plays its role while the device is booted into the OS and the Odin tool can only communicate with your Samsung device while it is booted into Download Mode. So, USB debugging is not at all related to the Odin tool and isn’t involved at all in the firmware flashing process.
Use Odin to Flash Firmware on Samsung Galaxy Devices
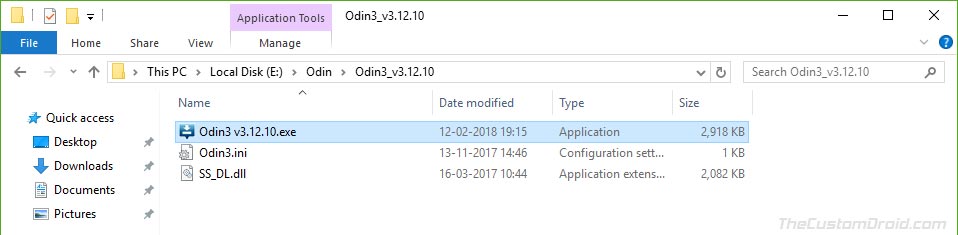
Odin is a portable software, which means that you can just run it by launching the included executable file on your PC without any installation. To run the flashing software on your Windows machine, download the Samsung Odin tool from the links above. Then extract the downloaded ZIP file to a suitable location on your computer.
Advertisement
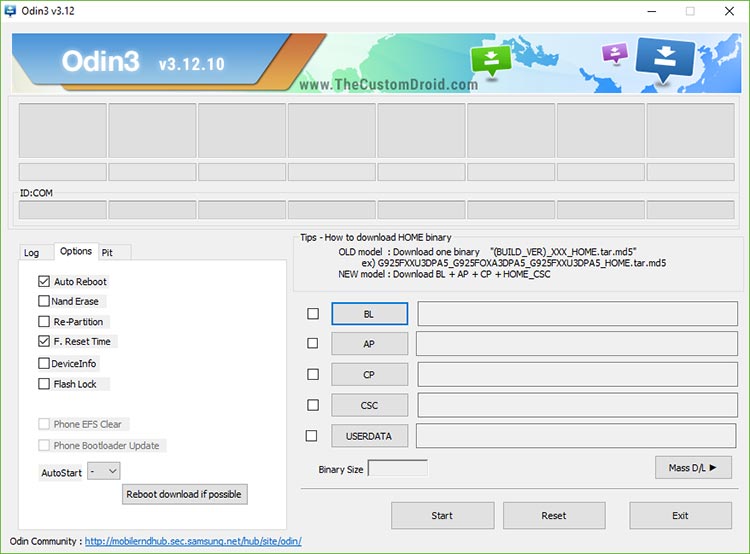
Next, open the extracted folder and simply double-click on the Odin executable file (e.g. Odin3 v3.14.1.exe) to launch the Samsung Odin tool on your PC.
- Note: If you try to launch the older versions of Odin, you shall further be prompted to allow “User Account Control” as well.
That’s it! Once you have launched the tool, you can grab a copy of the firmware for your device using the Frija or Samloader. The step-by-step guide linked below will show you how to flash the firmware on any Samsung Galaxy device using the Odin tool.
Verdict
So by now, you have been able to download Odin Flash Tool and learned about its common use-cases, terminology, and also how to use it to flash the firmware.
The tool plays a very crucial role when it comes to dealing with the software on Samsung Galaxy devices. If you’re an average user, you can use Odin to flash the firmware to manually update the software. If you’re an enthusiast who likes tinkering with the software, then Odin can be used to install TWRP recovery and gain root access. In which case, it is also the tool you’ll rely on if you ever wish to restore the stock firmware or unbrick your Samsung Galaxy device.
If you have any questions regarding the software or its usage, feel free to ask. When asking for help, please mention details like your Samsung device’s name/model, CSC code, and the Android version installed.
Comments 4 Comments
Comments are moderated, and published only if they are relevant to the topic and add value in a constructive way. If you disagree with something, please be polite and respectful. We suggest you read our comment policy before commenting.
Hello. Noob to Odin, however, I’ve quickly gotten a hang of it after 3 days straight of online research & YouTube tutorials. The reason for my Odin download was because of a few of my older phones being FRP. As you can tell, it is 2021 & Samsung just released a new update & I have tried using OEM Samsung Firmware, as well as extracted the PIT file myself & attempted using the Combination firmware file & the individual “AP”, “BL”, “CP”, “CSC” date in order to attempt the FRP unlock. Even attempted using the SamFirm latest version to FRP unlock. I keep running into the “COM4 Port Failed”, for that one.
However, with Odin, I am able to entirely flash, get to the “PASS” green message & have my S10+ reset after it going through, but the phone will restart & reset with the “Enter MCK”, & the “There has been unauthorized attempt at resetting…”, messages.
Any help?
Please & Thank you so very much!!
Jay, thanks for providing the context.
As far as I can tell, any errors related to COM ports mean an issue with the connection. Could be the USB cable, the USB ports on the computer, or the device’s USB port in some rare cases. As far as your computer’s ports are concerned, try and use USB 2.0 ports instead of USB 3.0 or newer.
For the second error, see the reply posted by a known user on this Samsung Community help thread.
Galaxy s9 Stucked to Odin Mode. Can you help me to fix it ? i downloaded it from odindownload.com , is it original vendors site ? what version suites for Galaxy s9 ?
Thanks
Hi Russ. Like I mentioned initially in this article, Odin was only leaked and so, there’s no “official” website for it.
Now, over to your situation. Press and hold the Volume Down + Power button altogether until the screen turns off. Your phone should then be out of Download Mode.
And for the Samsung Galaxy S9, it is advised to use Odin v3.13.1. You can try with the original version if it shows errors regarding SHA256 checksums, then you can use the Patched Odin v3.13.1.