Not only the Nexus and Pixel devices, but you can now install Android 8.1 Oreo on Moto G3. You can do so by flashing Pixel Experience ROM on the Moto G 3rd-Gen (osprey).
Advertisement
The Moto G is indeed a smartphone lineup that has gained popularity in the price segment. The G series devices have always offered the best available hardware for pretty affordable rates. Third Gen Moto G that was released in 2015 has been well-known for various factors. The more sturdy new design and the cheap price are a few to count. Unfortunately, the software support for the device came to an end at Marshmallow 6.0. This is where the developer community kicked in for further support using custom ROMs. Today, you will be able to install Android 8.1 Oreo on Moto G3 using one such ROM.
- Install OxygenOS Open Beta 28/19 on OnePlus 3 and 3T (Android Oreo)
- How to Install Android Oreo on Huawei P8 Lite (GZOSP ROM)
- Install Paranoid Android on OnePlus 3 and 3T (Android 8.0 Oreo)
- Install Galaxy S8 Plus Android Oreo Beta 3 Update (G955F)
Page Contents
Android 8.1 Oreo on Moto G3 via Pixel Experience ROM
Manufacturers are now focusing their attention on bringing Android Oreo to their devices. At the same time, Google has also announced Android 8.1 Developer Preview 2 for the supported devices lately. What we see lost around here are the budget devices that a lot of us still summon.
There’s more for the older devices at the XDA forums. Senior member rahul9999 has compiled an AOSP ROM that will help you install Android 8.1 Oreo on Moto G3. The ROM is named “Pixel Experience“, considering the Pixel phone aesthetics that it offers. Which means you will get to enjoy Pixel-like visual interface on your Moto G3 device. The ROM also includes the November Security Patches.
Advertisement
The ROM has every major device feature working, which includes the following:
- Wi-Fi
- Bluetooth
- Calls
- Mobile data
- VoLTE
- GPS
- Camera
- Flashlight
- FM Radio
- Moto Actions
- Sound/vibration
Now before you go ahead and install Android 8.1 Oreo on Moto G3, take a note of a few issues that you might face.
- The interface could be laggy. It is mostly due to hardware limitations.
- While VoLTE works, it is still a little buggy. You might often need to toggle the ‘Enhanced 4G LTE’ option ON and OFF at every reboot.
- The camcorder is not fully functional.
You’re aware of what the Pixel Experience ROM on Moto G3 offers and what it doesn’t. So head over to install Android 8.1 Oreo on Moto G3 by flashing the ROM.
Prerequisites
- The ROM and instructions here are only meant for the Moto G 3rd Gen. Do not attempt to install it on any other device.
- Your device must have TWRP recovery installed: Download link
- Installing custom ROM will wipe your apps and data. So make sure to take a full backup beforehand. You may follow our guide on how to backup Android phones.
Instructions to Install Android 8.1 Oreo on Moto G3 2015
- Download Pixel Experience ROM for Moto G3: Link
- GApps are already included in the ROM, so you wouldn’t need to download any separate package for it.
- Once the ROM has been downloaded, connect your Moto G3 to the PC and enable ‘File Transfer’ mode.
- Copy the ROM zip file to the internal storage/SD card.
- Disconnect the phone and power it off.
- Boot Moto G3 into TWRP recovery mode:
- Press and hold the Volume Down + Power button to enter the bootloader screen.
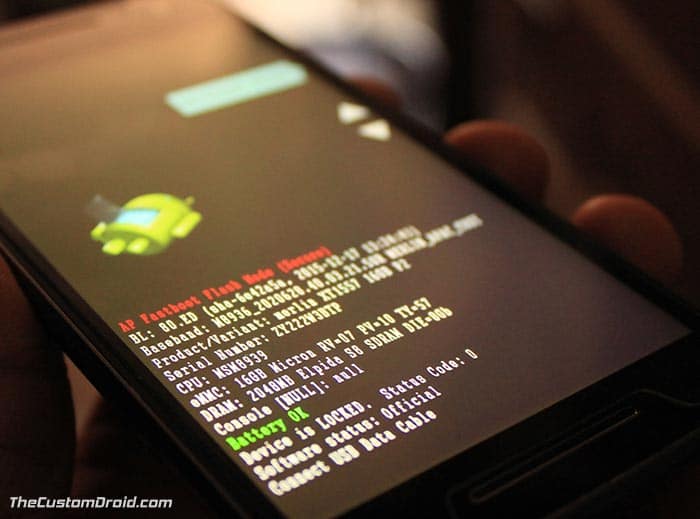
- On the Bootloader screen, tap the Volume button until you see “Recovery mode” option in the Bootloader menu.
- Now press the Power button to enter TWRP.
- Press and hold the Volume Down + Power button to enter the bootloader screen.
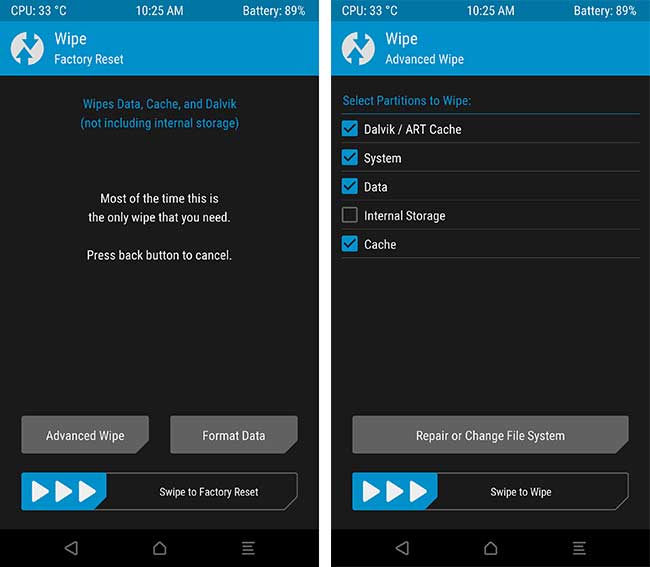
- In TWRP, go to ‘Wipe’ » ‘Advanced Wipe’. Select the following checkboxes and swipe the button on the bottom of the screen.
- When the wipe process is complete, go back to the TWRP main screen.
- Tap on the ‘Install’ button and select the “PixelExperience_osprey-8.1.0-20171209-1730.zip” file.
- Finally, swipe the ‘Swipe to confirm Flash’ button to install Android 8.1 Oreo on Moto G3.
- When the process is complete, hit the ‘Reboot System’ button.
Once your phone boots, complete the setup and enjoy the latest Android version. If you have any problems installing this ROM, let us know through the comments.
ROM Source: XDA-Developers
Comments 10 Comments
Comments are moderated, and published only if they are relevant to the topic and add value in a constructive way. If you disagree with something, please be polite and respectful. We suggest you read our comment policy before commenting.
Hey can anyone leave a link to the rom. Unable to find it in the website
Shashank, the Moto G 2015 lost official support from Pixel Experience back in 2019 itself.
You can refer to the device sub-forum on XDA to find the ROMs that are actively updated.
The osprey file from the pixelexperience website has been removed please help.
Hi Sai. It seems like they do not support the device anymore. I have cross-checked and couldn’t find any unofficial build either.
But if you want, you can upgrade your Moto G3 to Android Oreo, even Pie. There are a lot of custom ROMs available here for the device.
Hi there,
Thank you so much such an easy guide to install the custom ROM om Moto G3.
I have successfully installed the Custom ROM however I am unable to install any apps from the Google Play Store with the Error code : 190
Kindly help.
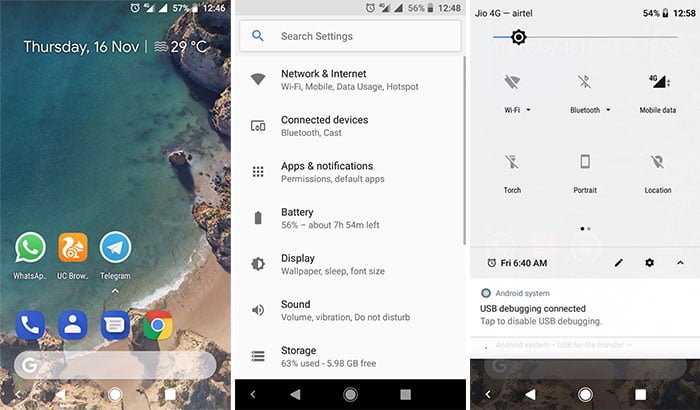
Hi Prajwal! You’re welcome! Please go to Settings -> Apps & notifications -> App permissions -> Storage and make sure the toggle is turned ON for Google Play Store and Google Play Services. Then reboot your phone and check again.
is root is compulsary for rom
installation
Hi. No, not at all. Only TWRP is.
Hi , my phone does not go into TWRP mode , in the recovery mode it jumps to ” no command” and than it takes 2 minutes for the phone to reboot it self
Hi John, that’s because the ‘No command’ screen is the entry point of the stock recovery. Which means, your Moto G3 does not have TWRP recovery installed. Kindly download the latest recovery image and flash it using the following command:
“fastboot flash recovery twrp-3.2.1-0-osprey.img”
Download link: https://dl.twrp.me/osprey/twrp-3.2.1-0-osprey.img.html