How to Create Fastboot-flashable Factory Image for Any OnePlus Phone
Learn how to create a factory image for any OnePlus phone and flash it using Fastboot. Useful for restoring stock OxygenOS software and unbricking.

On this page
Factory images (or Fastboot ROMs) can be used to unbrick and to restore stock OxygenOS software on OnePlus devices.
In this tutorial, I will show you how to create a fastboot-flashable factory image for any OnePlus phone and how to flash it. This will work for all OnePlus phones including the latest OnePlus 8T, OnePlus Nord, OnePlus 8/8 Pro, OnePlus 7T/7T Pro, OnePlus 7/7 Pro, and OnePlus 6/6T.
Introduction
OnePlus phones are considered among the most flexible Android devices when it comes to software modding and development, due to the fact the bootloader is easily unlockable. So you can easily install a custom recovery, flash custom ROMs, and root your OnePlus phone using Magisk.
Well, that’s easy and fun, but it also means that these phones (like any other Android device) are susceptible to software failures if you accidentally flash a wrong ROM/mod, use a wrong command, or just be too much liberal with root permissions.
A majority of these things can often land your OnePlus phone into a bootloop or a bricked state. Moreover, even faulty OTA updates can sometimes be a cause.
So, what do you do then to recover your phone from such an ordeal?
OnePlus Provides OTA Packages of OxygenOS ROM
OnePlus does provide OTA ZIP packages of the latest OxygenOS updates for all its phones. And you can find these on the official support page.
However, these could only be flashed via the in-built update engine (Local Upgrade option) or through a custom recovery such as TWRP. Further, the OEM also pulled the plug by removing the option to manually sideload OTA updates from the stock OxygenOS recovery, specifically on more recent phones.
So, there’s no way to recover your phone and restore the stock OxygenOS software in case you can’t access the Local Upgrade option and moreover, do not have a custom recovery installed.
The Need for Factory Images
Google already publishes factory images for all Pixel phones to give users the liberty to flash their phones and fix such issues. Something similar is also done by Xiaomi and was done by Essential too in the past.
Sadly, OnePlus doesn’t offer any other form of firmware files or a flash tool that users could use in such situations. I am sure users would admire OnePlus if they facilitate the users with an official way to restore stock OxygenOS software on OnePlus phones, allowing them to fix such issues on their own.
A factory image not only aids in software restoration, but is also very useful when you’re dealing with things like Magisk root, TWRP, and other software modifications. Users could also cherry-pick and use the device partition images from a factory image to restore individual partitions. For example:
- You can extract and flash the stock boot image (
boot.img) if you’ve flashed a wrong boot image, and also if you wish to unroot your phone. - You can extract and flash the system image (
system.img) if you accidentally bricked your phone by modifying the/systempartition directly.
As it happens, I was able to find a way that could allow you to fix issues like boot loops and even help you unbrick the phone as long as you can boot it into Fastboot Mode. The said way is to create a factory image for your OnePlus phone and flash it through fastboot. And that’s what is tutorial is all about. So let’s begin!
How to Create Fastboot Flashable Factory Image for Any OnePlus Phone
So, how can you create a factory image for my OnePlus phone? Do you need to be a developer and compile it from the source code? – No, not at all.
The process of generating a factory image is quite easy and does not require any expertise. The idea is to download the OxygenOS OTA package for your OnePlus phone, extract the payload.bin file from within it to get the individual partition images, and finally flash these partition images to your phone using fastboot commands.
I will take you through the complete process in a step-by-step manner and all you’ll require is:
- Your OnePlus phone
- A compatible USB-C cable
- A Windows, macOS, or Linux computer
- And, some of your time
So without any further delay, follow the instructions below to create a factory image for your OnePlus phone.
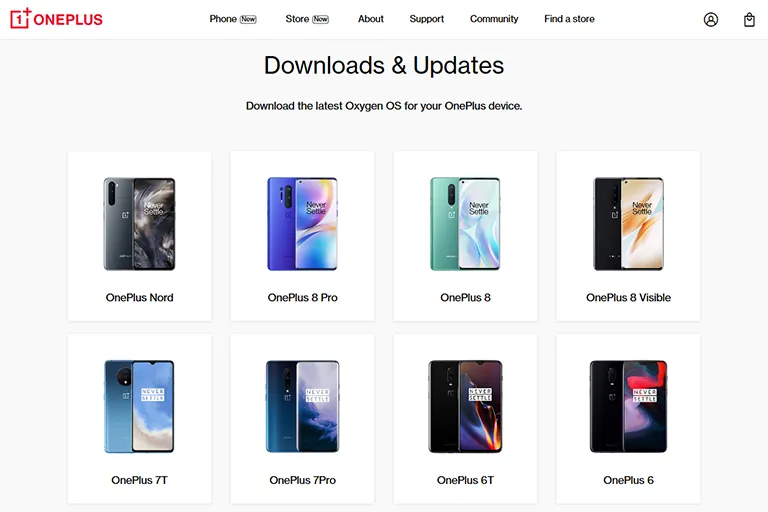
Step 1: Download the OxygenOS OTA Package
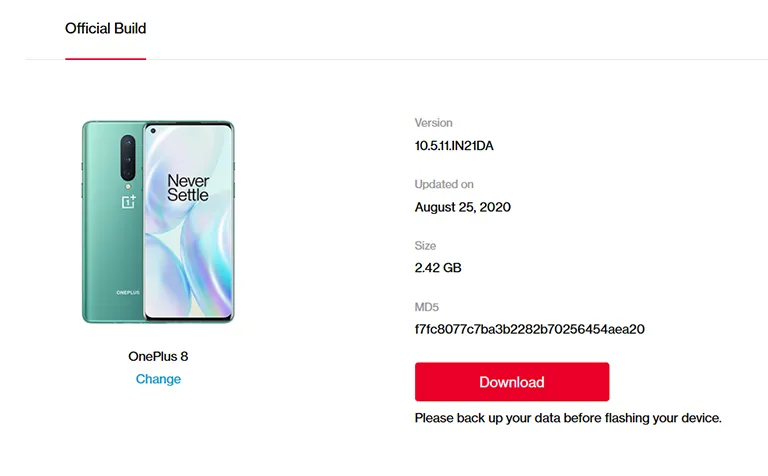
The first step is to download the OxygenOS OTA package (.zip file) for your OnePlus phone. To do this, visit the official database on your computer and select your OnePlus phone from the list. Then click the ‘Download’ button to download the OTA package to your computer.
It is worth noting that the official database isn’t updated that often. In that case, or if you’re looking for a particular OxygenOS version, you could go through the unofficial OTA repository for your device by clicking the link below.
- OnePlus 8T
- OnePlus Nord
- OnePlus 8 and OnePlus 8 Pro
- OnePlus 7T and OnePlus 7T Pro
- OnePlus 7 and OnePlus 7 Pro
- OnePlus 6 and OnePlus 6T
Step 2: Extract the OTA to Get the Payload.bin File
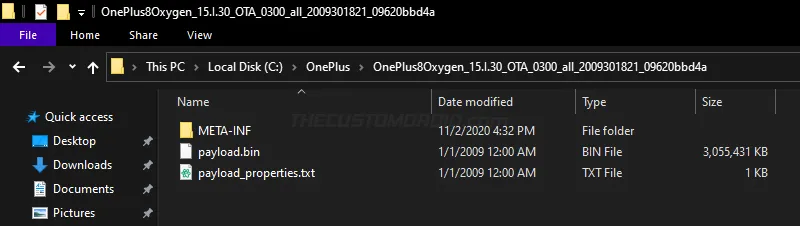
The second step is to extract the contents of the OTA ZIP package on your computer to get the payload.bin file. To do this, you will need an archive utility like 7-Zip installed on your computer.
Once you have that, open the folder where the OTA package was downloaded, right-click it on it, select “7-Zip”, and then “Extract here”.

The extracted files should include the Payload BIN file (See the figure below for reference) that you’ll be needing in the steps that follow.
Step 3: Install and Set Up Python on Your Computer
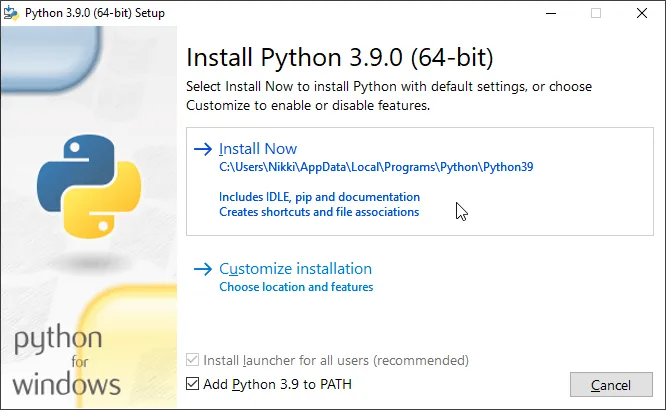
Since Payload Dumper is a Python-based program, you’d first need to install and set up Python on your Windows, macOS, or Linux computer. To do this:
- On Windows: Download the latest Python executable installer from this page and launch the installer by double-clicking the executable (.exe) file. Select the ‘Add Python to the PATH’ option and click ‘Install Now’.
- On macOS: Download the macOS 64-bit installer from here and launch the downloaded package (.pkg) file. Follow the on-screen instructions shown in the installer window.
- On Linux: You could install Python on your Linux machine by compiling it from the source. I suggest you take a look at the instructions in this guide published by OpenSource.com.
Once you have installed Python, restart your computer to ensure that Python is added to the PATH variable.
Step 4: Download the Payload Dumper Tool
Now that you have Python installed, the next step is to download the Payload Dumper tool by developer vm03. Unlike some alternatives, this tool works across multiple platforms including Windows, macOS, Linux, and even Android itself.
You can click the direct link below to download the latest Payloader Dumper tool and save it on your computer.
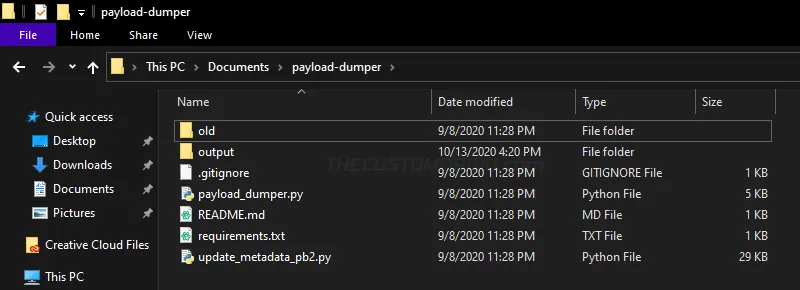
After downloading, extract the ZIP file to get the ‘payload_dumper-master’ folder. This folder should contain the tool’s Python scripts, a readme file, a requirements TXT file, and the output folder where the Payload.bin file is extracted to.
I suggest you rename the ‘payload_dumper-master’ folder to just ‘payload_dumper’. Also, move the folder to the root of the C:\ drive on your Windows computer, or to the ‘Documents’ directory on your macOS/Linux computer for easier access.
Step 5: Open the Command-line inside the ‘payload_dumper’ Folder
With the Payload Dumper tool set up on your computer, you have to launch the command-line inside the working directory (i.e. the ‘payload_dumper’ folder).
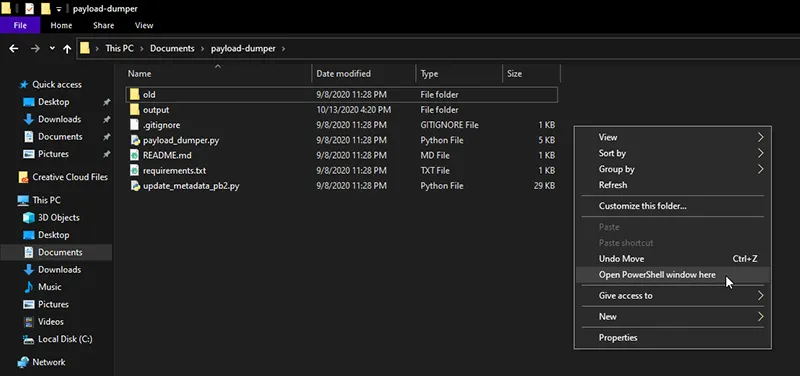
- If you’re operating on a Windows computer, open the ‘payload_dumper’ folder. Hold the SHIFT key and right-click on an empty spot inside the folder, then select the ‘Open PowerShell window here’ option.
- If you’re using a macOS/Linux PC, launch the Terminal and change its directory to the ‘payload_dumper’ folder using the ‘cd’ command. For example: If the ‘payload_dumper’ folder is located in the ‘Documents’ directory, then the command should look like:
cd Documents/payload_dumper
Step 6: Extract the Payload.bin File
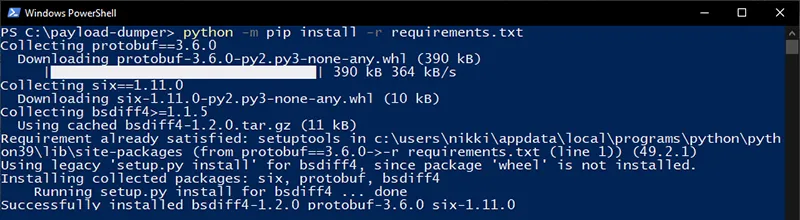
To begin, enter the following command in the PowerShell/Terminal to ensure that requirements for the Payload Dumper tool are met:
python -m pip install -r requirements.txt
The tool utilizes protobuf, six, and bsdiff4 dependencies to work properly. The above command will automatically install these required modules on your computer if they are not already installed.
Notes:
- Windows users will need to precede the commands with a dot and a backslash ”.\” when using PowerShell. On the other hand, Linux/macOS users will need to precede these commands with a dot and a forward slash ”./“in the Terminal.
- Additionally, macOS users may also need to use “
python3” instead of “python” in the syntax.
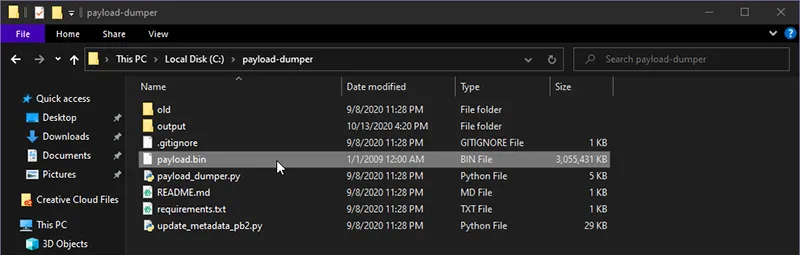
With the dependencies out of the way, it’s time to create the factory image by extracting the individual device partitions from the Payload.bin file. So, copy the payload.bin file you extracted during step #2 and paste it inside the ‘payload_dumper’ folder.
Now use the following command to extract the Payload BIN file:
python payload_dumper.py payload.bin
Since full OTA packages are quite large in size, often 2-3 GB, it could take some time for the extraction to finish. The progress for the same will be shown in the PowerShell/Terminal.
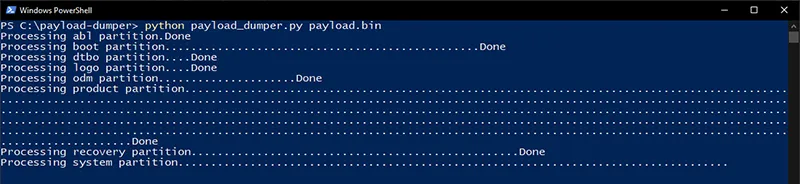
After the extraction finishes, you will find the individual device partition images inside the “output” folder.
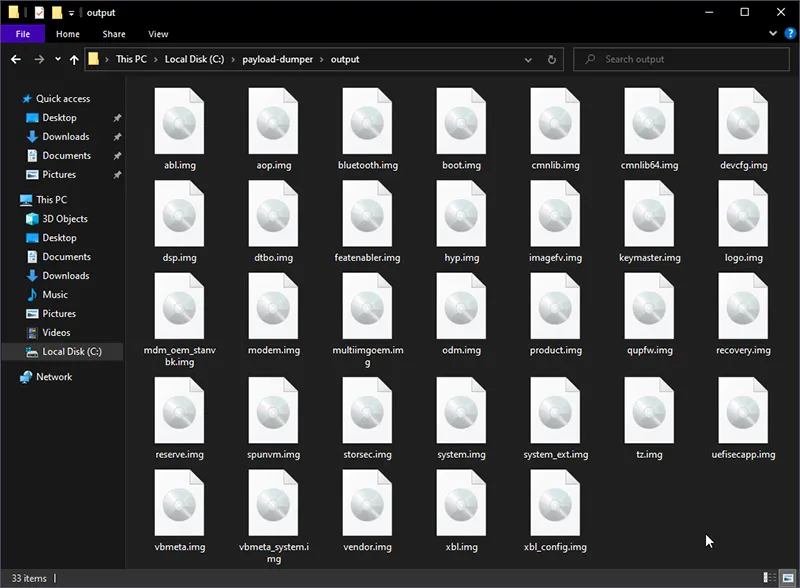
This is essentially what a factory image looks like, except that the ones officially provided by OEMs also include some sort of flashing script. However, since that isn’t the case here, you’d need to manually flash the firmware image files to the respective partitions of your OnePlus phone. Let’s see how.
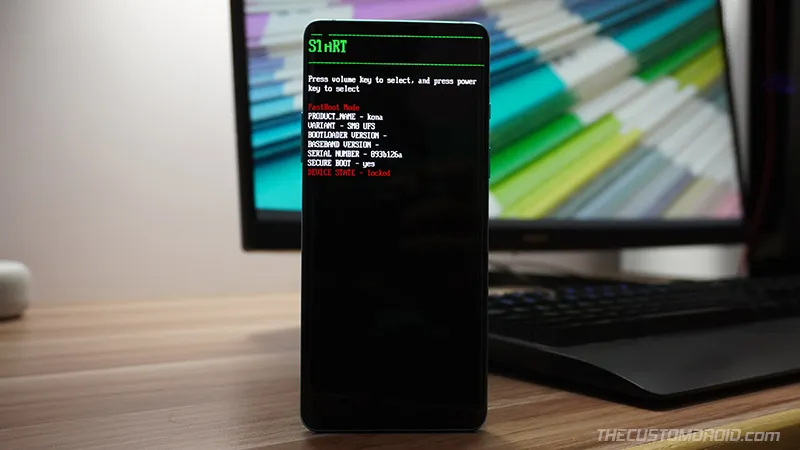
Step 7: Boot your OnePlus Phone into Fastboot Mode
Flashing your device’s partitions is done via Fastboot commands. The Fastboot tool can only interact with the phone while it’s in “Fastboot Mode”, or also sometimes referred to as the “Bootloader Mode”.
So, you must boot your OnePlus phone into Fastboot Mode first. To do this, first power off your phone completely. Then hold the Volume Up, Volume Down, and Power keys together until your phone enters Fastboot Mode.
- Note: On previous OnePlus phones, you’d need to press the Volume Down and Power keys to get into Fastboot Mode
Once your phone is in Fastboot Mode, connect it to your computer using a compatible USB-C cable.
Step 8: Flash the Factory Image using Fastboot Commands
Now, it’s finally time to flash the factory image you just created to your OnePlus phone. You’ll need to have the Android SDK platform-tools (and more specifically ‘Fastboot’) to be installed on your computer to do this. If you haven’t done it yet, you could follow our tutorial.
Next, open the command-line inside the ‘platform-tools’ folder, where Fastboot, ADB, and other tool binaries are present. This is very similar to what we did in the case of the ‘payload_dumper’ folder in step #5 above.
Now verify that your computer can recognize and communicate with your OnePlus phone over the bootloader interface. This could be done by using the following command:
fastboot devices
The command should return your phone’s unique identifier string. In case it doesn’t and you’re working on a Windows PC, you may need to install the OnePlus USB drivers.

Here are a few key things to keep in mind before you start flashing:
- Some partitions may exist on newer OnePlus phones, but not on the older ones, or vice-versa. For example, OnePlus re-introduced the /recovery partition on the OnePlus 7T, OnePlus 8, and newer phones. This partition does not exist on the older OnePlus 7 and the OnePlus 6 series.
- You would only need to use the commands for the partitions that apply to your particular model. To make this easier, I would suggest you observe the list of partition images extracted from the OTA file of your phone. If the image file exists, then the corresponding partition also exists on your phone.
Here’s the complete list of commands you’ll need to manually flash the factory image (partition images) on your OnePlus phone:
fastboot flash boot boot.img fastboot flash dtbo dtbo.img fastboot flash modem modem.img fastboot flash recovery recovery.img fastboot —disable-verity flash vbmeta vbmeta.img fastboot —disable-verity flash vbmeta_system vbmeta_system.img fastboot reboot fastboot fastboot flash abl abl.img fastboot flash aop aop.img fastboot flash bluetooth bluetooth.img fastboot flash cmnlib cmnlib.img fastboot flash cmnlib64 cmnlib64.img fastboot flash devcfg devcfg.img fastboot flash dsp dsp.img fastboot flash featenabler featenabler.img fastboot flash hyp hyp.img fastboot flash imagefv imagefv.img fastboot flash keymaster keymaster.img fastboot flash logo logo.img fastboot flash mdm_oem_stanvbk mdm_oem_stanvbk.img fastboot flash multiimgoem multiimgoem.img fastboot flash odm odm.img fastboot flash opproduct opproduct.img fastboot flash qupfw qupfw.img fastboot flash spunvm spunvm.img fastboot flash storsec storsec.img fastboot flash tz tz.img fastboot flash uefisecapp uefisecapp.img fastboot flash xbl xbl.img fastboot flash xbl_config xbl_config.img fastboot flash system system.img fastboot flash vendor vendor.img fastboot flash product product.img
Although not required, you might also want to format the /data partition, which is nothing but a factory data reset in essence. For this, use:
fastboot -w
Once you have flashed the factory image, reboot your phone into the OS by using the following command.
fastboot reboot
Wrapping Up
So by now, you know how significant a factory image is when it comes to unbricking and restoring the stock firmware on OnePlus phones, or any other Android OEM device for that matter. You have also learned how to create a factory image for any OnePlus device, as well as how to manually flash it via fastboot commands.
Yes, I know that it may all seem a bit extensive at first. But once you get a hold of the process, and have everything already set up on your computer, it will take a lot less time when you perform this again.
Tip: You can also extract the Payload BIN file on your Android device itself.
An Alternative Way
XDA developer mauronofrio, who is well-known for his work on TWRP recovery for a variety of OEM Android devices, also provides self-created fastboot ROMs for devices like OnePlus 8, OnePlus 8 Pro, OnePlus Nord, and more. I appreciate his effort and generosity for helping fellow users of the community.
If you feel that creating a factory image for your OnePlus phone is a daunting task, you might want to use the ones provided by him. As a bonus, they also include a flashing script that will further automate the whole flashing process.
It took a lot of time and effort to come up with this tutorial. I believe it would prove useful for users who’d like to do things on their own and learn something new in the process. If you have any feedback or questions, feel free to let me know.
Comments
Comments are moderated, and published only if they are relevant to the topic and add value in a constructive way. If you disagree with something, please be polite and respectful. We suggest you read our comment policy before commenting.