
On this page
If you wish to customize your Moto G5 beyond what the OEM offers, then the word “Root” must have already clicked your mind by now. So here, we’re going to help you root Moto G5 and G5 Plus.
Rooting will enable you to gain complete control over your device partitions, so you can mount them, access them, and modify them at your will. This allows you to get past the limitations laid down by the manufacturer. You will be able to use mods like ViPER4Android and Magisk, to make the most out of the current features and even add new ones.
Read: Google Assistant Tips & Tricks: 10 cool things to do with it
Rooting on the G5 or G5 Plus is not as easy as just flashing SuperSU. For some reason, flashing SuperSU/phh’s Superuser has failed for many users who have already tried. But there is one confirmed method that will work - MagiskSU. And even with that, only a specific version of Magisk is assured to be working. Also, we will be flashing an unofficial port of TWRP, which has been provided to the users by XDA Developer - Santhosh M. We appreciate the work he has done for the community.
So let us get to it!
Prerequisites
- Your device must have an unlocked bootloader. If you still haven’t unlocked it yet, follow out the tutorial.
- Install Motorola USB drivers on your PC.
- Install Android SDK on your PC. Or you can also use the ADB and Fastboot standalone package if you know how to use it. Extract its content to the location where you will download the TWRP image.
- Backup your Moto G5 completely. Decrypting will wipe out your complete device, including internal storage.
- Charge your phone to at least 60%. This will make sure that the device doesn’t switch down suddenly in the midst of the process.
Instructions to Install TWRP on Moto G5/G5 Plus
- Download the latest TWRP recovery image for your Moto G5 or Moto G5 Plus
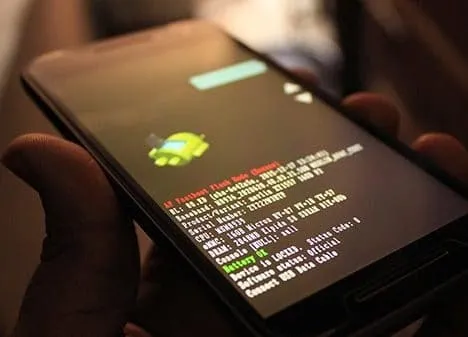
- Reboot your device into bootloader mode – Power it off completely. Press and hold the Volume Down and Power keys until you see the bootloader mode.
- Now connect the phone to the PC using a compatible USB cable.
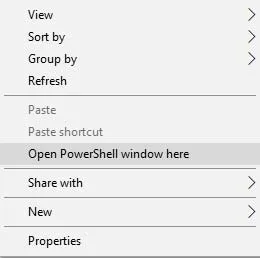
- Open the folder where the TWRP recovery image was downloaded. Press and hold the SHIFT key, and right-click on an empty space inside the same folder. Select Open PowerShell window here from the pop-up menu.
-
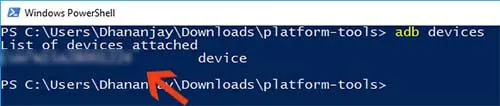
A command prompt window will open. Type in the following code to make sure that your device is being detected correctly.
fastboot devices
The command should return a device ID. If it doesn’t, make sure that you have installed Motorola drivers properly.
-
Flash the TWRP recovery using the following command. Moto G5:
fastboot flash recovery twrp-3.1.0-0-cedric.img
Moto G5 Plus:
fastboot flash recovery twrp-3.1.0-0-potter.img
-
The flashing process wouldn’t take more than a few seconds. Don’t boot your device yet.
Decrypt Data Partition & Flash Magisk to Root Moto G5/G5 Plus
Now that you have TWRP installed, you will be using it to decrypt the storage and finally root your Moto G5 or G5 Plus.
- While your device is still in bootloader mode since the previous step, press either of the volume buttons until you see Recovery mode highlighted*.* Finally hit the power button to boot into recovery.
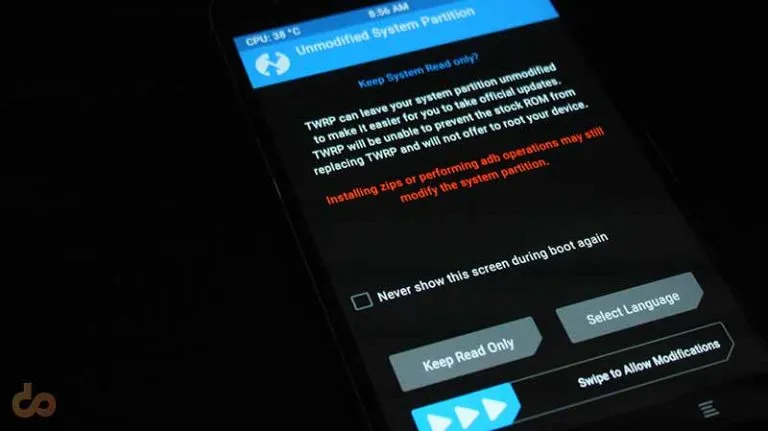
- The first time that your device boots into TWRP, it shall ask for a password. So, tap on Cancel. You will instantly be prompted with a warning message for “Unmodified System Partition”, so swipe and allow it.
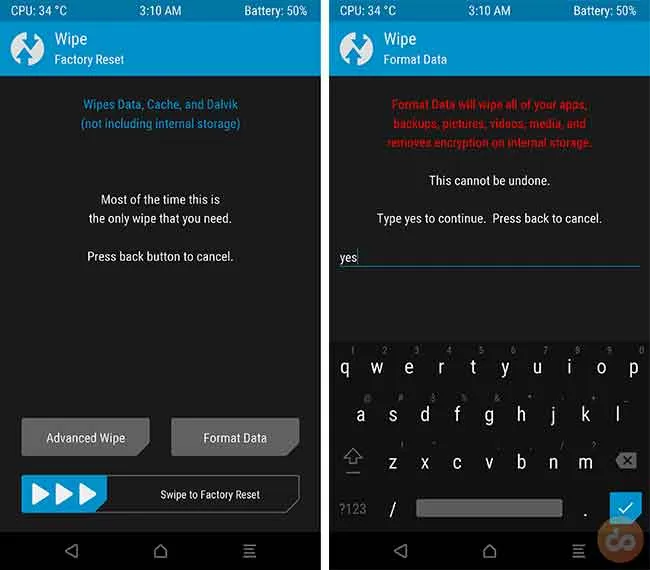
- Tap on Wipe > Format Data and enter “yes” in the provided field. This will format the complete data partition, which also includes the internal storage.
- Head back to the TWRP main screen and go to Reboot > Recovery. Your G5 will instantly reboot back into TWRP.
- Download the required files – no-verity-opt-encrypt-5.1.zip & Magisk-v20.4.zip
- Now while your device is in TWRP, connect it to the PC. Go to Mount > Enable MTP.
- Copy both the files to the storage and then tap on Disable MTP.
- Go to Install and select the no-verity-opt-encrypt-5.1.zip file and confirm the flashing process.
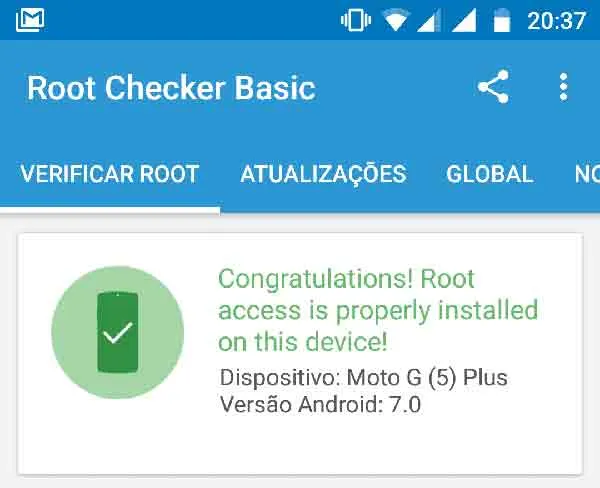
- When it’s done flashing, flash the “Magisk-v13.3.zip” file in the same manner. Finally, tap on Reboot System. This is how you easily root Moto G5 and G5 Plus.
Go ahead, there are loads that you can do with it. A few things definitely worth trying are ViPER4Android, SELinux Swith, and Magisk Modules. Do you know of something interesting, specific to the G5? Let us know by dropping a comment below.
Comments
Comments are moderated, and published only if they are relevant to the topic and add value in a constructive way. If you disagree with something, please be polite and respectful. We suggest you read our comment policy before commenting.