Motorola is now rolling out stable Android 8.1 Oreo update for the Moto G4/G4 Plus with the OPJ28.111-22-1 build number. You can follow the instructions below to manually install stable Android 8.1 Oreo on Moto G4/G4 Plus. You can either sideload the OTA package via stock recovery or install the TWRP flashable zip.
Advertisement
Android smartphones from Lenovo-owned Motorola aren’t the best bet when it comes to regular software updates. Most of these phones have been criticized for delayed software updates and broken promises. Talking about updates, last year Motorola publically disclosed the list of their phones that were designated to get Android Oreo update. Most of these phones including the Moto G5/G5 Plus, Moto G5S, Moto G5S Plus, Moto Z, Moto Z Play, Moto Z2 Play, and Moto X4 have already received the Android Oreo update. Motorola decided to directly jump to Android 8.1 Oreo, skipping 8.0 as the company was already behind the schedule.
However, both the Moto G4 and Moto G4 Plus were not present in the list. The phones were released back in 2016 and came with Android Marshmallow out-of-the-box. Seeing the outrage among the users, the company reconsidered its decision and has finally released stable Android 8.1 Oreo update for Moto G4/G4 Plus.
Update (9 September 2019): OTA package and TWRP Flashable zip of stable Android 8.1 Oreo for Moto G4/G4 Plus are now available. The new firmware comes with the OPJ28.111-22-1 build number and brings December 2018 security patches.
Page Contents
Moto G4/G4 Plus Android 8.1 Oreo Update
XDA Senior Member rajatgupta1998 was able to capture the Android 8.1 Oreo OTA package for the Moto G4/G4 Plus. The new software comes with OPJ28.111-22-1 build number and December 2018 security patches. Another forum member Jleeblanch made TWRP flashable zips of the stock firmware. So users who have an unlocked bootloader with TWRP can easily install Android 8.1 Oreo on Moto G4/G4 Plus.
Advertisement
Advertisement
Since the OTA updates your phone’s bootloader and modem to the newer Oreo version, you will NOT BE ABLE TO DOWNGRADE back to Nougat if you choose to sideload the OTA and will be forced to wait for the stable Oreo update. For the same reason, it is best to use the Android 8.1 Oreo TWRP Flashabe zip to upgrade. Using it will not update your Moto G4’s bootloader and thus allow you to downgrade easily, should you ever want to do it.
Advertisement
Requirements
- Irrespective of the method you choose (Method 2 will completely wipe your phone including the internal storage), I strongly suggest you take a complete backup of all your data on the phone. We also covered a detailed tutorial on how to backup Android devices completely.
- Charge your Moto G4/G4 Plus to a sufficient battery level to avoid any sudden shutdown during the update process.
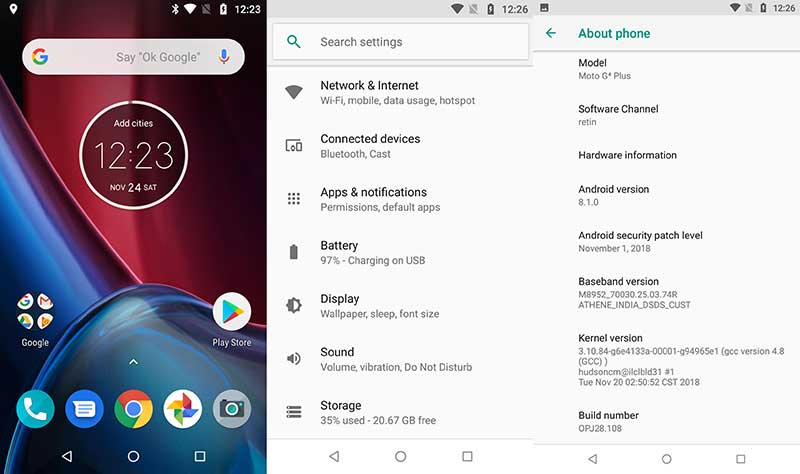
- For method 1, your phone must be on Nougat firmware with build number NPJS25.93-14-18 (Download here).
- In order to use method 2, you must have an unlocked bootloader and TWRP (You can download it here) installed on your phone.
- Important: Also, boot your Moto G4 into TWRP recovery and take a backup of your EFS (TWRP > Backup > Select EFS > Swipe to Backup). Make sure to copy the EFS backup to an external SD card or your PC.
Download Moto G4/G4 Plus Android 8.1 Oreo Firmware
- OTA Packages:
- NPJS25.93-14-18 (Stable 7.0 Nougat) to OPJ28.111-12 (Stable 8.1 Oreo): Blur_Version.25.236.3.athene.retail.en.US.zip
- OPJ28.111-12 to OPJ28.111-22-1: OTA_Package_OPJ28.111-22-1.zip
- TWRP Flashable (Stable Android 8.1 Oreo firmware): TWRP-athene-8.1.0-OPJ28.111-22.zip
The download links have been provided by XDA Senior Members rajatgupta1998 and Jleeblanch on their XDA threads (1 & 2). So the credits go to them! Don’t forget to give him a thumbs up.
How to Install Android 8.1 Oreo on Moto G4/G4 Plus
As told earlier, it is best to use Method 2 and install the TWRP flashable zip of the Android 8.1 Oreo build to upgrade. It will allow you to easily downgrade back to stock Nougat firmware or a custom ROM. On the other hand, Method 1 will block you from downgrading at all.
Advertisement
Method 1: Sideload OTA using Stock Recovery
- Download Android 8.1 Oreo OTA package.
- Connect your Moto G4/G4 Plus to the PC via the USB cable.
- Transfer the downloaded OTA package to the root of your phone’s internal storage. By “Root”, we mean outside all the folders.
- Disconnect the phone and power it off completely.
- Boot your Moto G4 into Bootloader Mode by pressing and holding the Volume Down and Power buttons together.
- On the Bootloader screen, tap the volume buttons until you see “Recovery mode” and press the Power button to select it.
- You should now see an Android robot on the screen.
- Now, hold the Power button and press the Volume Up button to finally boot into stock recovery mode.
- In the stock recovery mode, select “Apply update from SD card”.
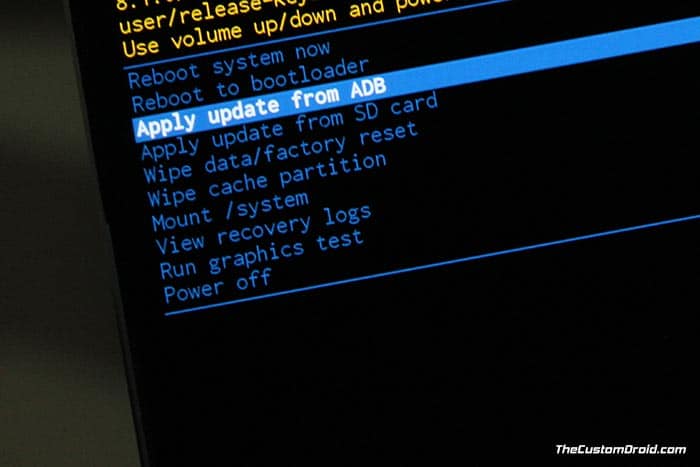
- Select the OTA package (e.g. OTA_Package_OPJ28.111-22-1.zip).
- Finally, press the Power button to confirm and install Android 8.1 Oreo on Moto G4/G4 Plus.
- Once the installation finishes, select “Reboot system now”.
Method 2: Flash TWRP-Flashable Zip
- Download the Android 8.1 Oreo TWRP flashable zip file
- Connect your Moto G4 to the PC using the USB cable
- Transfer the downloaded file to the phone’s internal storage or SD card
- Boot your Moto G4/G4 Plus into TWRP recovery mode
- [If you’re using a custom ROM] Go to Wipe’ menu and select the ‘Cache’, ‘Dalvik/ART Cache’, ‘System’, and ‘Data’ partitions. Then swipe the button on the screen to wipe the current OS.

- Tap on the ‘Install’ button in TWRP
- Navigate to the internal storage and select the ‘TWRP-athene-8.1.0-OPJ28.111-22.zip’ file
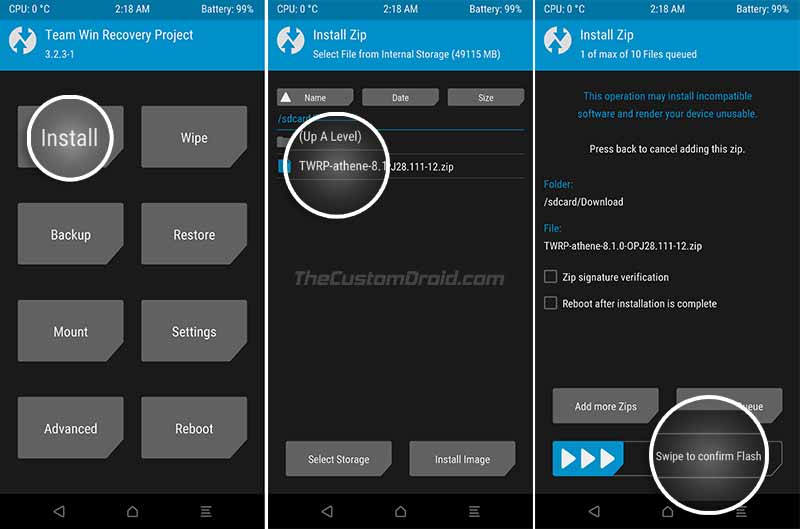
- Finally, swipe the button on the screen to install Android 8.1 Oreo on Moto G4/G4 Plus
- Once the installation finishes, tap on ‘Reboot System’.
Note that the first boot may be slow and can take around 10 minutes. Once your Moto G4 gets into the OS, set it up by following the on-screen instructions. Then enjoy all the latest Oreo goodies on your Moto G4/G4 Plus.
So, this was our tutorial on how to manually install Moto G4/G4 Plus Android 8.1 Oreo update. If you have any queries regarding the procedure, please feel free to comment below.
Comments 10 Comments
Comments are moderated, and published only if they are relevant to the topic and add value in a constructive way. If you disagree with something, please be polite and respectful. We suggest you read our comment policy before commenting.
i know this is a late entry, my build NPJS25.93-14.7-8 . Not rooted or anything, can this be updated ?
Scott, your Moto G4 must be on Nougat firmware with NPJS25.93-14-18 build number in order to sideload the Android Oreo OTA provided on this page. You can install this by flashing the NPJS25.93-14-18 factory image (link in prerequisites). For which, your phone must have an unlocked bootloader.
When I choose update from sd card and select update and it’s shows internal and external storage cannot be mounted PLZZZZ HELP AND REPLY 😶 build no.NPJS25.93-14.7-8
Shyam, in order to sideload the OTA, your phone must be on “NPJS25.93-14-18” build number. Else the OTA will not work.
As for the error, if the recovery cannot mount the storage, you might want to try using ADB sideload as shown in this tutorial.
My recommendation would be to skip all that trouble and flash the “OPJ28.111-22-1” fastboot ROM directly from this XDA thread. Make sure that your phone’s model number matches with the ones mentioned on that thread.
Is there any good custom rom for moto g4 plus oreo version. If there please let me know.Thank you
Hi Navin. The Moto G4 Plus development scene isn’t much now. However, there are a few ROMs that you could try. I would personally suggest trying OmniROM and crDroid, in that order. Omni’s userbase is quite good, and people seem to have had a good experience out of it, compared to other Android Pie ROMs.
Hello
I have rooted my device and installed an oreo version and screenshot attached please check it out so i want to upgrade it.
And i have questions that Do I have to download both files?
You have given 2 files links above. One is blur athene and 2nd one is twrp oreo update .
Waiting for your reply.
Thanks
Hi Chaitanya. It’s 111-22, which is the December security update and the latest one.
You just have to download the TWRP flashable version of the ROM (TWRP-athene-8.1.0-OPJ28.111-22.zip) and flash it via TWRP. For further retaining root, you will need to flash the Magisk ZIP right after flashing the ROM before you reboot the phone.
If you have any more questions, please feel free to let me know.
Should i install gapps after flashing via TWRP?
Hi Sachin. No need for that since the stock firmware comes with pre-installed GApps.