In this article, we will take you through the complete process on how to root Huawei P20 Pro and install TWRP recovery on it.
Advertisement
Huawei took the smartphone market last month with the set of the latest P series devices. Of the trio, the P20 and P20 Pro are tagged among the premium flagships. These are already known for packing in a very powerful hardware and the latest EMUI software based on Android 8.1 Oreo, that’s focused on AI and machine learning technology. The devices have also received the highest DxOMark score (102 and 109) surpassing some known flagships including Galaxy S9 Plus and Google Pixel 2. While the software experience is great, certain users might still want to step further and root Huawei P20 Pro/Huawei P20. The extensive tutorial below will take you through the complete process, step-by-step.
Page Contents
Guide to Root Huawei P20 Pro and Install TWRP Recovery
Judging by the hardware configuration, software, and all the unique features, the latest Huawei flagships have all the potential to stand against the competitors. While the devices have only started reaching a few markets till now, the community is making solid progress towards third-party development. XDA senior member Pretoriano80 has already managed to compile and release TWRP Recovery for the said devices.
Advertisement
Update (12 June 2018): Official TWRP recovery for Huawei P20 Pro is now available for download. Download link and instructions have been updated.
Advertisement
Which means you can easily install TWRP recovery on Huawei P20 Pro/Huawei P20 and use it too root the device. So far, there’s no information on when the P20 will be added to the official TWRP support list. But with the momentum we are seeing, it doesn’t seem to be too far away.
Rooting the phone is a three-step process. The first step is to unlock the phone’s bootloader, which will enable the user to flash TWRP recovery (second step). Afterward, you can flash Magisk installer ZIP using TWRP to root Huawei P20 Pro and Huawei P20.
Prerequisites
- Perform a full backup of the data on your device. You can follow our guide on how to backup Android devices.
- Charge your Huawei device to at least 60% battery level to avoid any shutdowns during the rooting process.
- Install ADB/Fastboot tools on the PC.
- Download TWRP Recovery IMG for the device:
- twrp-3.2.1-0-charlotte.img (P20 Pro – Unofficial)
- twrp-3.2.1-0-charlotte.img (P20 Pro – Official TWRP)
-
twrp_p20_0.1 .img (P20)
- Copy the downloaded IMG file to C:/adb. This is the folder on your PC, where the ADB/Fastboot binaries are present.
Unlock Huawei P20 Pro Bootloader
Now, the first step in order to root Huawei P20 Pro/Huawei P20 is to unlock the phone’s bootloader. This will allow you to manually flash the TWRP recovery image using Fastboot. Note that this process will completely erase the device. First, make sure to enable OEM unlocking on the phone. Then go ahead and follow our tutorial on how to unlock bootloader on Huawei P20.
Advertisement
Install TWRP Recovery on Huawei P20 Pro
- Go to C:\adb on the PC.
- This is the folder where the Android SDK tool binaries are present.
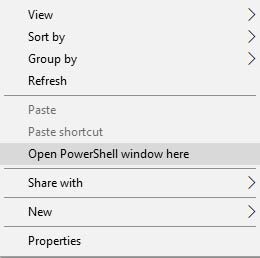
- Hold the SHIFT key on the keyboard and right-click on an empty space inside the folder.
- Select the ‘Open PowerShell window here’ option.
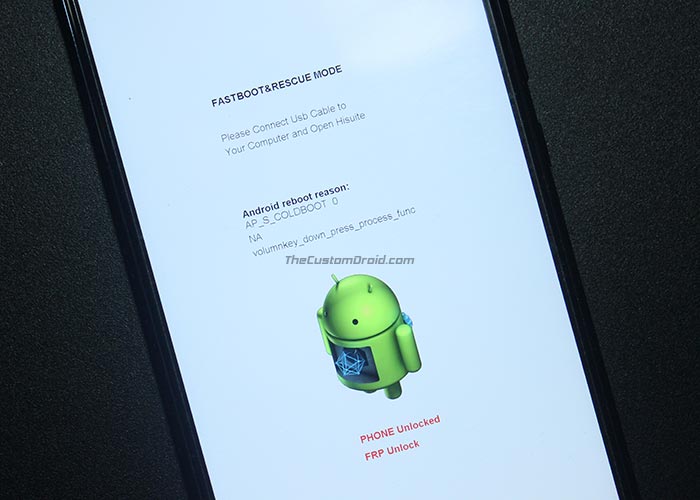
- Power off the Huawei P20 completely.
- Connect the device to the PC while holding the Volume Down key.
- The Huawei device should now be in Fastboot mode.
- Execute the following command to install TWRP recovery on Huawei P20:
fastboot flash recovery_ramdisk twrp_p20_0.1.img
- To install TWRP recovery on Huawei P20 Pro, use the following:
fastboot flash recovery_ramdisk twrp-3.2.1-0-charlotte.img
- Finally, reboot your device using:
fastboot reboot
Now move towards the third and the last step in order to root Huawei P20 Pro and Huawei P20.
How to Root Huawei P20 Pro?
- Download latest Magisk or SuperSU ZIP file.
- Copy the downloaded files to the phone’s storage or SD card.
- Disconnect the phone and power it off.
- Hold the Volume Up and Power keys simultaneously to enter TWRP recovery mode.
- Swipe the button on the ‘Unmodified system partition’ warning.
- Tap on the ‘Install’ button.
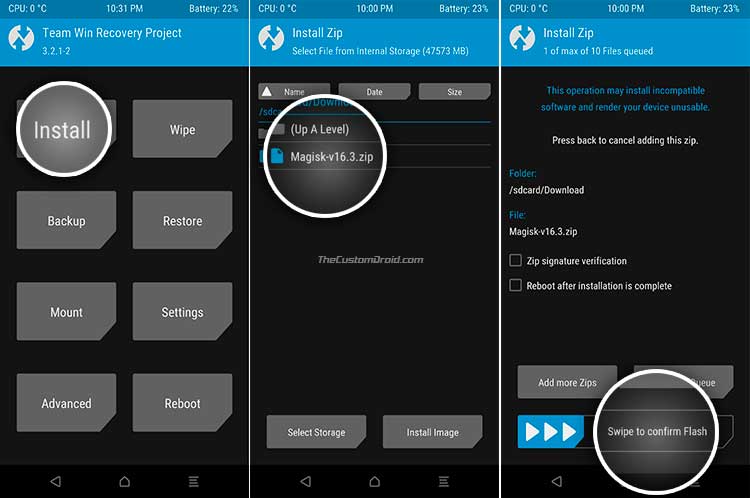
- Navigate to the storage and select the Magisk/SuperSU ZIP file.
- Finally, swipe the button on the screen to root Huawei P20 Pro/Huawei P20.
- When finished, press ‘Reboot System’.
Your Huawei device should now reboot into the OS. You can now take its advantage to install Magisk modules or mods like Dolby Atmos, ViPER4Android, and Xposed Framework on the device. Rooting gives you complete control over the system, which means you now have the privilege to modify the software according to your terms.
Advertisement
So you have just been able to root Huawei P20 Pro and Huawei P20. If you have any questions regarding the process, then leave us a comment.
Comments 10 Comments
Comments are moderated, and published only if they are relevant to the topic and add value in a constructive way. If you disagree with something, please be polite and respectful. We suggest you read our comment policy before commenting.
hello,
I know this article is old but I hope it will work for me still.
I have huawei p20 pro EMUI 9.1
I did everything as you wrote, I only face 1 problem which is I can not locate Magisk zip in the twrp boot. all the folders have mangled names.
please tell me how to locate the zip file.
Hi Zac. That’s because the storage is encrypted and TWRP cannot decrypt it. I tried researching on XDA forums, but couldn’t find a TWRP build that supports EMUI 9.
For now, you can install Magisk by doing the following:
1) Download the latest Magisk v20.3 from here and copy it to the folder where ADB/Fastboot are installed.
2) Then connect your phone to the PC (while it’s in TWRP) mode.
3) In TWRP, go to ‘Advanced’ and enable ‘ADB Sideload’.
4) Then, enter the following command on PC:
.\adb sideload Magisk-v20.3.zipThis should allow you to flash Magisk and root the phone.
In /sdcard I can’t see real folder names just randomly words and numbers and I can’t find anywhere magisk-16.4.zip
Hi John, that’s because the storage is encrypted. Please remove the PIN/Pattern/Password lock and set it to Swipe. Then go into TWRP and try again.
These instructions, while well intended and well written, don’t seem to work as written. Although you can unlock the bootloader and install TWRP, you can’t use TWRP to backup the existing image before attempting to flash a new image because you get Permission Denied error backing up to /data partition.
Then you can’t use “adb push” or a drag-n-drop transfer to transfer the the Magisk zip file to the device because all writeable partitions are encrypted, so the filenames are mangled, and all non-encrypted partitions are mounted read-only and we can’t change that until we have root privileges. “adb root” doesn’t work.
You could possibly use TWRP to wiping and reformatting the /data partition (which is wruteable) and remount it unencrypted, but that would wipe system info so you will also have to flash public and HW zips after formatting /data, because files in /data/hw_init are removed which are needed for themes to work and ‘System Update’ and a few other apps. This might be possible, but that would need different instructions.
Hi Dean, thanks for taking the time and explaining the whole situation. There are a few things that I can suggest right now.
1) The Huawei P20 Pro has recently received official TWRP support. Though, I am not exactly sure which one of the both – unofficial or official builds support encryption.
2) The partition and the files/folders inside it will be scrambled. To resolve this, simply boot into the OS and remove any PIN/PASSWORD/Pattern lockscreen. Once disabled, reboot back into the recovery and make sure to allow for modifications. Once done, TWRP should easily be able to decrypt your phone’s storage.
thanks Dhananjay for the tip on removing the PIN/password/pattern.
This doesn’t work to get past encryption in the /data partition (we are running as user “shell” but /data is owned by root.root with permissions rwxrwx–x so we still get “Permission Denied” trying to navigate into /data ).
I couldn’t find a way to download the zip file while the device is booted into the OS. However, here’s a workaround…
When booted to the OS there is no /tmp directory. However when booted into recovery, there is a /tmp directory owned by root.shell, so we *can* write to it.
So the instructions for installing Magisk are to boot to recovery, then use TWRP to mount all partitions, then use adb push to push the Magisk.zip file to /tmp/Magisk.zip, and then use TWRP Install to install /tmp/Magisk.zip.
That works 🙂
Wow! Thanks for all the thorough research and the solution! Have you also given a try to ADB sideload in TWRP?
can you provide the steps do it ?
For ADB sideload in TWRP? Here:
1) Go to TWRP > Advanced > Sideload and enable it
2) After enabling, connect the phone to the PC using the USB cable.
3) Open a PowerShell/Terminal window inside the folder where the Magisk zip file is present.
4) Finally, execute the following command: adb sideload Magisk-v18.0.zip