How to Root Google Pixel 3a and Pixel 3a XL using Magisk
In this guide, we will show you how to root Google Pixel 3a and Pixel 3a XL. You will start by first unlocking the bootloader on Pixel 3a (XL) and finally gain

On this page
In this guide, we will show you how to root Google Pixel 3a and Pixel 3a XL. You will start by first unlocking the bootloader on Pixel 3a (XL) and finally gain root access on it using Magisk.
While Google Pixel devices are known to be one of the best smartphones, they also come with a hefty price tag. But this year, Google decided to play the odds and brought the same Pixel experience at an affordable price through the Google Pixel 3a and 3a XL. The devices are a clear example that users can still enjoy the same flagship-level experience without having to reach deep into their pockets.
The all-new Pixel 3a and 3a XL share the same developer-friendly nature as any other Pixel device. This means, the software on these devices can easily be modified. This helps users to play around with the software, add more features to it according to their needs, tweak the kernel to flush out more performance or battery life, flash custom ROMs, etc. And since you’re here, we will assume that you are in for it. So, let’s get on with it!
The foremost requirement for modifying any Android phone’s software is to unlock the bootloader. Unlocking the bootloader on Pixel 3a/Pixel 3a XL will grant you the ability to flash the device partitions. So, once that is done, you can easily root the phone using Magisk, by flashing the patched boot image.
UPDATE: TWRP for Google Pixel 3a and Pixel 3a XL is now available. With that, you can use an alternative method to root your Pixel phone by flashing the latest Magisk Installer zip.
Rooting your Google Pixel 3a/Pixel 3a XL using Magisk has several advantages. For instance, you can easily pass SafetyNet which will otherwise prevent you from using certain apps. Further, you can also use MagiskHide feature to cloak root from certain apps/games that might not work normally on a rooted phone. Magisk also supports modules that could help you add third-party features to your phone without modifying the /system partition. These are just a few of the advantages of using Magisk to root your Pixel 3a device.
Before we get on with the procedure, let’s talk about root and OTA updates in the case of the Pixel 3a series. Back in the day, you wouldn’t have been able to install OTA updates on a rooted Android phone, but that’s not the case now, thanks to Magisk. The procedure mentioned below makes use of a special installation method for Magisk which makes it very easy to take OTA updates on a rooted phone.
The process involves downloading the stock boot image for your phone and then patching it using Magisk Manager. Once done, you can easily flash the patched boot image via fastboot to root Google Pixel 3 and Pixel 3a XL using Magisk.
Requirements
- Unlocking the bootloader, which is the first step in this guide, will format your phone completely. This means you will lose all your data including messages, apps, contacts, and even the internal storage. So, we strongly recommend that you take a full backup of all your data stored on the phone first.
- Make sure that you charge your Pixel 3a to a sufficient battery level. This shall help avoid any sudden shutdowns during the bootloader unlocking and rooting process.
- The process of both unlocking the bootloader and rooting the Pixel 3a/Pixel 3a XL requires the use of Android SDK platform-tools (ADB and fastboot). We also have a guide on how to install them on your PC.
- During this tutorial, we will often refer to ‘C:\adb’, which is the folder where you’d have installed the platform-tools if you followed our guide. If you installed it elsewhere, then make sure that you omit the folder’s location wherever it is mentioned.
- In order to unlock the bootloader, you must first enable the ‘OEM Unlocking’ toggle in ‘Developer Options’. If you’re not sure how to do that, you can follow our step-by-step tutorial for it.
- Make sure that you install the proper USB drivers on your PC.
Downloads
Make sure to download the boot image corresponding to the build number installed on your Pixel device.
- Stock Boot Images for Pixel 3a (codename: sargo)
- Android 9 Pie - March 2019 (Build number: PD2A.190115.032): Download link
- Android 9 Pie - June 2019 (Build number: PQ3B.190605.006): Download link
- Android 9 Pie - July 2019 (Build number: PQ3B.190705.003): Download link
- Android 9 Pie - August 2019 (Build number: PQ3B.190801.002): Download link
- Android 10 Q - September 2019 (Build number: QP1A.190711.020): Download link
- Android 10 Q - October 2019 (Build number: QP1A.191005.007): Download link
- Android 10 Q - November 2019 (Build number: QP1A.191105.003): Download link
- Android 10 Q - December 2019 (Build number: QQ1A.191205.011): Download link
- Android 10 Q - January 2020 (Build number: QQ1A.200105.002): Download link
- Stock Boot Images for Pixel 3a XL (codename: bonito):
- Android 9 Pie - March 2019 (Build number: PD2A.190115.032): Download link
- Android 9 Pie - June 2019 (Build number: PQ3B.190605.006): Download link
- Android 9 Pie - July 2019 (Build number: PQ3B.190705.003): Download link
- Android 9 Pie - August 2019 (Build number: PQ3B.190801.002): Download link
- Android 10 Q - September 2019 (Build number: QP1A.190711.020): Download link
- Android 10 Q - October 2019 (Build number: QP1A.191005.007): Download link
- Android 10 Q - November 2019 (Build number: QP1A.191105.003): Download link
- Android 10 Q - December 2019 (Build number: QQ1A.191205.011): Download link
- Android 10 Q - January 2020 (Build number: QQ1A.200105.002): Download link
- Latest Magisk Manager APK: MagiskManager-v7.5.1.apk | Check for the latest version here
Note: While we’ll try our best to keep this section updated with the latest stock boot images, it might not always be possible to do so. If you’re running a newer software version, you can download the corresponding factory image from here and extract the stock boot image from it.
Instructions to Root Google Pixel 3a and Pixel 3a XL using Magisk
For added convenience and better understanding, we have split the guide into three steps. The first step involves unlocking the bootloader on the Pixel 3a/Pixel 3a XL. Once unlocked, you can download the stock boot image for your phone and patch it using Magisk Manager. Finally, when all that is done, you can flash the patched boot image to root your Google Pixel 3a/Pixel 3a XL.
Step 1: Unlock the Bootloader
- Go to ‘Settings’ > ‘About phone’ on your Pixel 3a.
- Continuously tap on the ‘Build number’ section for 5 times to enable the ‘Developer options’.
- Once enabled, you should see the ‘You’re now a developer!’ message on the phone’s screen.
- Now go back to the Settings menu and tap on ‘Developer options’.
- Turn on the ‘OEM Unlocking’ option.
- After you have successfully enabled the option, power off your phone completely.
- Hold the Volume Down and Power buttons together to boot your Pixel 3a into the Bootloader Mode.
-
Connect your phone to the PC using the USB cable.
-
On your PC, go to the folder where the Android Platform Tools are installed (e.g. C:\adb).
-
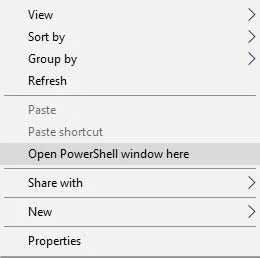
While holding the SHIFT key, right-click on any empty space inside the folder.
-
Select the ‘Open PowerShell window here’ option.
-
Enter the following command to ensure that your Pixel device is correctly being detected by the PC over fastboot:
fastboot devices
-
The command should return the device ID. If it does, make sure that you have installed the proper USB drivers for your phone.
-
Now, enter the following command to initiate the bootloader unlocking process:
fastboot flashing unlock
-
As soon as the command is entered, you should see the confirmation message on your phone’s screen.
- Tap the Volume button until the ‘Unlock the bootloader’ option shows up on the screen.
- Finally, press the Power button to confirm and unlock the bootloader on your Google Pixel 3a/Pixel 3a XL.
Once the bootloader unlocking process finishes, your phone will be wiped completely and will reboot into Bootloader Mode. Simply press the Power button once to boot your phone into the OS.
So now that the phone’s bootloader is unlocked, you can move over to step #2 to patch the stock boot image using Magisk Manager.
Step 2: Patch the Stock Boot Image
In order to root your Google Pixel 3a/Pixel 3a XL, you must download the stock boot image and patch it using Magisk Manager. To do so, follow the instructions laid below.
- Download the stock boot image for your Pixel 3a/Pixel 3a XL.
- Ensure that you download the boot image corresponding to the software build number presently installed on your phone.
- Connect your phone to the PC and transfer the downloaded boot image to the phone’s internal storage.
- Once transferred, disconnect the phone from the PC.
- Next, download the latest Magisk Manager APK and install it on your phone.
- Once installed, go to the app drawer and launch the Magisk Manager app on your Pixel 3a (XL).
- Tap on the ‘Install’ button and then again on ‘Install’.
- Select the ‘Select and Patch a File’ option.
- Now navigate to the internal storage and select the stock boot image file.
- Magisk will now start patching the stock boot image.
Once the patching process finishes, the Magisk Patched Boot Image for your Pixel 3a/3a XL will be stored in [internal storage]/Download. Simply connect your phone to the PC and transfer the patched boot image (magisk_patched.img) file over.
Step 3: Flash the Patched Boot Image to Root Google Pixel 3a/Pixel 3a XL
Now that you have the Magisk Patched Boot Image, you can flash it using fastboot to root your Google Pixel 3a/Pixel 3a XL. Just follow the instructions below:
- Copy the patched boot image to the folder where the Android SDK platform-tools are installed (e.g. C:\adb).
- Hold the SHIFT key and right-click on an empty space inside this folder.
- Select ‘Open PowerShell window here’ to launch the PowerShell on your PC.
-
Power off your Google Pixel 3a/Pixel 3a XL completely.
-
Boot your phone into Bootloader Mode by pressing and holding the Volume Down and Power buttons together.
-
Once the phone is in Bootloader Mode, connect it to the PC via the USB cable.
-
Enter the following command in the PowerShell window to ensure that your phone is successfully being detected by fastboot:
fastboot devices
-
The command should return a device ID. If it doesn’t, ensure that you have installed the appropriate USB drivers on your PC.
-
Now, enter the command below to flash the Magisk Patched Boot Image and root your Google Pixel 3a/Pixel 3a XL:
fastboot flash boot magisk_patched.img
-
Once flashed, reboot your phone using:
fastboot reboot
Your Pixel 3a/Pixel 3a XL should now be rooted with Magisk. Once your phone boots into the OS, you should see ‘Magisk Manager’ in the app drawer.
Now that you have root, you can go ahead and install some root-enabled apps like ‘Kernel Adiutor’ to tweak your phone’s kernel for enhanced performance and battery life. You can install Magisk Modules to gain some extra features within the OS. and use MagiskHide to hide root from certain apps. You can also install audio mods like ViPER4Android easily.
Rooting your phone via Magisk also gives you the ability to take OTA updates while maintaining root. If an update arrives, you can refer to the instructions mentioned here to safely install it.
More on Google Pixel
So, this was our detailed tutorial on how to unlock bootloader and root Google Pixel 3a/Pixel 3a XL using Magisk. If you have any questions regarding the instructions or the method, let us know through the comments.
Comments
Comments are moderated, and published only if they are relevant to the topic and add value in a constructive way. If you disagree with something, please be polite and respectful. We suggest you read our comment policy before commenting.