In this tutorial, we will show you how you can easily install TWRP recovery and root Samsung Galaxy A6/A6+ (2018) running Android Pie and Oreo.
Advertisement
The recently launched Samsung Galaxy A6 is a mid-range smartphone, which continues in the footsteps of the A-series. It sports a 5.6″ Super AMOLED display, powered by an Exynos 7870 chip, coupled with 3/4GB of RAM, and comes with storage options of 32GB/64GB, running Android 8.0 Oreo out-of-the-box.
Despite the decent hardware configuration, I’m personally not a big fan of the amount of bloatware Samsung saddles all its devices with. You would be pleased to know that, an unofficial TWRP recovery for Galaxy A6 and A6+ is now available, thanks to XDA senior member BlackMesa123 and ashyx.
Updated on 19 June 2019: KG/RMM Bypass v3 zip is now available, thanks to XDA Developer corsicanu! With this available, you can now easily prevent KG/RMM Prenormal State on your Galaxy A6/A6+ running Android Pie and Oreo. If you do not understand what KnoxGuard (KG)/RMM state is, we recommend that you go through this post.
Here’s a handy guide that will help you install TWRP recovery on Samsung Galaxy A6/A6+. Post that, you can easily use Magisk to root Samsung Galaxy A6/A6+ (2018) and get rid of all the unwanted apps, use root-enabled apps or mods like Dolby Atmos, or just to get some additional features.
Advertisement
Advertisement
Disclaimer & Warning
- This guide is ONLY meant only for the SM-A600* and SM-A605* models. Please do not attempt to use these files or steps if your model is different.
- Rooting will void the warranty permanently. KNOX dependent apps like Samsung Pay and Secure Folder will no longer function, even if the device is unrooted/flashed back to stock later.
- Installing TWRP and rooting your Galaxy A6/A6+ on Android Pie will break Samsung Account and secure lock screen (PIN, Fingerprint, etc) functionality. This issue might be fixed in the future. So, only follow the procedure if you can cope up with the said issue.
Page Contents
Before You Begin
Make sure that you fulfill all the requirements before you head down to the instructions and root Samsung Galaxy A6/A6+ (2018).
Advertisement
- First and foremost, ensure that you take a full backup of all the data on your phone. This includes messages, contacts, and everything else that you feel necessary. We also have a tutorial that will help you backup your data with ease.
- Charge the battery to at least 70%, so as to avoid the device shutting down during the process.
- Download and install the latest Samsung USB drivers.
- Enable USB debugging on Galaxy A6: To do so, go to the device ‘Settings’ -> ‘About phone’ -> ‘Software information’. Then tap on the ‘Build Number’ continuously until ‘Developer mode has been enabled.’ message appears on the screen.
- Also, enable OEM Unlocking in Developer Options. For that, go to ‘Settings’ -> ‘Aditional settings’ and tap on ‘Developer options’. Scroll down and enable the ‘OEM Unlock’ toggle. If the OEM unlock toggle is missing, then you also check out this tutorial.
- Download and extract the Odin 3.13.1 on your PC.
Downloads
- TWRP Recovery for Samsung Galaxy A6 (SM-A600): TWRP-3.2.3-TwrpBuilder-a6ltexx-2018-11-26_20-43.tar
- TWRP Recovery for Samsung Galaxy A6+ (SM-A605): twrp_3.2.3-2_sm-a6plte_191118.tar
- RMM Bypass: RMM_Bypass_v3_corsicanu.zip – This fixes the KG/RMM State – Pre-Normal issue (OEM unlock disappearing after reboot) on Samsung devices
- DM Verity fix: no-verity-opt-encrypt-6.1.zip
- Latest Magisk Installer zip: Magisk-v20.0.zip (Optionally, check for the latest available version here)
- Latest Odin flash tool: Odin v3.13.1.zip
Install TWRP Recovery on Samsung Galaxy A6/A6+ (2018)
- Download TWRP Recovery image for Samsung Galaxy A6/A6+.
- Switch off your phone completely.
- While the phone is powered down, hold the Volume Down, Volume Up and Power button to enter Download Mode.
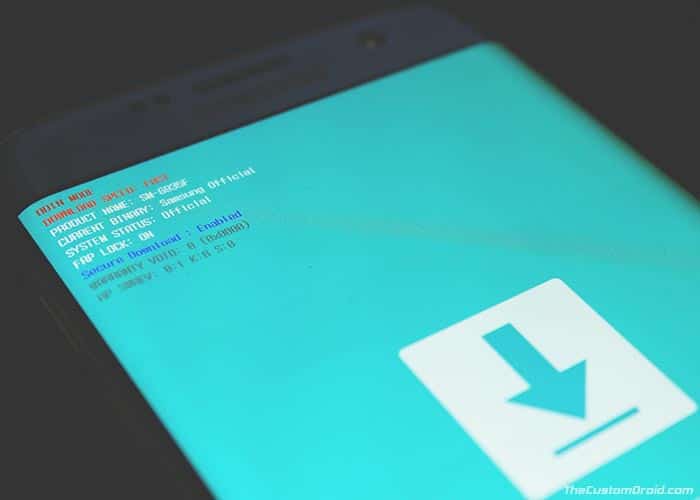
- With the Galaxy A6/A6+ in Download Mode, connect it to the PC via the USB cable.
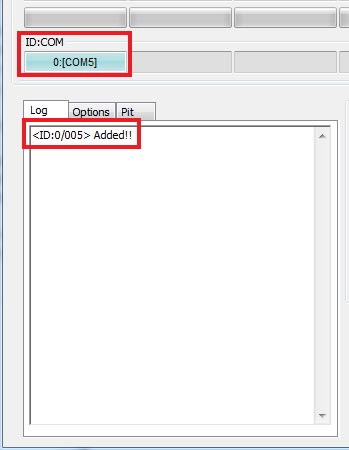
- Launch Odin Flash tool by double-clicking on the ‘Odin3 3.13.1.exe’ file. Make sure the device is detected, and the COM port at the top left of the screen is blue.
- Click on the ‘AP’ button and select the ‘TWRP-3.2.3-TwrpBuilder-a6ltexx-2018-08-21_14-37.tar‘ file for the Galaxy A6 (SM-A600) or ‘twrp_3.2.3-2_sm-a6plte_191118.tar‘ file for the Galaxy A6+ (SM-A605).
- Make sure that ‘F.Reset Time’ and ‘Auto-reboot’ options are selected in Odin’s options.
- While holding the Volume Up and Power buttons together, click on the ‘Start’ button to install TWRP recovery on Samsung Galaxy A6/A6+ 2018.
Important!: Keep holding the buttons even after the flashing process finishes. This will make sure that your phone directly boots into TWRP. If not, then DM-Verity and Prenormal RMM/KG State will trigger and you will have to wait for another 7 days until you can flash something.
Your phone should now enter the TWRP recovery mode. Now head down to the next section to finally root Samsung Galaxy A6/A6+ (2018) using Magisk.
Root Samsung Galaxy A6/A6+ (2018)
- On the ‘Unmodified System Partition’ screen, swipe to allow modifications.
- Now go to ‘Wipe‘ -> ‘Format Data‘. Type ‘yes‘ in the field to confirm the wiping of /data partition and hit Enter. This will completely erase all the data on the device.

- Go back to the TWRP home screen, then tap on ‘Reboot‘, and then on ‘Recovery‘.
- Next, go to ‘Mount’ and press the ‘Enable MTP’ button.
- Connect the Galaxy A6 to the PC using the USB cable.
- Transfer the RMM Bypass, DM Verity fix and the latest Magisk installer zip files to the internal storage.
- In the TWRP main menu, tap the ‘Install’ button and first select the ‘RMM_Bypass_v3_corsicanu.zip‘ and swipe to confirm the installation
- Press the back button once, and flash the ‘no-verity-opt-encrypt-6.1.zip‘ file.
- Lastly, flash the ‘Magisk-v20.0.zip‘ file to root Samsung Galaxy A6/A6+ (2018).
- When the flashing process finishes, tap the ‘Reboot System’ button.
Once your Galaxy A6 boots set it up by following the on-screen instructions. You should now see Magisk Manager among other apps. If you want to verify if your device has been successfully rooted, download and run the Root Checker app from the Play Store. Now that your phone is rooted, you can start using root-enabled apps, install Magisk modules to add extra features or use MagiskHide to hide root from certain apps.
Advertisement
Rooting via Magisk also makes it easier to install OTA updates on your rooted phone. To know more, check out the instructions in this guide.
So, this was our tutorial on how to install TWRP recovery and root Samsung Galaxy A6/A6+ (2018). If you have any questions or get stuck at any step, feel free to drop a comment below, and we will try our best to help you out.
Comments 28 Comments
Comments are moderated, and published only if they are relevant to the topic and add value in a constructive way. If you disagree with something, please be polite and respectful. We suggest you read our comment policy before commenting.
Most useless tutorial. Waste of time. Why on this earth someone would want to install TWRP on their working phone? One generally need to do this on non-working (bricked) phones to recover data. And on bricked phones we cannot enable USB debugging (if not already), because phone is BRICKED. Period.
Hi Ashish. Well, people install TWRP not to recover data primarily, but because they want to install custom ROMs, kernels, other flashable mods, root binaries, take NANDroid backups, etc. Custom recoveries like TWRP, ClockWorkMod, etc were developed for this purpose alone.
Yes, users who are new to the modding scene, would consider “TWRP Recovery” as a data recovery tool as it includes the word “recovery” in it. However, that isn’t the case.
As for the thing you pointed out about USB debugging, there’s no need to enable it when flashing TWRP or rooting your phone. The only purpose USB debugging can serve is to allow you to boot your phone into Download Mode using ADB commands. If the phone’s bricked, one can simply use the button sequence as mentioned in the instructions above to boot their phone into Download Mode.
EDIT: You can also refer to Wikipedia to know what TWRP is.
hi guys thanks for all your job!!!
but i’ve faced a problem with this TWRP when flashing it. Odin shows failed so i want to know if it’s also compatible with the samsung A600P SPR
thanks
Hi mwaka. The ones provided here are for the International variant running Exynos 7870 SoC, while your phone has 7874.
Please try this TWRP recovery image on your device. The instructions and rest of the files are the same. Let me know if you succeed.
One more thing, before everything else, boot your phone into Download mode and check the current RMM state first.
ok. so the problem im having is it wont boot into twrp recovery. ive got all the correct files and applications. after I press start it passes but when I force restart it, it stays on Samsung logo. ive read that sometimes it can take up to 20 minutes. if that’s the case should I be holding volume up and power the whole time tell I see twrp. is there a way I can install it using magisk manager. cause I have successfully rooted my device
Hi Kevin. You will need to hold the Volume Up + Power buttons right from the moment when you click the ‘Start’ button in Odin and keep holding the buttons until you see the TWRP splashscreen.
hey guys, just a quick question,
i need the magisk root and that works fine,
but for my purposese i need smali module installed in magisk, fine so far but….. when i restart its bootloop forever….
im on stock rom on a605fn
no custom lineage or whatsoever or an other sollution?
kind regards, Peter.
Hi Peter. I have tried researching the official Magisk Module thread and found some instances where certain users faced the same bootloop issue. For a majority of them, it was specific to the Samsung stock firmware. While another user was able to fix it by unticking “signature spoofing” while patching. References: 1, 2, 3, and 4.
Try going through a few posts above and below each referenced post. It might help.
I have personally never used this specific module. So, I couldn’t provide any technical help regarding it. However, it would be better if you could further take logs and provide them to the developer on the original XDA thread itself. Someone else with more expertise with the module + Samsung devices might be able to help. May be the developer himself.
It actually worked! I had to connect the usb cable to enter download mode! Now I’m rooted! Thanks for everything.
I believe you don’t need to wait 7 days if you use your gmail account.
Nice to hear that Moses! Actually the seven days period is necessary unless Prenromal/KnoxGuard state is triggered. In your case, you did everything to the point, and hence, you didn’t need to wait for seven days.
Hello,
I recently bought a Samsung A6 ( SM-A600FZKNXEF). Before beginning to use it, I tried to install TWRP for backup ( not interested to root it for the moment). I followed the procedure but unfortunately, it did not work for me. After I installed TWRP and fix for RMM, the phone was rebooting indefinitely. Luckily, I was able to flash an official ROM.
Did someone already face this issue?
Hi Abdelaziz. That’s because DM-Verity was triggered. It is supposed to be that way.
So, once you have TWRP installed, boot directly into it. Then flash the RMM/KG State bypass and no-verity-opt-encrypt zip files. The former will make sure that your Galaxy A6 does not enter Prenormal RMM/KG state and the latter will prevent DM-Verity to be triggered.
To sum up, you can simply skip the Magisk installation part and follow the rest of the instructions as mentioned.
Hey, I’ve got a little issue here, when I flash TWRP to my device (A6+), reboot and press volume up to approve “custom OS”, the device just goes into download mode and it says
“Downloading… Do not turn off target
Volume Down Key + Power Key for more than 7 secs : Cancel (restart phone)”
in the centre of the screen. What do I do? Thanks in advance.
Hi. While your phone is in Download Mode, connect it to the PC and run Odin tool again. Then, select the TWRP file.
Now, pay attention to step #8 above: Make sure to hold the Volume Up and Volume Down buttons together and then click on the ‘Start’ button in Odin. Keep holding the buttons until your phone reboots and enters the TWRP recovery mode.
Removing the cable from phone after odin finishes worked for me
Hi, Thanks for the detailed steps but I got stuck at the very begining:
I was on stock unrooted firmware and I waited for the OEM unlock option to show. After it showed up, i turned it one. The device wanted to reset to factory settings and it restarted.
After the first boot the OEM option disappeared.
But when I went to the download mode I found that:
FRP lock : off
OEM lock : off
RMM state : prenormal
When I tried to install twrp it said: only official binaries are allowed to be flashed.
Should I wait for another 7 days for the OEM to show up again to turn it on?
Or what should I do?
Thanks in advance.
Hi Bassem Baraya, I believe you would have solved the issue by now. Sorry for the late response.
If not yet, then yes. As you have mentioned, the “RMM State” is now set to “Prernormal”. Which means you need to wait for another 7 days until the RMM state turns back to normal and the OEM Unlock toggle should re-appear.
One thing to take care of, is that during this 7 days period your phone should be connected to internet (mobile data or WiFi) and shouldn’t be powered off or rebooted.
Hi again, thanks for the reply.
Yes, it was fixed by now, but unfortunately I can’t root my phone on android 9 because I use samsung account and I can’t give up using the lockscreen. so, I’m waiting for a fix, or else I’ll have to downgrade and re-root.
Thanks again for your reply 🙂 and thanks for the guide.
Hey when I flash the twrp file and boot to recovery mode, twrp fails to do anything it fails to mount so it fails to install zips and as a reasult I have to flash the stock firmware to accually boot into os am i doing anything wrong ?
Hi Manos! That’s because you first need to format the userdata to decrypt the storage, so that the recovery could mount the partition. After that, you will be able to flash the zip files. To do that, go to ‘Wipe’ > ‘Format Data’ in TWRP and then type in “Yes” in the provided field.
I turn on the OEM unlock and it says the phone will factory reset (i thought doing this the OEM will enable and i don’t have any choice) after factory reset then i check to developer options and the OEM unluck is missing. my question is, are the OEM unlock enable or disable?
Hi Yusuf. Samsung has recently been implementing a lot of security features to tighten things up. Basically, your phone has entered the ‘Prenormal’ RMM State, you can know more about it here.
You have to make sure that phone’s connected to the network and also do not reboot it in any case for straight 7 (seven) days. After that, the OEM unlock toggle should reappear and you should be able to flash TWRP and root the phone.
Earlier, there was a method to bypass this 7 day period. The method could be found here, although the trick was patched. But a recent user reported that he succeeded by performing an extra step after the instructions mentioned in our post.
Hello sir, after flashing twrp file in Odin in downloading…it pass but it doesn’t show teamwin in recovery…I tried everything sir…please tell what I am missing.
My OEM was unlocked by the way
Hi Faruk. Are you still facing this issue? If so, then before you press the ‘Start’ button in Odin during the TWRP installation instructions, ensure that you press and hold the Volume Up button. As soon as the flashing process finishes, your phone will reboot and will enter TWRP. Just make sure not to release the Volume Up and Power buttons together until you see the TWRP screen.
Sorry for the delayed response. It’s quite hard for me to manage all the comments in various posts.
Hello there , i’ve tried this method with my Galaxy a6 plus.
When i press the flash button on odim, the whole process fails with a message “ONLY OFFICIAL RELEASED BINARIES ARE ALLOWED TO BE FLASHED” on my device.
Mind you, i pressed and held volume up and down while pressing the Start button on odim.
What am i missing ??
Hi Salim. In order to flash TWRP or any custom binary, you must first enable the ‘OEM unlock’ option in Developer options.
Hi, thanks for the instructions. However, befor I begin:
1) do these instructions cover the A6+ model (SM-A605FN)?
2) can you recommend a rom to flash to get rid of the Samsung bloatware?
Hello. Initially, this guide was only for the A6 (A600). However, upon seeing your comment, I have now updated it and it now supports the A6+ (SM-A605) too. Thanks to the unofficial TWRP build posted by ashyx on XDA forums.
There aren’t any ROMs (that I could find) that support the A6+. With root, you can easily get rid of the bloatware. But if you are really interested in experimenting and since the A6+ supports Project Treble, you can try one of the ROMs available in XDA’s Project Treble section.