How to Install Samsung Galaxy Note 9 Android Pie (One UI) Update
After the Galaxy S9/S9+, Samsung has started rolling out Stable Android Pie Update for Galaxy Note 9.

On this page
After the Galaxy S9/S9+, Samsung has started rolling out Stable Android Pie Update for Galaxy Note 9. You can follow this guide to manually install Samsung Galaxy Note 9 Android Pie (One UI) Update right now. This could be easily done by sideloading the OTA package in stock recovery.
About a week ago, Samsung pushed Android Pie-based One UI for Galaxy Note 9 over-the-air. Initially, the update was only limited to the beta users, but recently SamMobile reported (Source: 1, 2) that it is now available for non-beta users in UAE and Germany as well. The new firmware comes with N960FXXU2CSA2 software version and OTA weighs about 1590 MB.
If you still haven’t got the OTA update notification, you can go to phone’s Settings > Software updates and tap on the Download Updates Manually button. If you still didn’t get it, then you can follow the instructions below to install Samsung Galaxy Note 9 Android Pie Update manually.
Editor
Samsung’s One UI on Galaxy Note 9
Samsung has done a tremendous job with its new stock OEM skin. Not only does it feels light, but it also looks clean as well. Unlike its predecessors, Samsung’s One UI focuses more on the user experience and makes it easier for users to get things done on their smartphones. Analyzing how users actually operate their smartphones, Samsung has changed the interface so that it significantly impacts navigation within the OS.
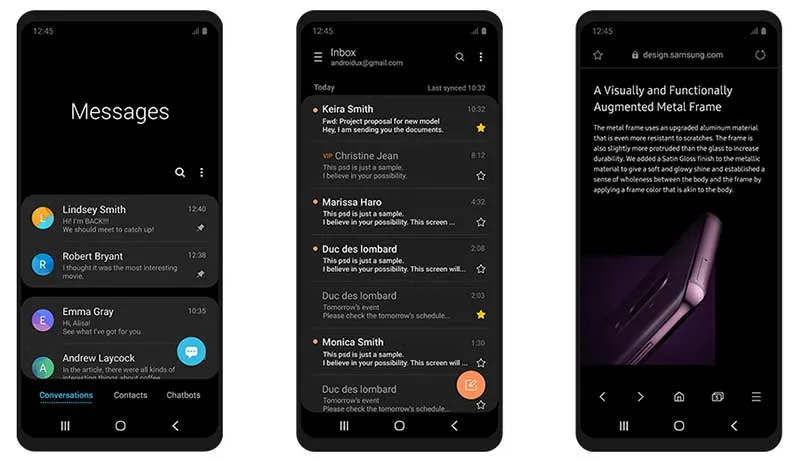
Not just that, the new minimal UI focuses on things-at-hand, which means there are no distractions when you’re doing something on the phone. On the other hand, system-wide Dark Mode in One UI aids in a very comfortable viewing experience. Once enabled, it adjusts the screen’s tone, brightness, and contrast that easies up on the eyes. Don’t forget to check out the list of all Samsung One UI features.
Overall, Android Pie-based One UI on Galaxy Note 9 is a massive update. Along with the standard Android Pie features, it also accommodates significant changes and brings new features to the OS.
Prerequisites
- The process below will not wipe any data. However, we still strongly recommend that you take a complete backup of all your data on the phone including the internal storage. You can also follow our Android backup guide for this purpose.
- Charge your Galaxy Note 9 to a sufficient battery level. This shall help avoid any sudden shutdowns during the update process.
- Make sure that you install Samsung USB drivers on your PC
- Important: On your phone, go to the security settings and delete your current fingerprint data. This shall be done in order to prevent corruption of secure data/fingerprints after the update.
- The provided Android Pie OTA packages will require you to be on a specific firmware on your Galaxy Note 9. It shall work as follows:
- For Galaxy Note 9 Exynos variant (N960F): ZRLT (Latest Pie Beta) > CRLT (First Android Pie update) > CSA2 (Second Android Pie update)
- For Galaxy Note 9 Snapdragon variant (N960U): ARJA/ARL1 (Android Oreo) > CSA7/CSB3 (Android Pie update)
- For Galaxy Note 9 US Carrier Snapdragon variant (N960U): ARL1 (Android Oreo) > CSB3 (Android Pie update)
Download Galaxy Note 9 Android Pie (One UI) Update
Odin Firmware
The fastest way to download latest Android Pie firmware for your Galaxy Note 9 (Exynos or Snapdragon) is by using the SamFirm tool. Simply download SamFirm tool and enter your phone’s model (e.g. SM-N960F, N960U, etc) and the product code (e.g. TMB, VZW, BTU, etc) and hit the download button.
Exynos Galaxy Note 9 (SM-N960F):
- With OXM-Multi CSC: Sammobile | SamFrew
- With OVF-Multi CSC: Sammobile | SamFrew
- With OGC-Multi CSC: Sammobile | SamFrew
Snapdragon Galaxy Note 9 (SM-N960U):
- CCT: Sammobile | SamFrew
- Sprint (SPR): Sammobile | SamFrew
- T-Mobile (TMB): Sammobile | SamFrew
- USC: Sammobile | SamFrew
- Verizon (VZW): Sammobile | SamFrew
Snapdragon Galaxy Note 9 (SM-N960U1):
- AT&T (ATT): Sammobile | SamFrew
- Bluegrass Cellular (LRA): Sammobile | SamFrew
- Nextech / C-Spire (ACG): Sammobile | SamFrew
- Sprint (SPR): Sammobile | SamFrew
- Tracfone (TFN): Sammobile | SamFrew
- T-Mobile (TMB): Sammobile | SamFrew
- USC: Sammobile | SamFrew
- Verizon (VZW): Sammobile | SamFrew
- Virgin Mobile USA (VMU): Sammobile | SamFrew
Snapdragon Galaxy Note 9 (SM-N960W):
- Canada (XAC): Sammobile | SamFrew
- EastLink (ESK): Sammobile | SamFrew
- Bell Mobile (BMC): Sammobile | SamFrew
- Bell-Internet (SOL): Sammobile | SamFrew
- Telus (TLS): Sammobile | SamFrew
- Videotron (VTR): Sammobile | SamFrew
- Virgin Mobile (VMC): Sammobile | SamFrew
- Koodo Mobile (KDO): Sammobile | SamFrew
- Fido Mobile (FMC): Sammobile | SamFrew
- SaskTel (BWA): Sammobile | SamFrew
- Rogers (RWC): Sammobile | SamFrew
- Canada MTB (MTB): Sammobile | SamFrew
- Globalive Wind Mobile (GLW): Sammobile | SamFrew
Snapdragon Galaxy Note 9 (SM-N9600):
OTA Package
The Android Pie OTA for the Exynos variant was provided by XDA Senior Member h**enklbr. Make sure to visit the XDA thread and press the ‘Thanks’ button for him. As for the Snapdragon variant, the OTA was captured and provided by the folks at firmware.science and XDA Senior Member tx_dbs_tx.
Galaxy Note 9 (Exynos - N960F):
- ARL3 (Android Oreo) > CSA2 (Stable Android Pie): Download link (It’s a “.bin” file, rename it to “update.zip” after download)
Galaxy Note 9 (Snapdragon - N960U):
- ARJA (Stable Android Oreo) > CSA7 (Stable Android Pie): Download link
- ARL1 (Stable Android Oreo) > CSB3 (Stable Android Pie; 2nd March): Download link
How to Install Samsung Galaxy Note 9 Android Pie Update
You can update your Galaxy Note 9 to Android Pie using two different methods. The first method will guide you to flash the Pie firmware using Odin Flash Tool, but it is only limited to the Note 9 Exynos (SM-N960F) variant for now. The second method will help you update your phone by manually installing the OTA package via stock recovery.
Method 1: Using Odin
- Download Galaxy Note 9 Android Pie (One UI) firmware
- Extract the downloaded firmware file on the PC
- Power off your phone completely
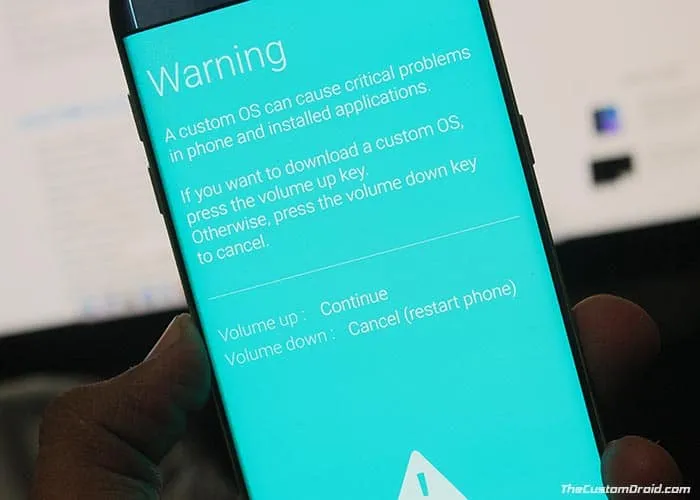
- Hold the Volume Down and Bixby buttons together and connect the USB cable
- Once the Warning screen appears, press the Volume Up button enter Download Mode on your Galaxy Note 9
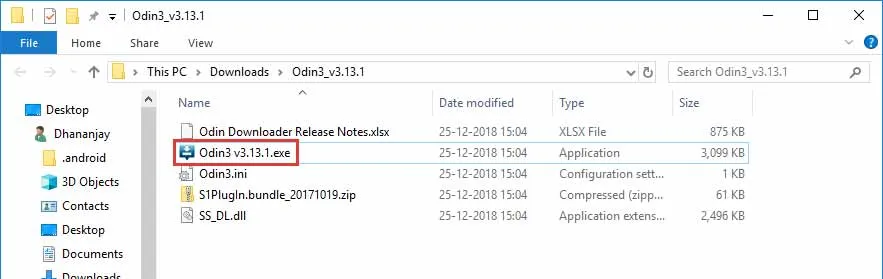
- Download the Odin 3.13.1 zip and extract it on the PC
- Double-click on ‘Odin3 3.13.1.exe’ file to run the Odin tool
- The ‘ID:COM’ port should light up ensuring that your phone is successfully detected by the tool
- Now, click on the ‘BL’ button in Odin and select the firmware file starting with ‘BL_N960FXXU2CSA2.
- Do the same for ‘AP’, ‘CP’, and ‘CSC’ and select the corresponding firmware files.
- In the case of ‘CSC’, make sure to select the ‘HOME_CSC’.
- Once all the files have been selected, click on the ‘Options’ tab in Odin
- Make sure that ‘Auto Reboot’ and ‘F.Reset Time’ have been checked
- Finally, click on the ‘Start’ button to install Samsung Galaxy Note 9 Android Pie Update
After the installation finishes, you shall see the ‘PASS!’ message in the Odin tool window and your phone should reboot into the updated OS.
Method 2: Using OTA
Once you have made sure that your phone is on the required firmware, you can follow the steps below to sideload the OTA and manually install Android Pie-based One UI on Samsung Galaxy Note 9.
- Download Android Pie-based One UI OTA package for your Galaxy Note 9
- Connect your phone to the PC
- Copy the downloaded OTA package to the root of the SD card (external storage). By ‘Root’, we mean outside all the folders.
- Disconnect the device and power it off completely
- Boot your Galaxy Note 9 into stock recovery mode
- Release the buttons when you see a blue screen with the Android logo.
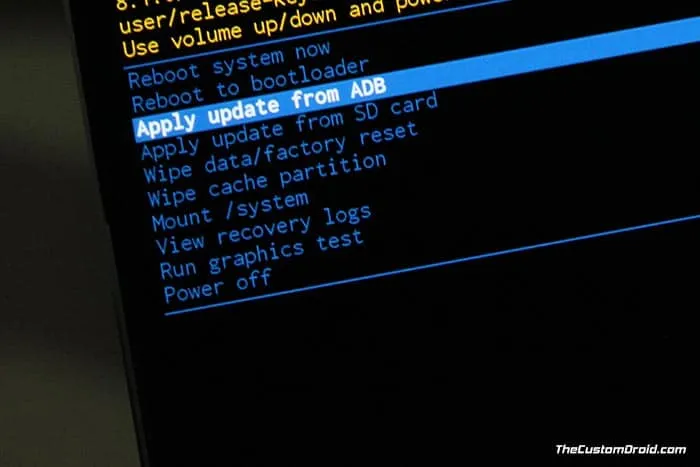
- In stock recovery, use the Volume buttons to highlight “Apply update from SD card” and select the option using the Power button
- Navigate to the SD card and select the Android Pie-based One UI OTA update package
- Finally, select “Yes” to install Samsung Galaxy Note 9 Android Pie Update
- When the sideloading process finishes, select the “Reboot system now” option.
In case you do not have an external SD card, you can also alternatively install the OTA using ADB Sideload. We would also strongly recommend you to do a factory reset via the device settings or stock recovery. This shall help prevent any unusual behavior after updating.
Your phone should now boot into the OS. Now go ahead and explore new features on your phone Android Pie and Samsung’s One UI. So, you have just been able to install Samsung Galaxy Note 9 One UI (Android Pie) Update. If you have any questions regarding the process, feel free to drop a comment below.
Comments
Comments are moderated, and published only if they are relevant to the topic and add value in a constructive way. If you disagree with something, please be polite and respectful. We suggest you read our comment policy before commenting.